At last, we have pushed a full new release of WebRotate 360 Product Viewer. It's released as v4.0 as the number of new features, enhancements, and fixes we packed in it since the last full release (v3.6.4) is significant, not to mention that it's two years in the making.
If you follow our blog, you probably have seen already this summary on some of the key features in this release as well as the follow up on the new hotspot Magnify tool.
Today we will cover the remainder of the key additions that made it into the final release (see full version history).
macOS Monterey Support and DMG installer
With the release of macOS Monterey, Apple broke our desktop software and that required the rework of some of the key image processing features in SpotEditor. While at it, we also revamped the Mac installation to use DMG installer, making it more streamlined and secure. And finally, we have notarized everything with Apple so that it seamlessly installs on Mac.

Also new in this release is the ability to install and use different versions of the software at the same time on both Mac and Windows.
Advanced "Play to Label" controls
This feature update gives you the ability to create "scripted" presentations that don't require user interaction. Using the new controls you can configure a 360 product views or a multi-row 3d spin to automatically animate to various labels (a.k.a. "key-frames") with extra options to control the animation direction, activate and/or trigger hotspots, etc.
If you visit our home page today on a desktop computer, you will see the 360 product animation of a Reebok shoe that automatically starts "playing" through the hotspots. Previously this required relatively involved use of viewer's APIs. With the new controls we go over below, the same (and more) can be done without any coding.
To use the new feature, first create one or more image labels. This is done under Images -> Rows tab where you can double-click on any of the images to create a named label. Once labels are created, you can optionally auto-start the animation by selecting Play to label in the drop-down under On view load section via Control -> Rotation tab. Click to configure and select the first label where you want to animate your spin when it's fully loaded.
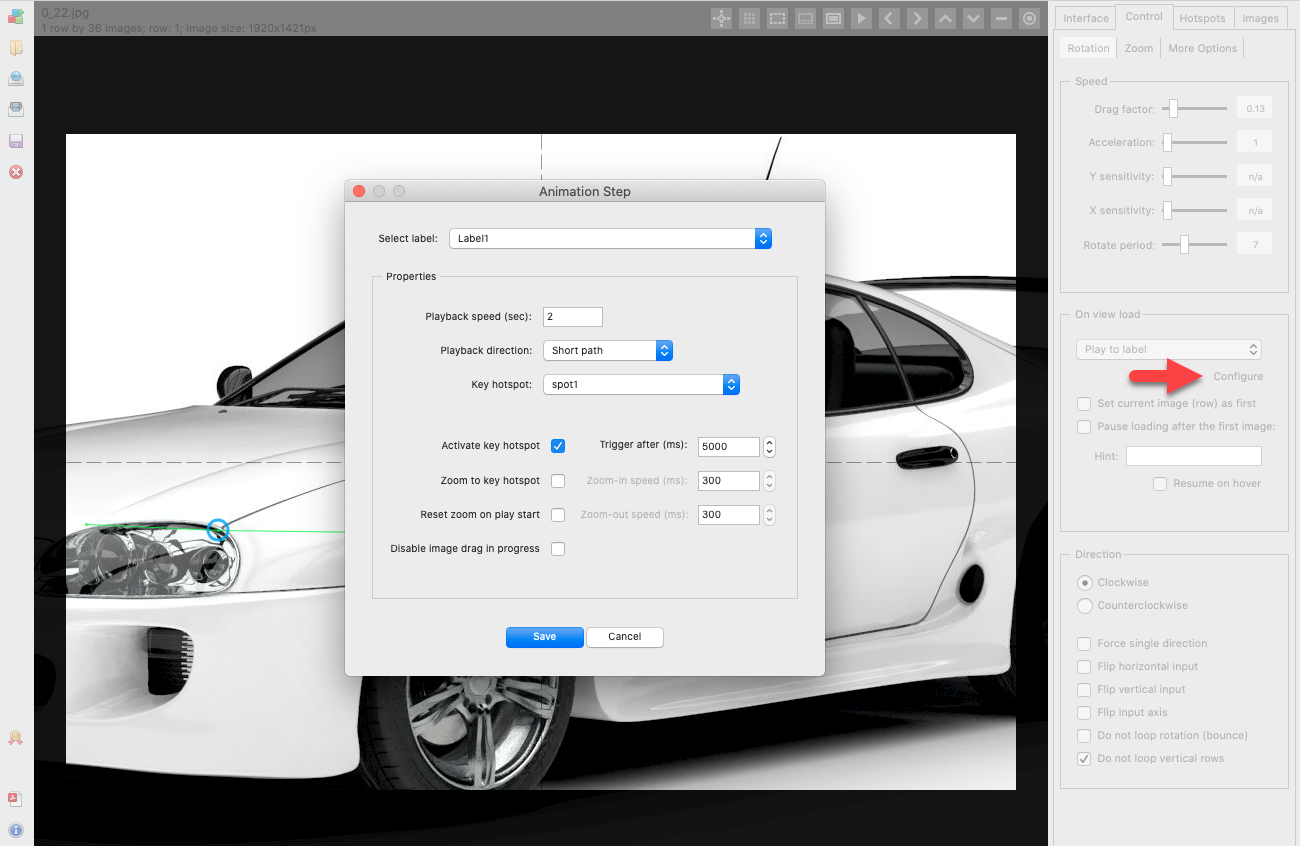
Here you can control the speed (i.e the number of seconds to spin through all images), the direction of the animation, and optionally pick a key hotspot that you would create beforehand via the Hotspots tab.
First, you can simply choose to activate the hotspot so that its popup is made visible when the label is reached. You can also make it wait a number of milliseconds to auto-trigger the hotspot using the Trigger after control. Triggering a key hotspot can either result in simply closing the hotspot popup or "triggering" a hotspot action that you would assign to the hotspot on the Action tab of the hotspot form.
There're a few actions to choose from on the Action tab (e.g the new "zoom to hotspot action" under Control action). One of them is called Label action and it allows you to pick a label and configure the same animation settings for your next step, thus giving you the ability to fully "script" the tour:
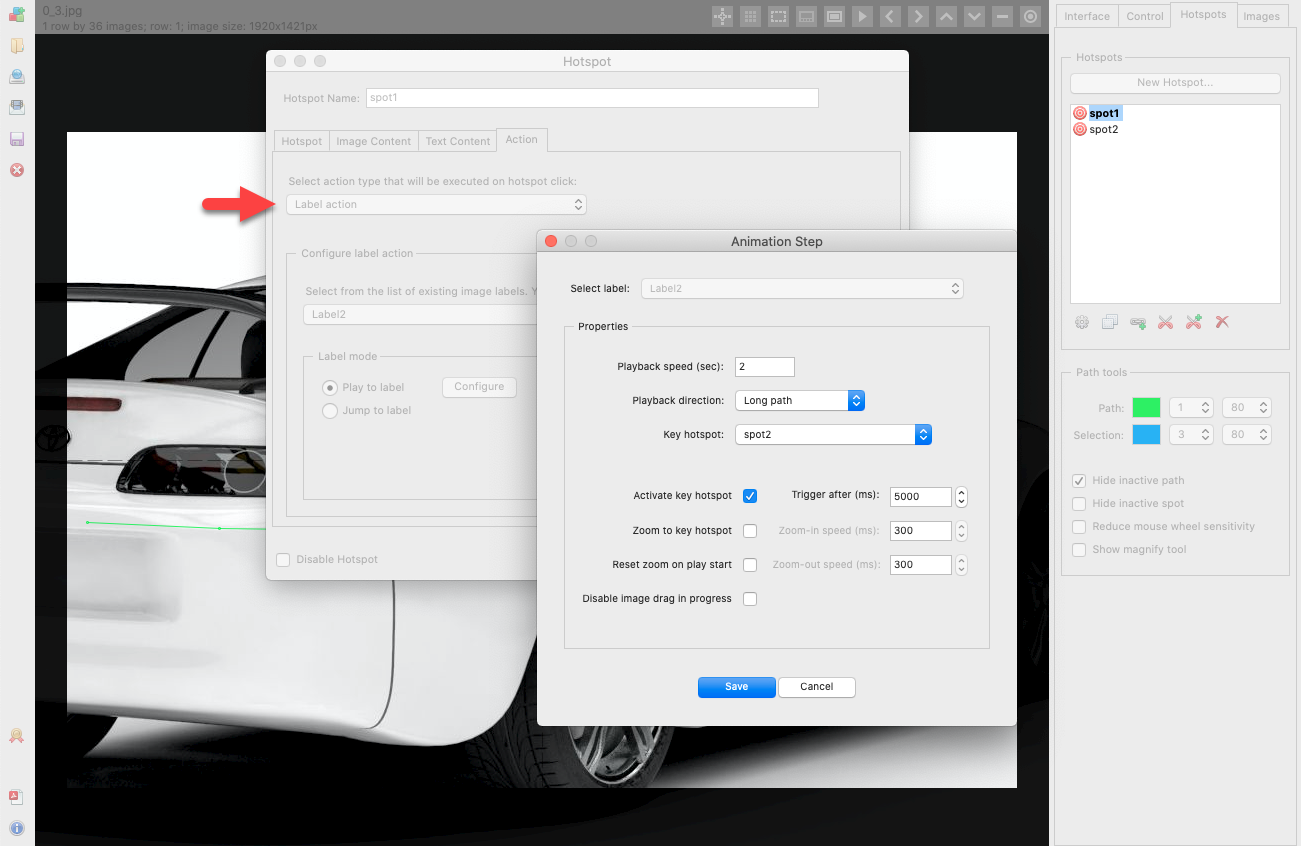
Remember, these hotspots can be made invisible by using a transparent 1px PNG as a hotspot indicator for example, and hotspots can be auto-triggered without being activated using the new feature, so technically you don't have to show hotspots to create such scripted 360 product tours.
Hotspot Animations
In v4 we have introduced six hotspot indicator animations to add a modern touch to your interactive 360 product photography or rendered 360 product views. They are made to work with any of the default indicators that come with SpotEditor and should work equally well with your custom graphics. The colors were fine-tuned to work well with light and dark backgrounds and you can always customize it further in your skin's CSS stylesheet if you need something different. To give you extra control, you can configure the speed of the animation and stop animating once user has interacted with the hotspot.
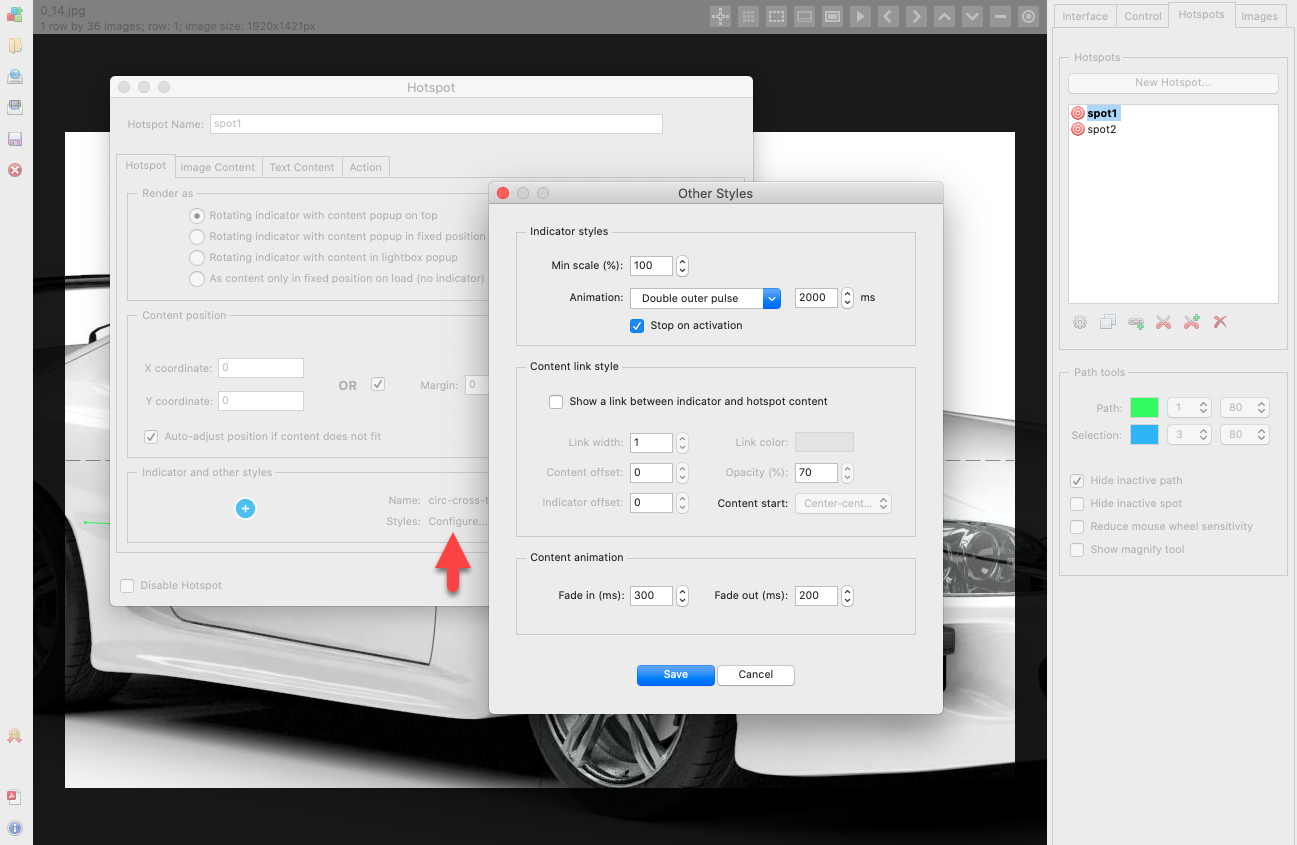
To assign an animation to a hotspot, select Configure next to Styles on the main tab of the hotspot form and choose one of the styles in the drop-down next to Animation. Note the new Min scale control that makes the indicators responsive which we covered in the previous blog post.
This website has not been updated yet to use the latest viewer (we're working on it!), so the best place to see 4 out of the 6 new animations that you can now configure for your hotspot indicators is this video.
To get the latest release using your existing installation, start SpotEditor and click the blue "info" icon in the bottom left corner, then select Check Updates. Free version can be downloaded using this link: