Last week we released our stable beta of WebRotate 360 SpotEditor v3.5 for both Windows and Mac OS X that you can download below. The cornerstone of this major release is an introduction of a complete 360 degree image editing and publishing workflow that eliminates the need for third-party tools and other intermediate steps that were absolutely necessary in the previous versions of our 360 photography software.
PRO version of this release is also available and can be requested via support at webrotate360 dot com if you have purchased either PRO or Enterprise license before.
In this post we will go through the list of our key new features that were released so far in this stable release of WebRotate 360 SpotEditor v3.5 (beta). Please note that we strongly encourage everybody who is installing our software for the first time to jump to this beta release right away. It's a robust release with a brand-new publishing workflow that can save a lot of time and many folks are already using it in the field. Not to mention the actual WebRotate 360 Product Viewer v3.5 that is included with this release has been integrated in most of our eCommerce and CMS plugins for more than 6 months now and the feedback has been only positive.
SIMPLIFIED IMAGE IMPORT AND PROJECT COPY
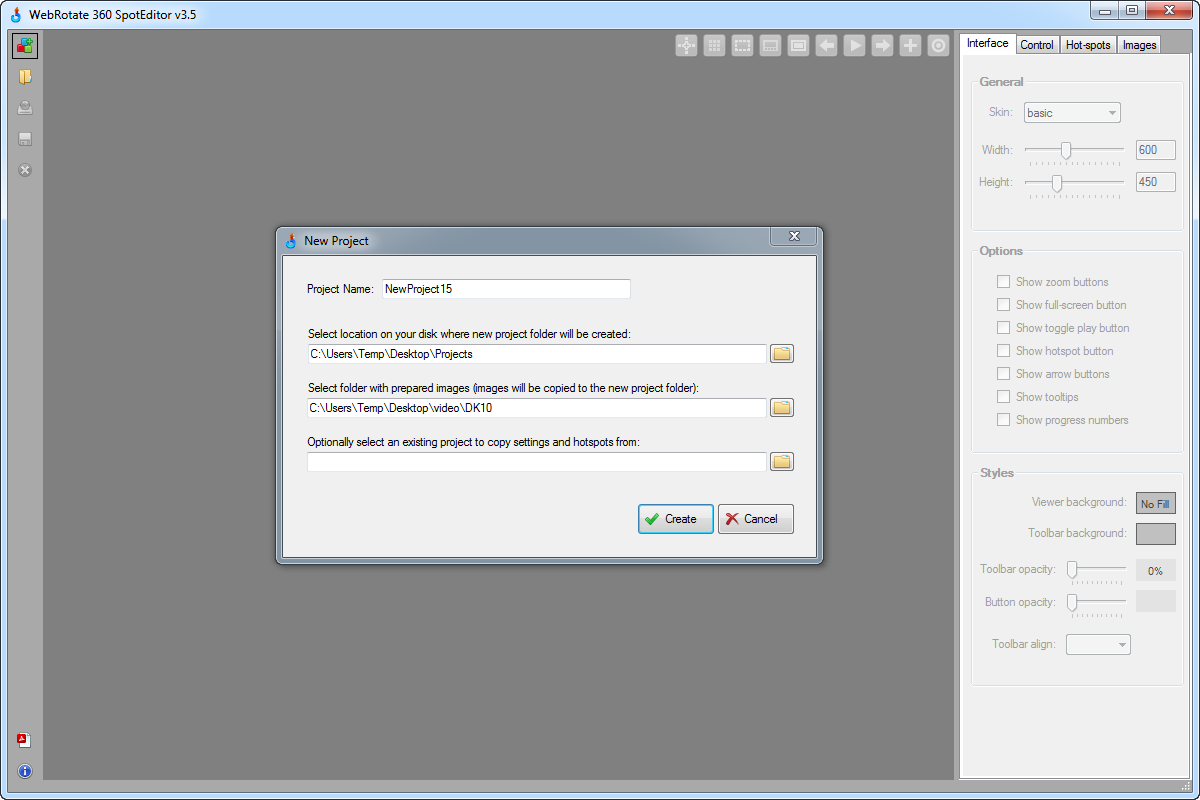
SpotEditor v3.5 has all required tools to efficiently resize and crop your 360 product photos so the New Project dialog in v3.5 has just a single field where you can enter path to your image folder. These can be the images that you have already produced (resized, cropped, optimized, etc) or the ones that came straight out of your camera. The software can now automatically create low-resolution and high-resolution images if specified on Publish (described below). We also added a project copy tool where you can enter an existing WebRotate 360 project to copy settings and hot-spots from during the creation of a new project. This can be a life-saver when working on a large number of uniform products (shoes, bags, etc).
INSTANT NON-DESTRUCTIVE 360 DEGREE PREVIEW
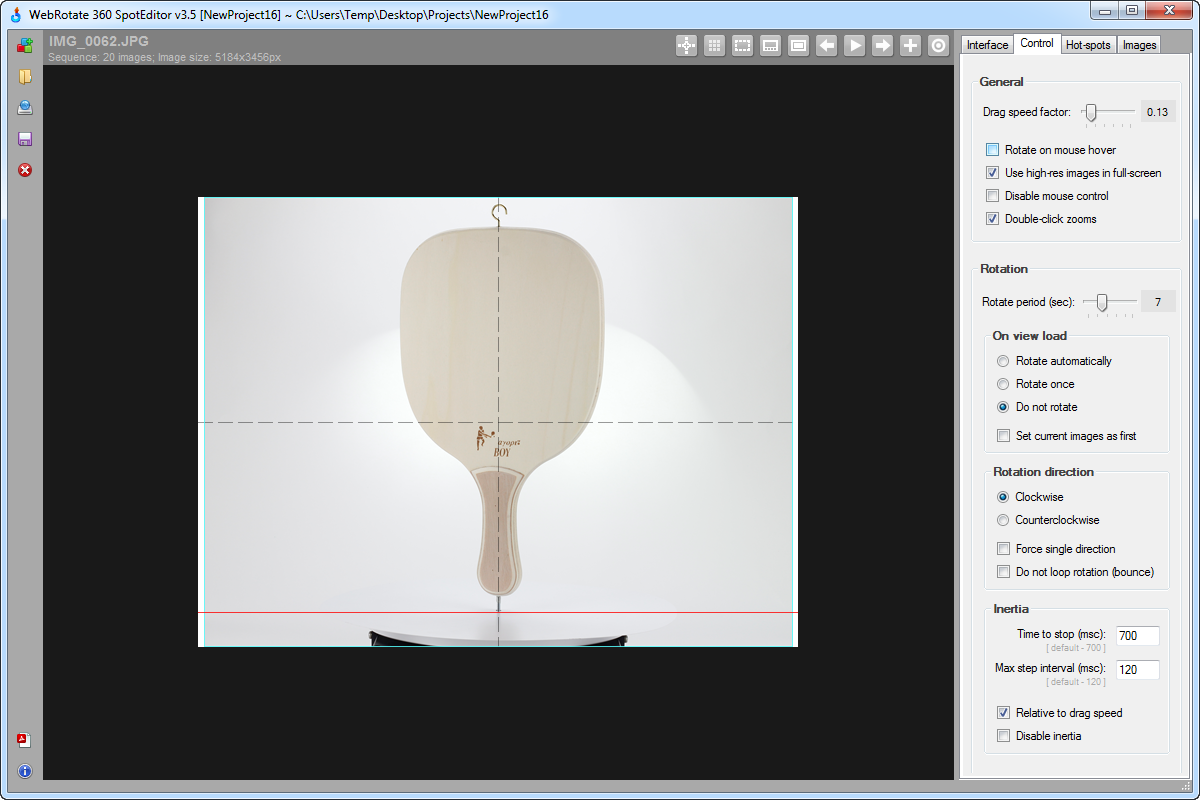
Our new software preview mode (which is on by default) instantly renders all 360 degree product photos to show you how the images will look and perform inside a web browser once your 360 product view is published. You can turn this preview mode on and off but it's usually very convenient to have it on to see the actual image presentation as your go through various image editing steps inside the software. For example, you can quickly update your 360 viewer dimensions after you adjust image crop area and see everything applied immediately inside the preview.
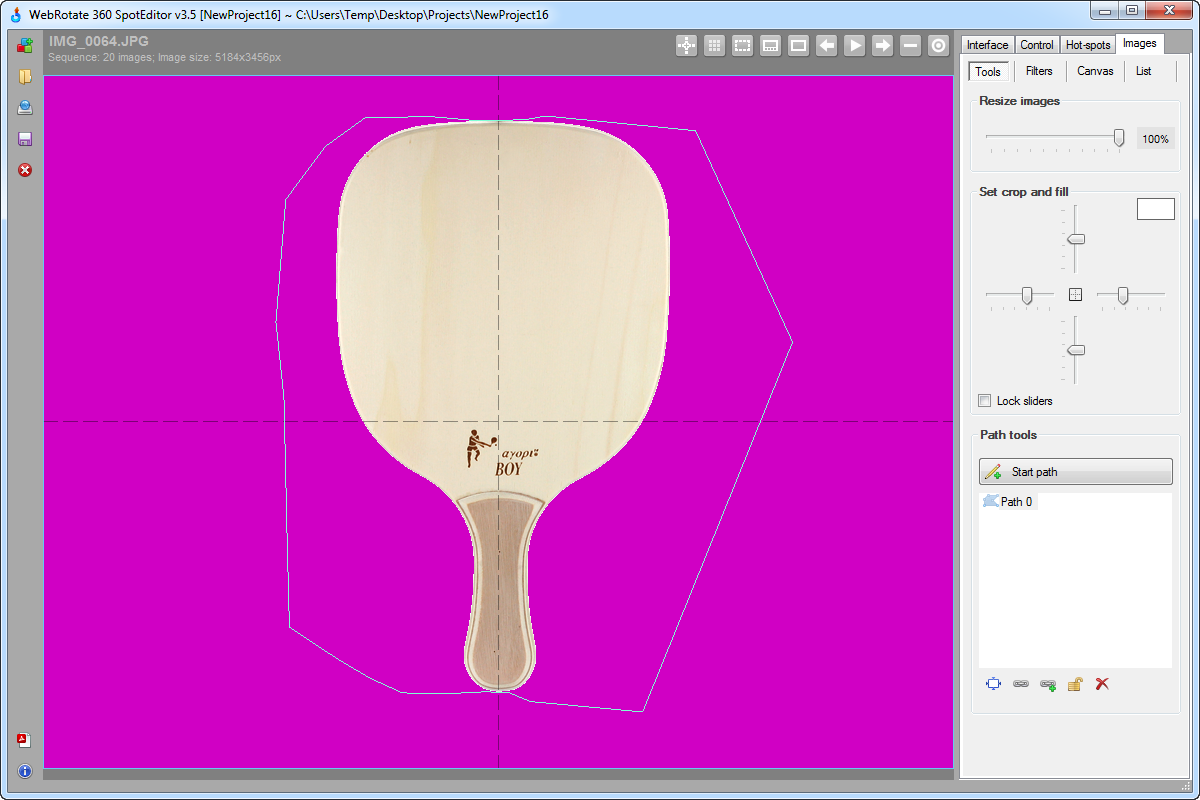
SMART CROP-RESIZE
In SpotEditor v3.5 we came up with the first of its kind smart crop / resize tool designed specifically for publishing 360 product views. Our new crop function consists of four sliders, one for each side of a 360 degree view. You can drag horizontal or vertical sliders either locked to shift the crop area left and right or top and bottom proportionally, or unlocked to add or remove some crop space on either side of the images. The crop is applied to all 360 degree images immediately and doesn't affect the originals, so you can rotate your images inside the preview right away and see if any part of your product got clipped away or if the product view got shifted too far left or right when viewed from the back for example.
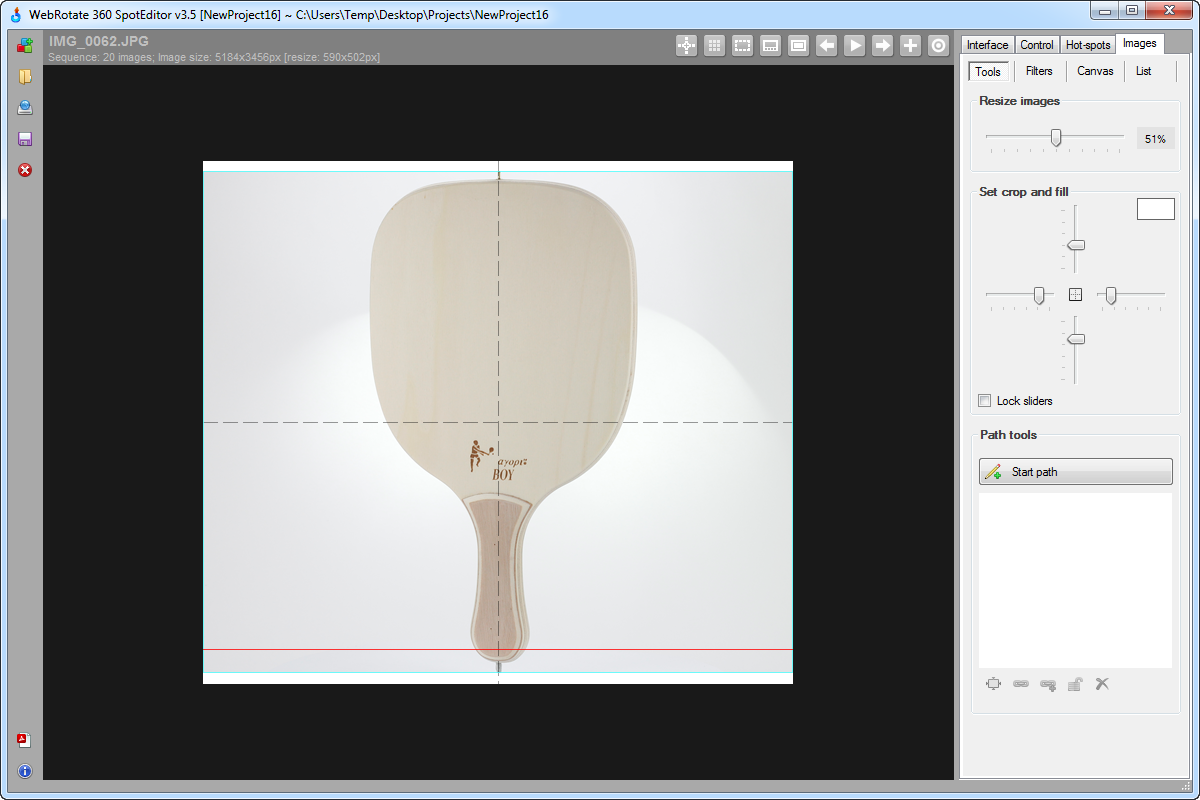
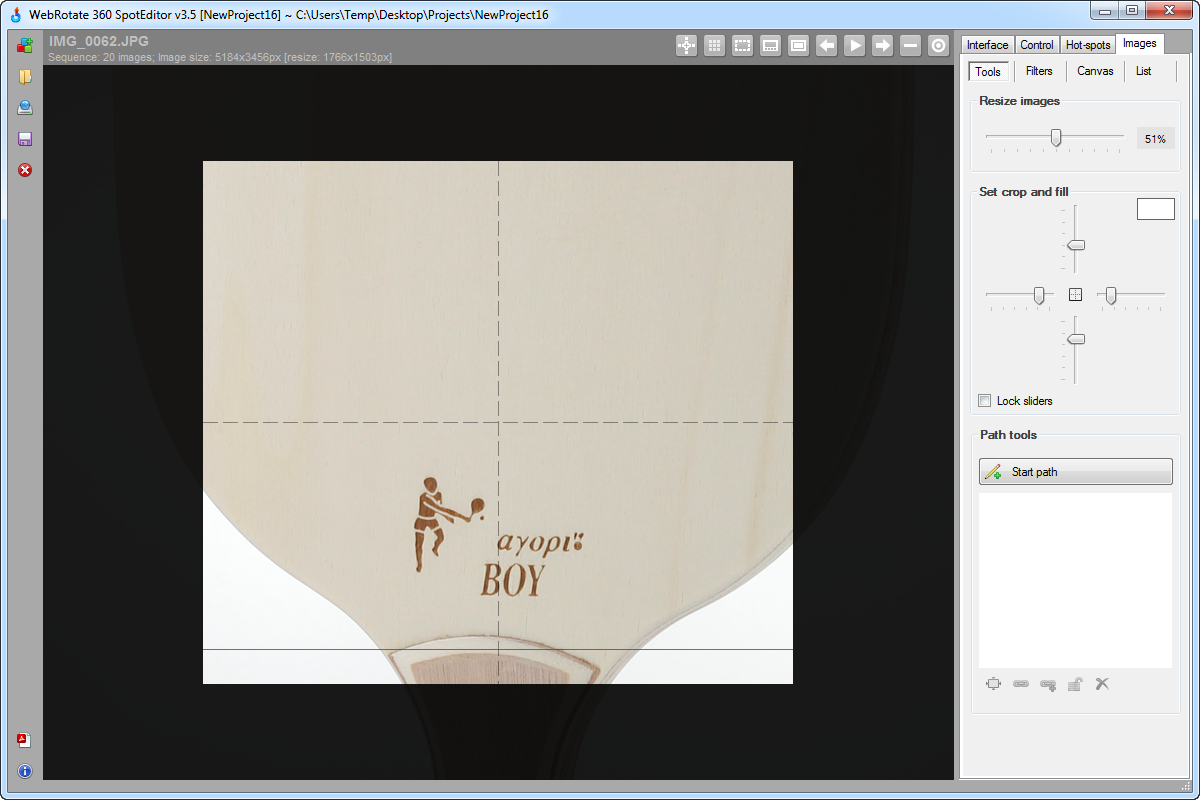
Our smart resize tool brings instant image resizing so you can adjust your 360 view zooming or the full-screen presentation just by moving a single resize slider to the left, i.e below 100% which is the size of your original imported images. When you start moving the slider, we automatically switch to the full-size / zoomed image presentation and you can simply click the Zoom-out button at the top to go back to the fitted preview mode. All 360 degree photos inside the preview are immediately resized without affecting the originals so you can instantly verify that all images look right at the given resize level.
You can change either crop or image size or any other image editing setting at any time even after you save and re-open the project as all image rendering occurs on-the-fly and doesn't affect original (imported) images. It's also worth noting that hot-spots and watermarks can be easily added before crop and resize as we will scale and / or reposition them accordingly should you decide to change any of the settings that can affect image presentation.
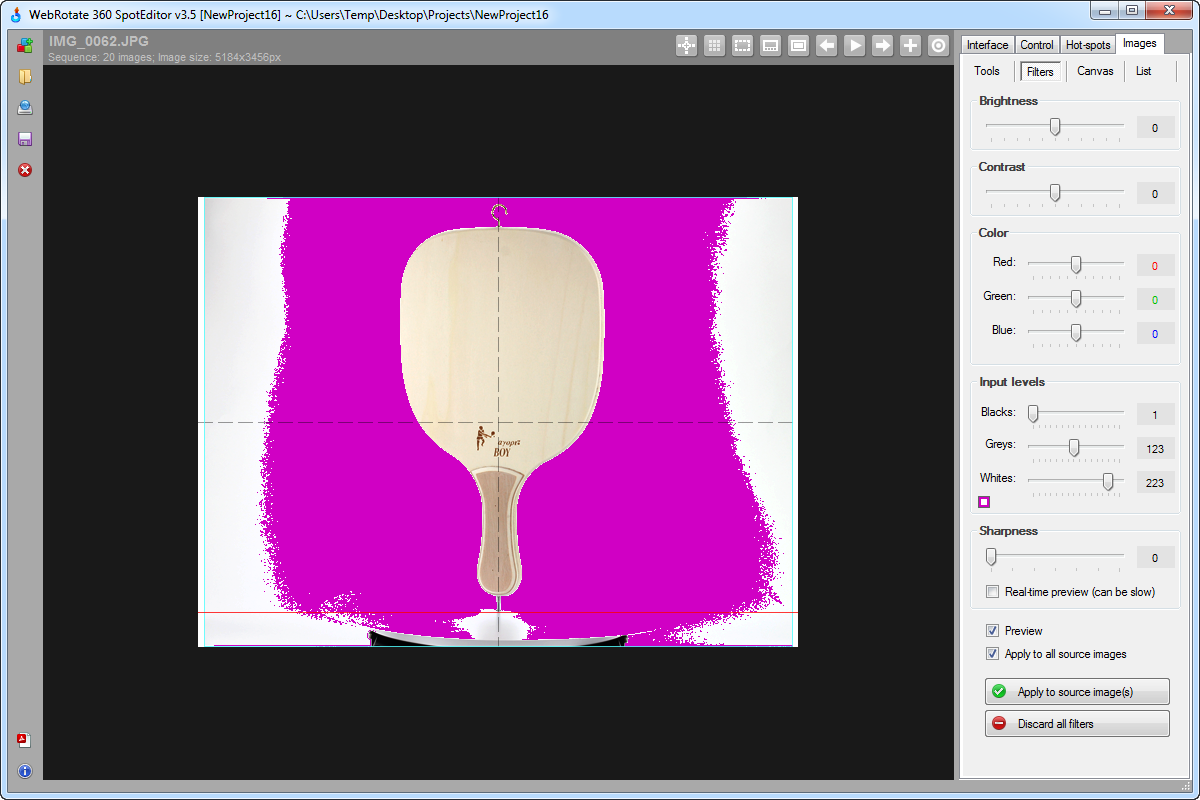
INSTANT PHOTOGRAPHY FILTERS
Our new Filters tab has all your standard photography filters such as brightness, contrast, color balance, levels and sharpness. The beauty of these filters and pretty much any other edits you make in our software is that you can immediately preview their effect on all images.
Most often you would want to use Levels to adjust both your background fill and your image contrast but in addition to this we also added a handy background color helper tool that allows you to see the area of the images that is either white or non-white (or some other color you chose). If you click once on the background helper box, everything that is non-white will be highlighted in pink. And if you click there again, all parts of the images that are white will be now highlighted in pink. This helps a lot when you need to overexpose the highlights using Levels just enough to have most of the image background in white while maintaining a reasonable product exposure.
It's also possible to permanently apply all image filters to your original 360 product photos via the Apply to source image(s) button. You can ether apply the filters to the current image or to all images in your 360 product view at once if the Apply to all source images checkbox is selected. Being able to permanently apply the filters to your original images allows you to selectively fix certain images (color issues, low contrast, underexposed images, etc). Normally you would NOT need to apply the filters to your originals so that there's a flexibility to adjust the filter settings later. The software will still apply all active filter edits to the outputed images on Publish.
CLIPPING PATH TOOLS
Changing output Levels may not always work when there's not enough contrast with your product background. Also, very often your 360 product images may have certain studio artifacts that will still remain on the images even after you cropped the images to your required viewer dimensions. Such artifacts may include fishing lines, stands, lightboxes, turntable, etc.
To help with this, we added Clipping Path Tools designed specifically with the 360 product photography in mind. Simply start a new path, and circle around any part of your 360 spin that has to be removed. You can apply your path only to those images that need it by hitting the chain icon or to all images in your 360 view at once using the icon with the chain sign and a plus. Often you would just circle your product around and simply hit the Inverse Path icon to clip away all surrounding areas at once as shown in the screenshot below.
Note that you can add more than one path selection to a single path or create more than one path consisting of its own multiple selections as needed. You can also lock any finished path such that it doesn't move accidentally when you drag the image with your mouse. It's also easier to work with the Clipping Path tools when the preview mode is off and the images are presented in full view using the Zoom-in button at the top.
IMAGE WATERMARKING
There are two types of image watermarking that were introduced in this release: (1) Text watermarks that you can quickly create using your own wording and then adjust various styles and orientation (2) Image watermarks that you prepare upfront and which you can then add using the Image Watermarks section at the bottom. To delete an existing watermark, simply select it with your mouse and press the delete key on your keyboard. You can also lock all watermarks at once to prevent them from any accidental movement or hide them all together for the final delivery to your client.
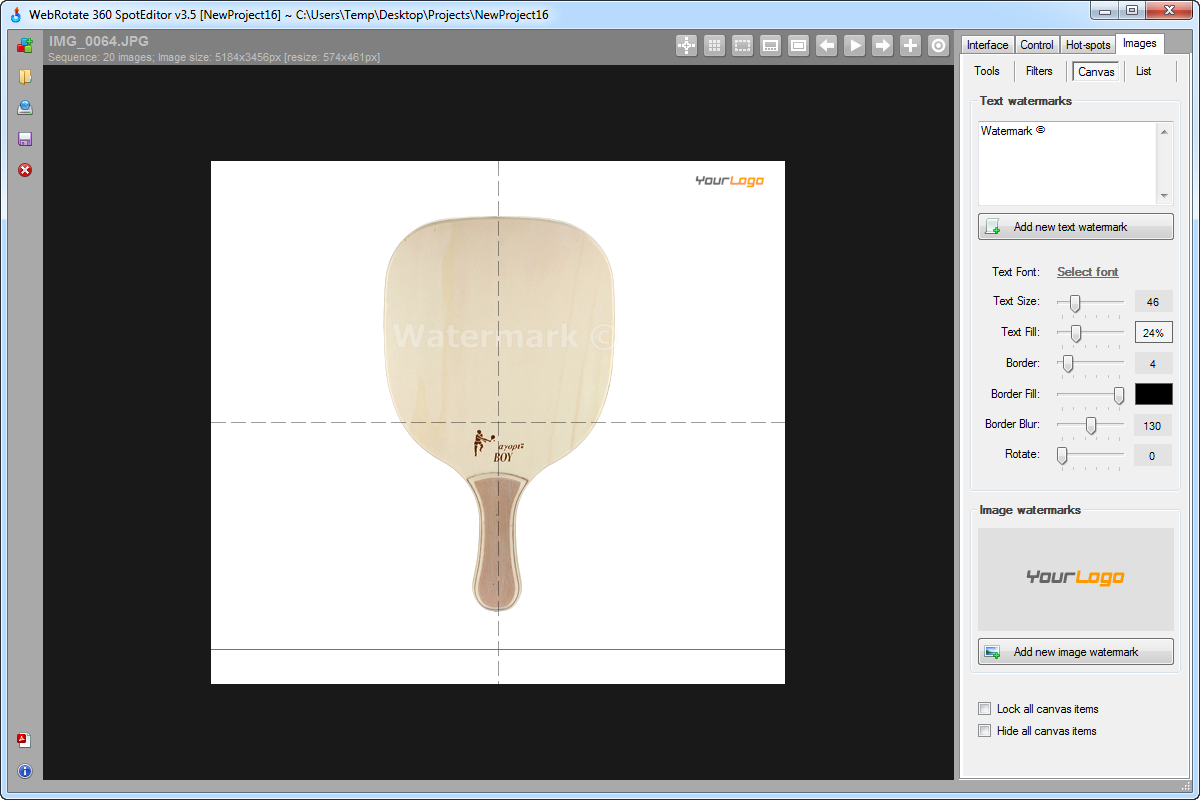
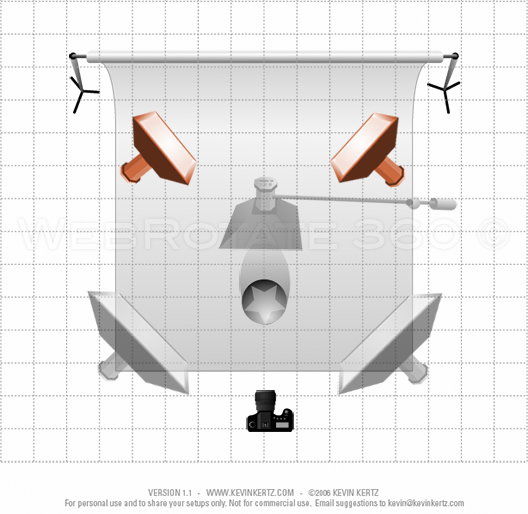
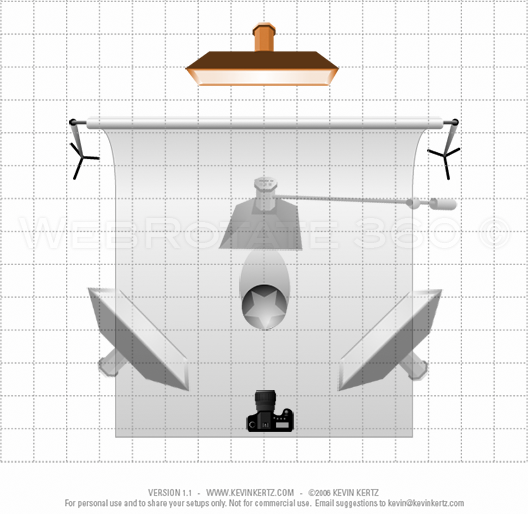
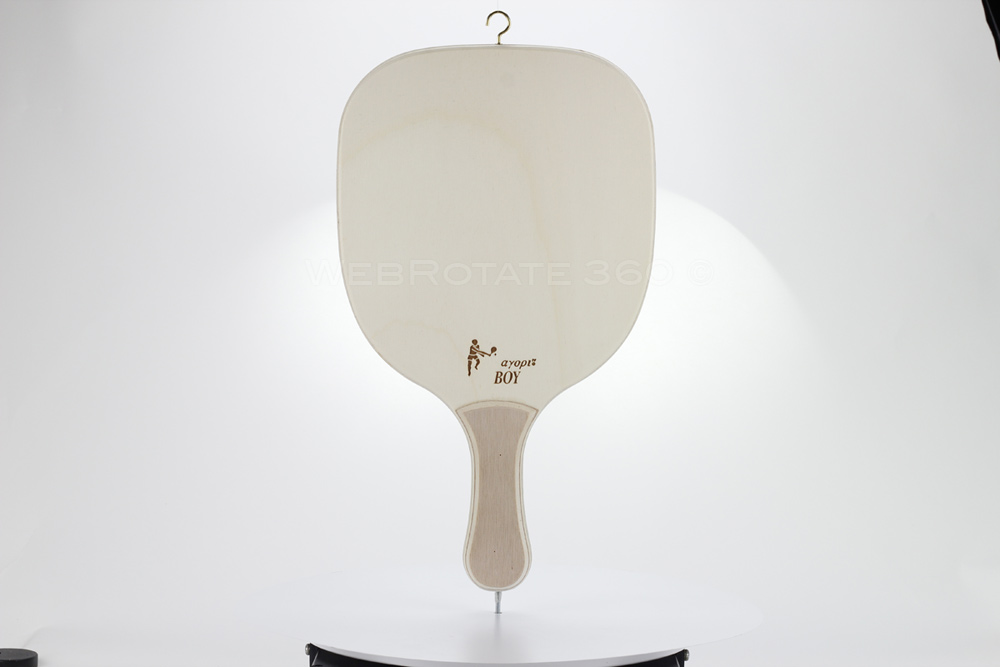
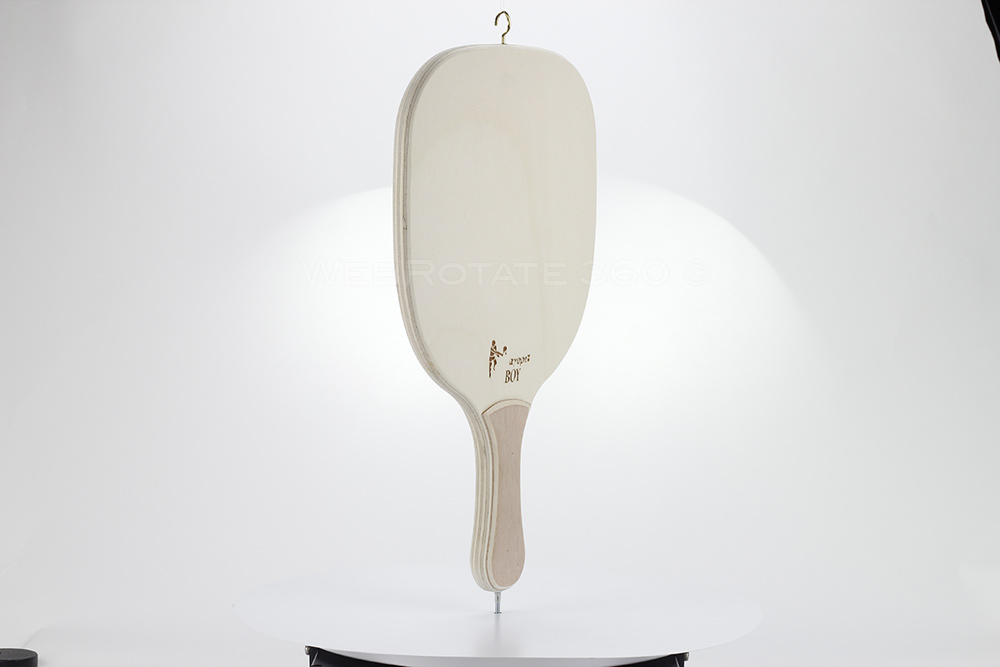
BTW: here's how this tennis paddle was photographed - link.
NEW HOT-SPOT RENDERING MODE
We now have three hot-spot rendering modes in v3.5: (1) Rotating hot-spot indicator with the hover-over popup centered on top of the indicator (2) Rotating indicator with the hover-over popup presented in a fixed position (3) Hot-spot content that is rendered in a fixed position right away and which doesn't involve any moving indicators. The second one is a new rendering mode that was introduced in v3.5. When it's selected, the actual hot-spot popup is rendered in a fixed position anywhere inside your 360 view as specified using the popup positioning controls on the same tab as shown below. This is very handy when you don't want your hot-spot rollovers (popups) to block the product area around the hot-spot indicators.
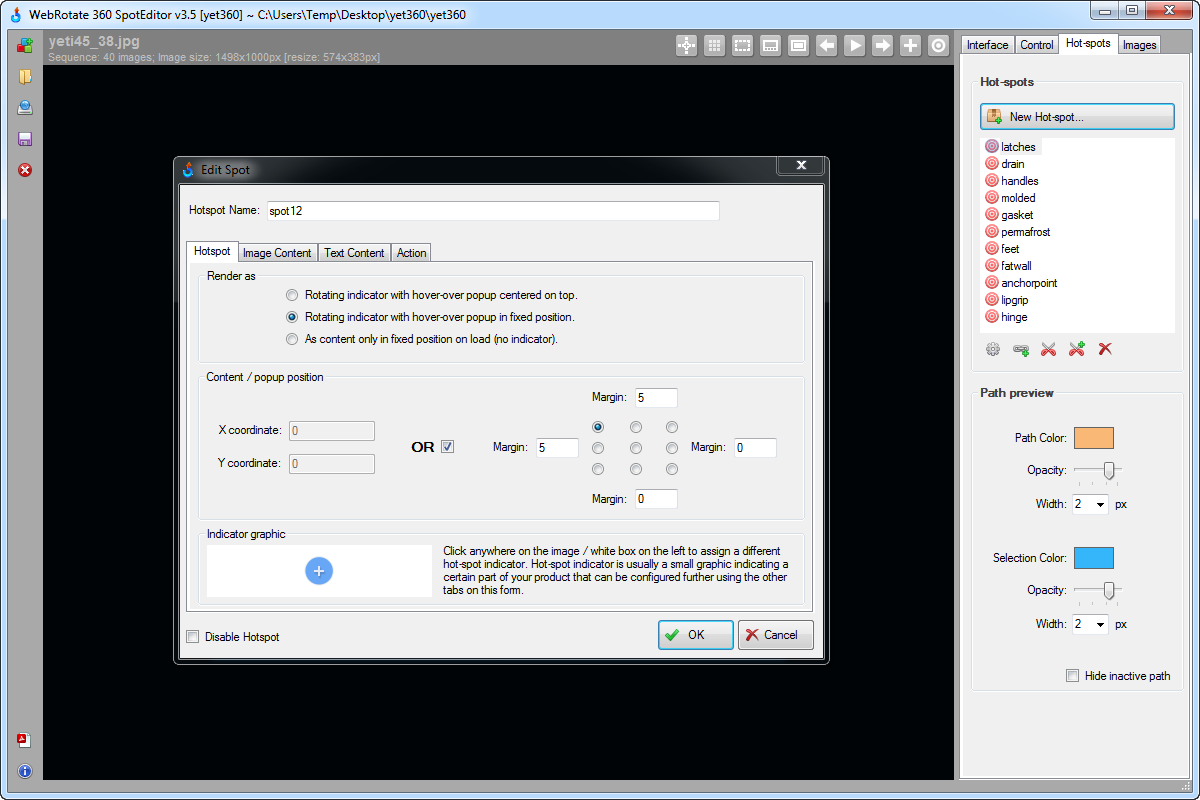
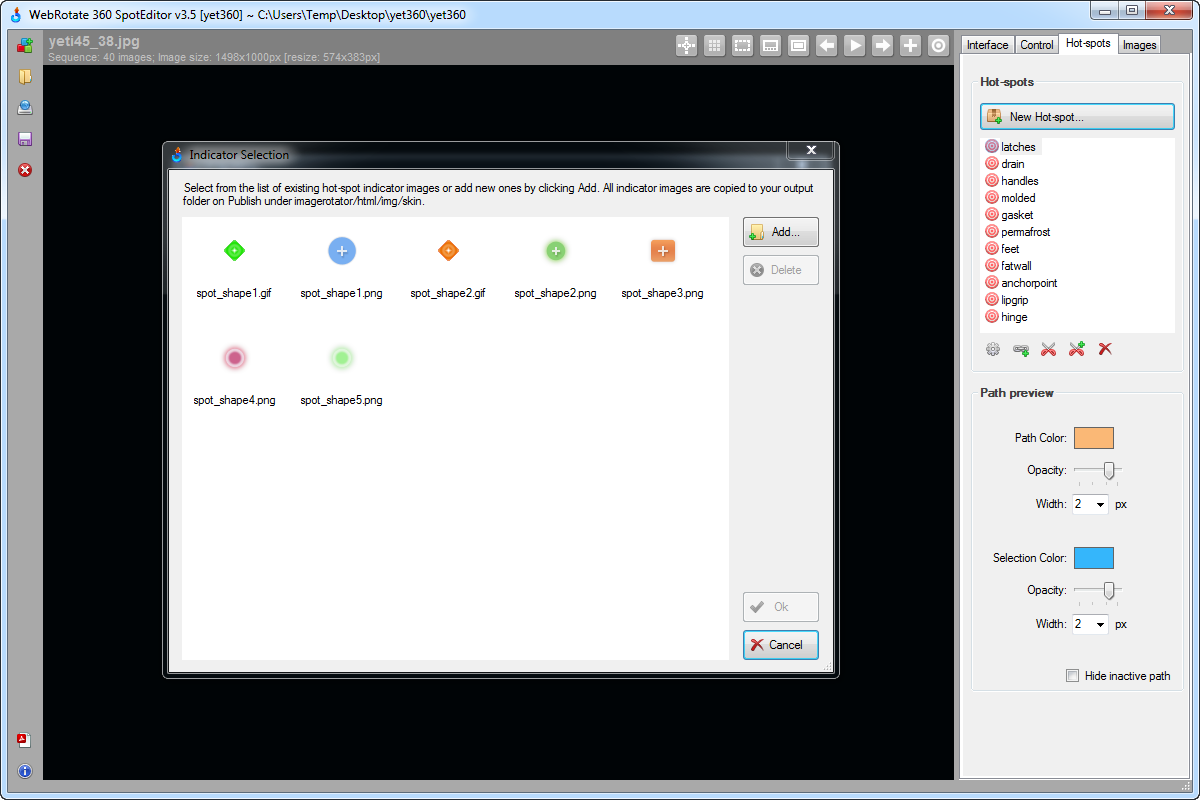
HOT-SPOT INDICATOR LIBRARY
Previously it was quite difficult to customize your hot-spot indicators and almost impossible to maintain them across your WebRotate 360 projects. Now you can simply add any custom shapes you designed for your 360 product spins into our global hot-spot indicator library and then select them anywhere on demand. The Indicator Selection form where this is now managed can be accessed by clicking inside the white-colored area under the Indicator Graphic section on the Edit Spot form (see the screenshot above).
ADVANCED WEB PUBLISHING AND TEMPLATES
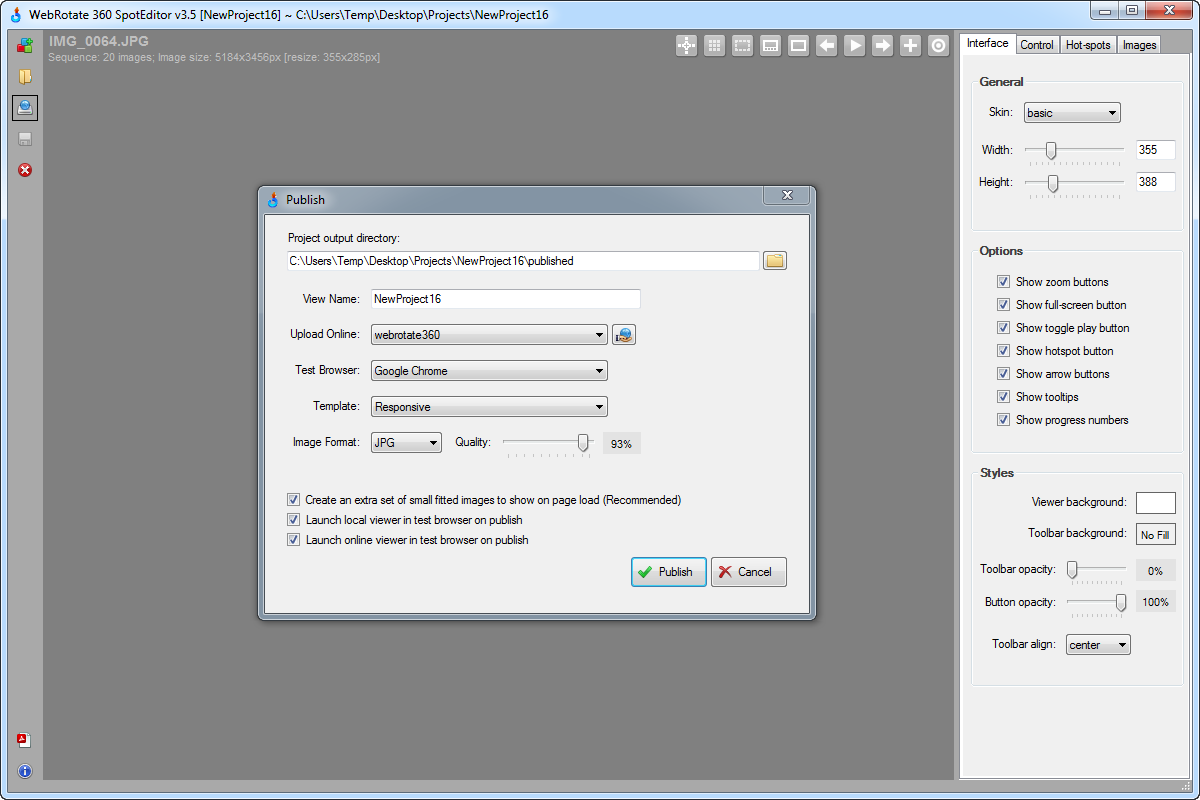
One of our main goals with v3.5 was to make publishing process complete and simple. The Publish form in v3.5 now allows creating multiple FTP connections and use them to upload either full 360 views (with scripts and sample html) of just image assets (images plus config that can be used with our plugins) to your FTP right away on Publish. And if you have more than one web browser installed, it's now also possible to preview your published 360 product views either online, if an FTP connection was selected, or offline inside a browser of your choice. Please note that browser selection is limited to Safari on Mac OS X.
Using the Create extra set... checkbox it's possible to automatically create and integrate two sets of images into your 360 views. First set consists of small fitted 360 degree photos that load immediately on page load. The second set has high-resolution ones that load on demand when user hits zoom or full-screen. Small fitted images are auto-resized on publish such that they fit into your specified viewer dimensions exactly. This makes initial viewer loading very fast and at the same time the images look sharp as we are not relying on a low-quality image resizing by a browser in this case. If the checkbox is not set, a 360 view is published with just a single set of images. This makes initial viewer loading slower but produces immediate high-quality zooming or full-screen presentation when a user hits the full-screen button.
In SpotEditor v3.5 we also added a selection of pre-made integration templates which can greatly simplify any further integration with your website pages (please note that we also have several free plugins for popular CMS and eCommerce platforms as well) :
- Standard which is our basic integration template that was available previously.
- Responsive which is used to create a fully responsive 360 views that can scale both horizontally and vertically inside your responsive website layouts.
- Full-screen only which activates a 360 view in the full-screen mode right away on click or tap somewhere on your web page.
- Full page mobile.
- Multiple embedded views which used to show more than one spin on the same page.
- Lightbox popup (not available in the current build).
- 360 view gallery (not available in the current build).
- API template (not available in the current build).
PROJECT FILES
We have finally introduced WebRotate 360 project file where we store all project environment settings, filters, watermarks, etc. Previously there was just a single 360 product viewer configuration xml file that served both as a project file and as an actual 360 viewer configuration that you would upload to your web server. In SpotEditor v3.5 a dedicated project file (.wr360) is used to open / save your projects.
NEW 360 PRODUCT VIEWER FEATURES BUNDLED WITH THIS RELEASE
As always, WebRotate 360 SpotEditor is bundled with our popular 360 product viewer script engine which is integrated in all of our free plugins such as WordPress, Magento, Prestashop, OpenCart, etc. Each time you publish a 360 view via SpotEditor, the 360 viewer script is activated inside a sample web page that the software creates on publish to work seamlessly with your edited images. So we with this new release we made sure that all recent script features (that hundreds of our users confirmed were stable) were also packaged in this SpotEditor installation:
- Full-screen viewer function.
- Fully responsive viewer script (scales vertically and horizontally with hot-spots, etc).
- New hot-spot rendering mode with a fixed popup position (see above).
- Can be used as a jQuery plugin.
- Multiple 360 product views on the same page.
- Rotation inertia or gradual slowdown on image drag / release.
- New viewer rotation mode that works on mouse hover vs mouse drag.
- Improved support for various mobile browsers and touch events.
- Anti-flicker system for large 360 degree image rendering.
- Out-of-the-box integration in Magento, BigCommerce, OpenCart, PrestaShop and WordPress.
PS: there are several other important features that we couldn't release in this drop yet.
UPDATE - August 7th, 2014: build 764. More new features and fixes:
PRO version of this release is also available and can be requested via support at webrotate360 dot com if you have purchased either PRO or Enterprise license before.