We're happy to announce that we've implemented full-finger gesture control on touch-screen devices in v5.2 of WebRotate 360 Product Viewer, scheduled for release in January 2025.
This means your visitors can now pinch to zoom and use two-finger panning on your 360 product views in a seamless, predictable way. Combined with existing WebRotate 360 features - like incremental zooming and concurrent spin & pan while zoomed - the new gesture support offers unmatched capabilities.
Check out this quick video demonstrating these features. Most of the example 360 views on our website, including the one on our home page (featuring the same 360 vehicle view shown in the video), already have these new capabilities enabled.
v5.2 is a maintenance release that, in addition to new gesture support, includes a handful of minor improvements and bug fixes. It will be offered free of charge to all customers currently on v5. Our PixRiot service, npm package, and the CMS plugins (e.g., WordPress, Adobe Commerce, Joomla etc.) will also receive the new core v5.2 update in January.
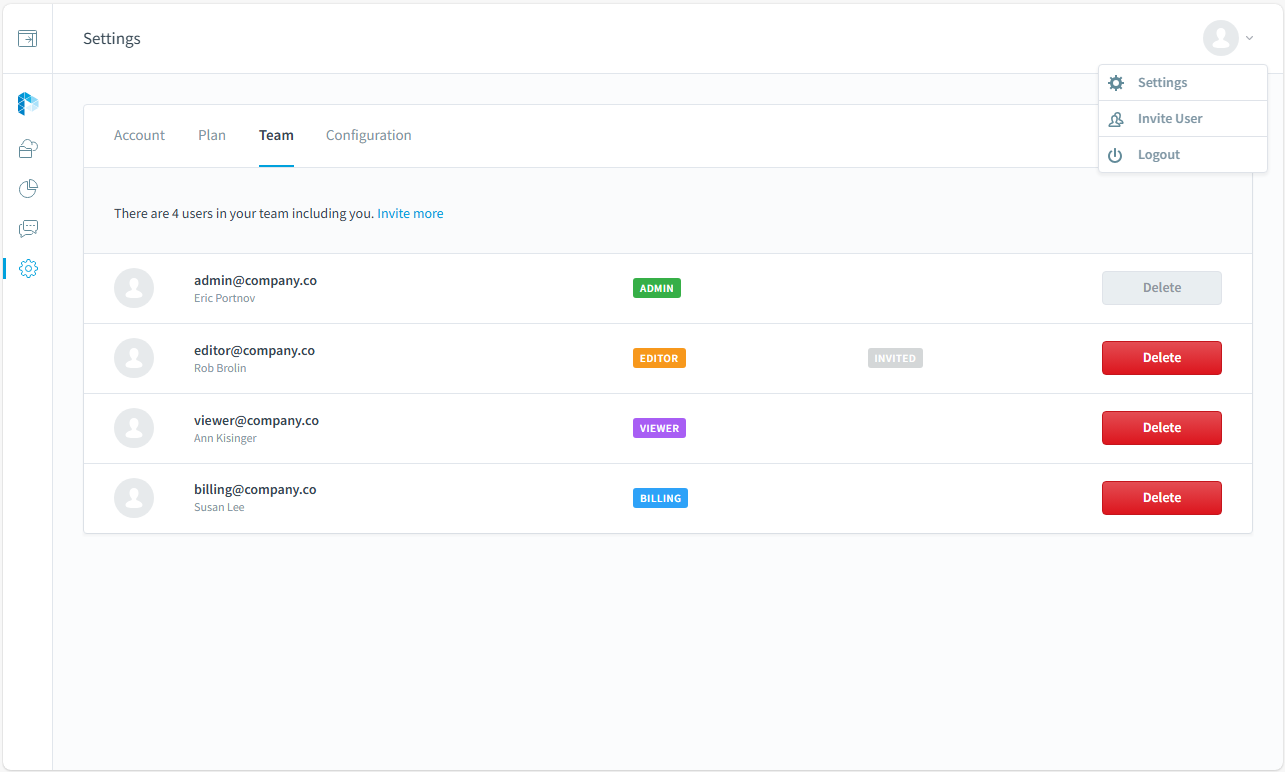
For PixRiot customers, we're also releasing Teams in January, allowing multiple members to use one PixRiot account under four different roles: Admin, Editor, Viewer, and Billing:
We've revised private folders as well, so you can now share a folder with a third party for uploads and public sharing of its contents. Previously, folders were too restrictive - you could share them, but you couldn't upload or share 360 views properly. This has now been addressed.
We can't wait for you to try these new features! Let us know if you have any questions, and thank you for your continued support.
One of the questions we often get is: "I’m new to this... How many images do I need to photograph or 3D render for my 360 product view?"
We can expand on this by discussing how viewer dimensions and image zooming factor into the decision, but if you'd rather skip the details, here's our quick recommendation for single-row 360 views:
Stay within the range of 20 to 80 images per 360 view, and keep the combined file size under 20 MB. For large eCommerce projects with many products, stick to the lower end of this range. For high-end marketing presentations featuring just a few items, using 72 or more images makes sense.
Note: this post focuses on single-row 360 views that rotate on a horizontal plane. Some of these recommendations do not apply to multi-row 3D views, which we will discuss separately.
Here are some key concepts to help answer the question:
More images create smoother animations.
The number of images impacts the time and cost of shooting or rendering in 360, as well as post-production (e.g., background removal).
The number of images and total file size affect webpage performance, as well as web traffic costs and hosting.
Let's review each factor in more detail.
PS: you can always check out our examples for comparison as each example has footnotes that cover the number of images as well.
Animation Smoothness
There are two aspects to consider:
The smoothness of dragging the image with a mouse or finger.
It's no surprise that fewer images result in a less smooth animation, whether for dragging or playback. However, you can mitigate this by adjusting the settings in SpotEditor that control rotation speed:
Increase drag speed by reducing the Drag Factor under Control -> Rotation in SpotEditor.
Decrease Drag Acceleration (usually set to 1, which is the minimum).
Decrease the Rotate Period to speed up both drag speed and playback.
Keep in mind that after a certain number of images, the browser may struggle to flip images fast enough based on these speed settings. We usually notice this with around 200 images. Generally, we don't recommend going over 120 images per a single-row 360 spin, but if you still need more, consider increasing Drag Acceleration and reduce the drag speed using the same settings.
Time and Cost of Image Production
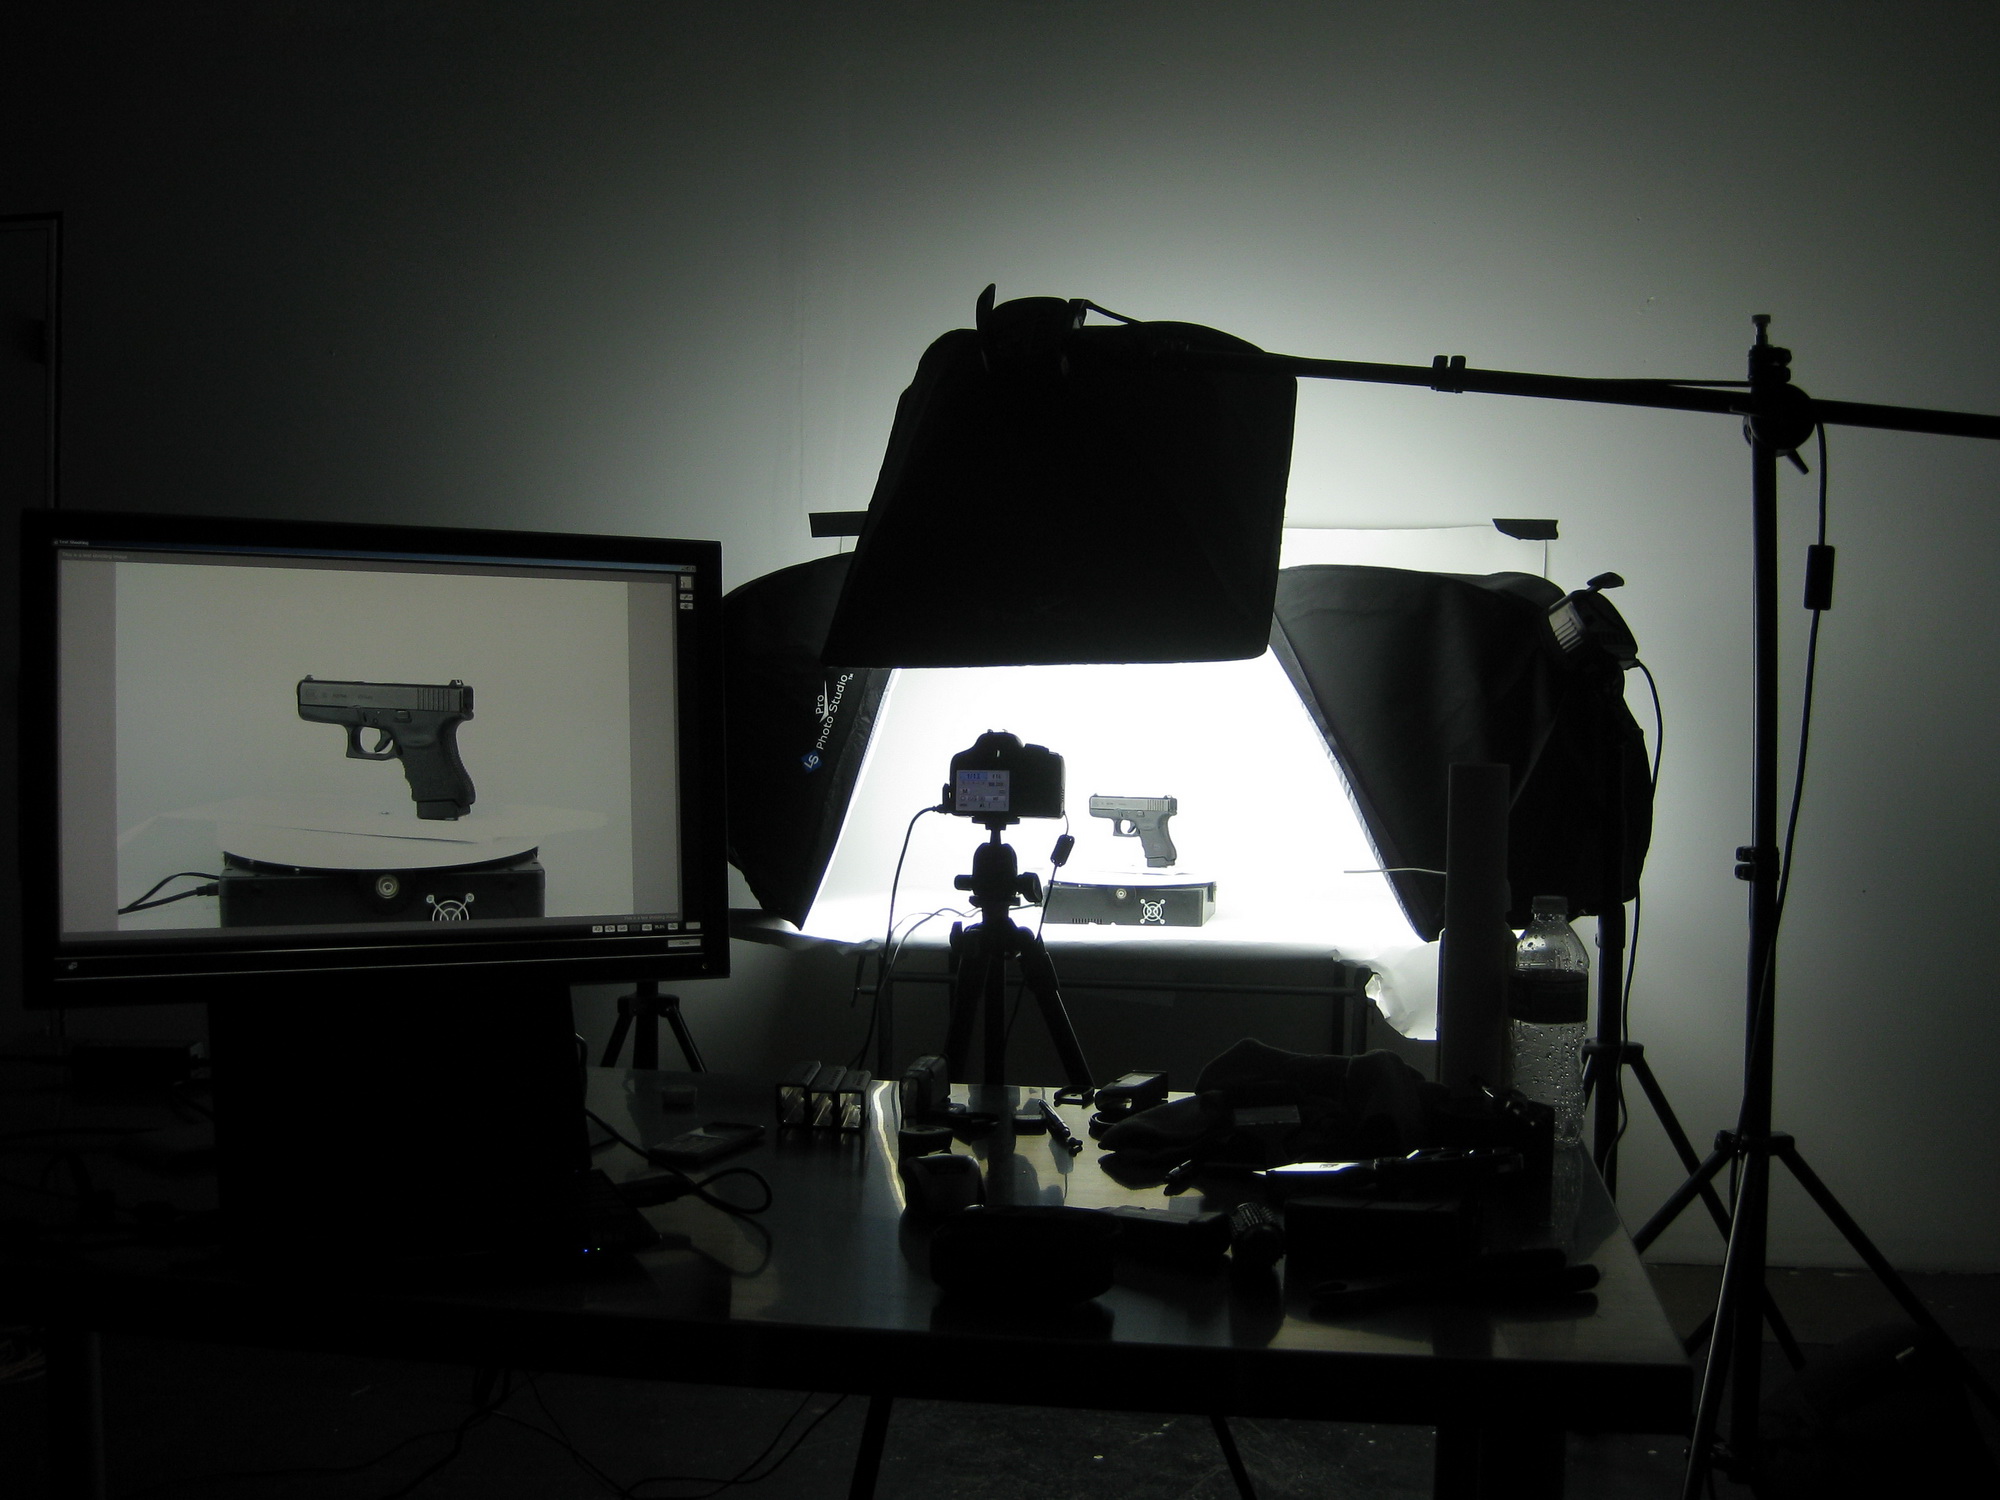
We've photographed thousands of products in 360 for commercial projects, both in our studio and on-site. Based on our experience, shooting 72 images per spin vs. 36 makes a huge difference, especially for large projects. It takes almost twice as long to photograph and review, with more angles to consider for lighting, exposure, and rigging. Reshooting a 360 can also be tiring.
3 days' worth of 360 product photography on-site for Glock with LAPD in the studio!
The same applies to post-production, where costs can quickly add up. Manual rigging removal (e.g., hot glue, wires, stands) or outsourcing to clipping path companies can be expensive on a per-image basis.
One trick to optimize photography is to use video recording to capture 360 spins instead of the stop-motion approach, where you take a photo at each turntable increment. Recording video is faster, although the quality may suffer. Later, you can decide how many images to extract, as we discuss in the linked blog post.
Webpage Performance
We all want our 360 product views to load quickly for website visitors. In e-commerce, every millisecond counts. Metrics like Largest Contentful Paint and First Contentful Paint - which a 360 view can directly impact - are crucial for both conversion rates and SEO.
Here are three factors affecting webpage performance:
Number of image requests.
File size of each image.
Network and server performance.
Unlike some 360 viewers, we load images simultaneously and asynchronously, leveraging modern multiplexing protocols that handle multiple image requests on a single browser connection. This greatly improves performance for views with many images. However, loading a large number of images can still take resources away from other important page elements, so consider these built-in optimizations available in WebRotate 360 Product Viewer:
If your 360 view is central to the page and visible on landing, configure the first image to load upfront in SpotEditor under Control -> Rotation -> On view load. The latest version of WebRotate 360 Product Viewer v5 also offers a feature that embeds a static image in the viewer container before any scripts are loaded. Learn more about this feature under Performance and SEO).
For pages with heavier content, consider pausing the 360 product image load until the user interacts with the view. Activate this in SpotEditor under Control -> Rotation -> On view load, ensuring only a single image loads initially, saving bandwidth and CPU/GPU resources.
We recommend keeping the combined file size of each 360 view below 20 MB. WebRotate 360 SpotEditor offers several options to optimize file size:
1) Create two sets of images: one for the main view and another for zooming/full-screen. This is controlled by the "Create an extra set of small fitted images" checkbox on the Publish form in SpotEditor. Check out this video for details on sizing image sets correctly:
2) Adjust the image quality for each set. Lower quality means smaller file sizes, so find the lowest quality setting that remains visually acceptable for your users.
3) Choose the right image format. Unless you need transparent images (which is rare), use JPG or WEBP image format. WEBP can reduce file sizes by up to 40% compared to JPG, but publishing takes longer, so only switch to WEBP after finalizing your edits.
While network and server performance are often beyond your control, the good news is that global internet speeds are improving, averaging 45.6 Mbps worldwide in 2024. At this speed, loading 72 images with a combined size of 20 MB would take around 3.5 seconds, which is acceptable for most users.
If you run an e-commerce store, consider using a CDN-enabled web hosting service. CDNs distribute your media across hundreds of servers, ensuring faster load times by hosting files closer to your customers.
Our PixRiot service is designed specifically for this purpose:
While PixRiot is undergoing major feature development that may take some time to release to the public, there are a couple of notable additions you can use right now. Let's dive in!
Social Share
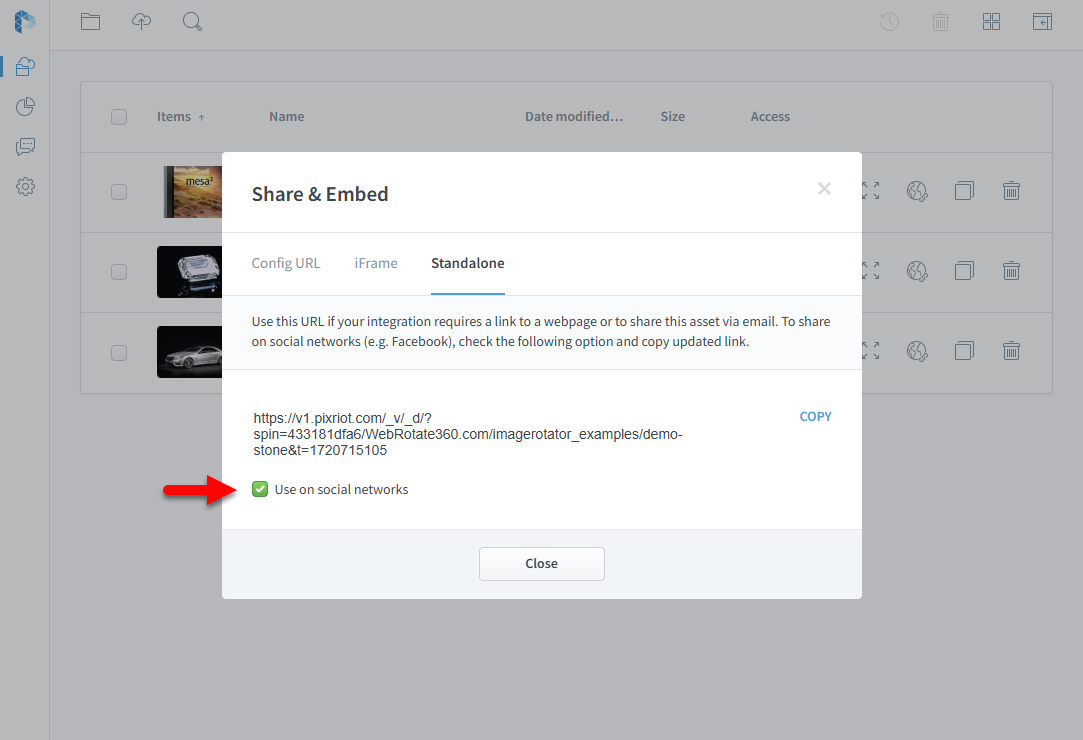
Until recently, sharing your 360 product view on social media using a standalone link wouldn't look good — neither the title nor the image would show up in the preview (e.g., in your Facebook timeline). Obviously, this didn't work for our PixRiot users.
Now, you can simply check a new checkbox at the bottom of the Standalone tab to get a link you can finally share everywhere. The social link will show both the thumbnail and the title of the view.
For example, see the image banner at the top this post with the results of our recent Facebook share using an awesome used car automotive example we uploaded to PixRiot (and covered here as well). This share is doing unusually well.
Cache Reset
Another problem our users reported was the lack of control over the CDN cache. As you may know, PixRiot is optimized for the fastest delivery of 360 product imagery, partly achieved via CDN (Content Delivery Network).
When you share a 360 product spin in PixRiot, users who load it in their browsers usually get it from CDN servers located in their geographical region, where the content is cached for optimal delivery.
But what happens when you re-upload your 360 spin in PixRiot? Well, the cached version would continue to be served to your users for a while — and that's the problem. You could resend a new link from the Share & Embed form, which would always work as we modify it slightly every time you copy it there to bypass the old CDN cache. Often, though, your client has already integrated PixRiot links you've shared with them, and resending new links wouldn't be ideal.
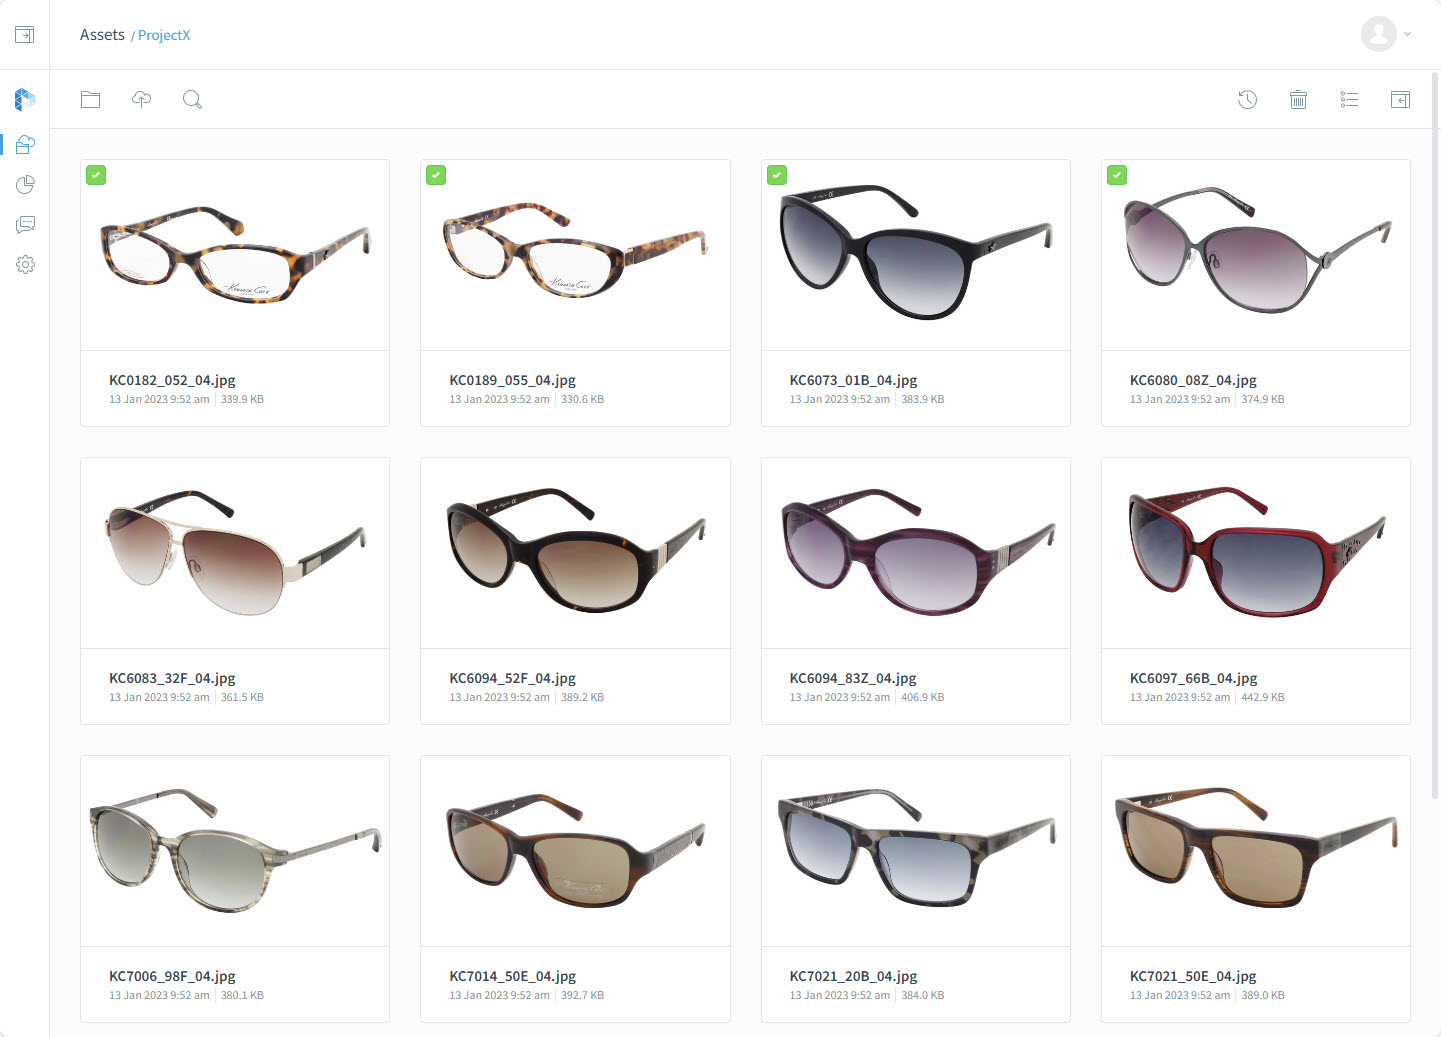
That's where the new Clear Cache option comes in. Access it using the time arrow icon in the top menu of the Assets view after checking the assets you've reuploaded that may have been cached. After clearing the cache, the old links for the same assets will get updated once refreshed in the browser.
If you are not familiar with PixRiot, check out this older video that covers the basics:
We hope these new features enhance your PixRiot experience. Stay tuned for more updates!
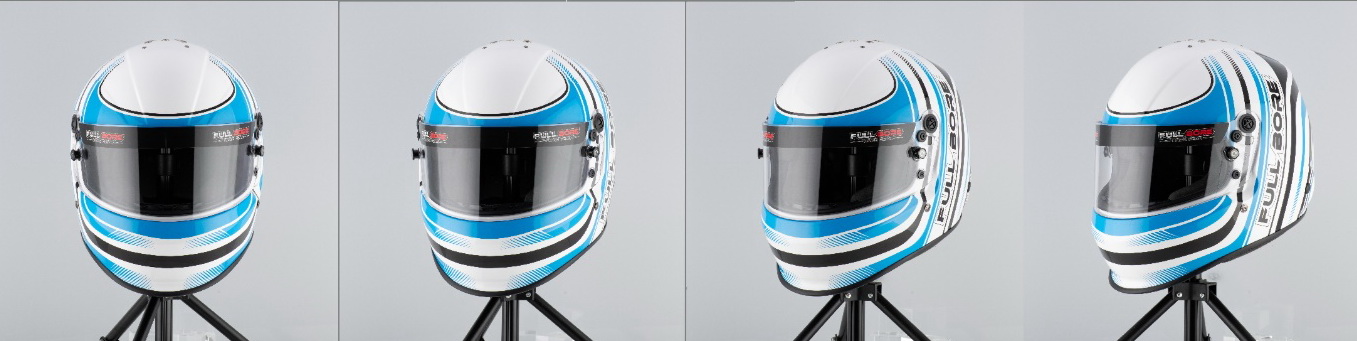
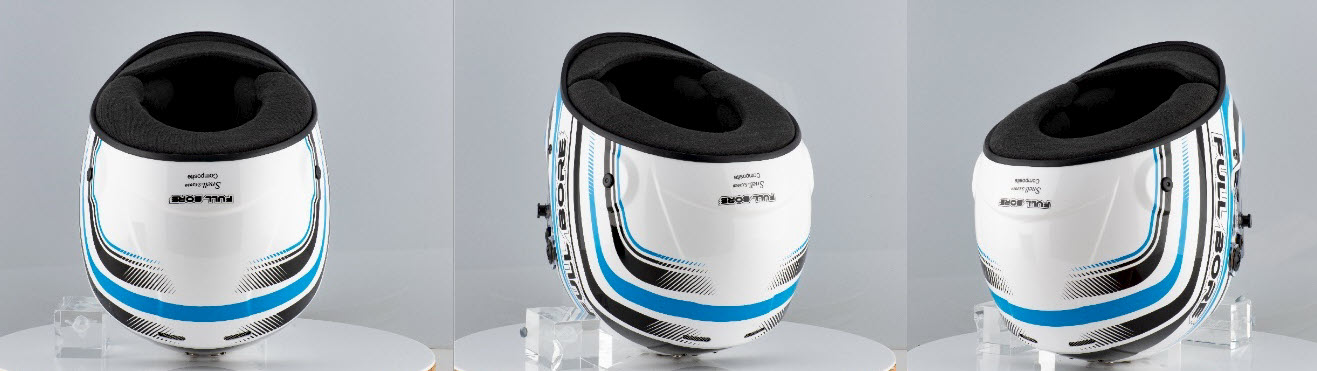
Today I will share a couple of quick tips on how we recently produced 360 product photography of a few racing helmets for a customer. To see the final result, check out the helmet examples we shared under 360 product photography services.
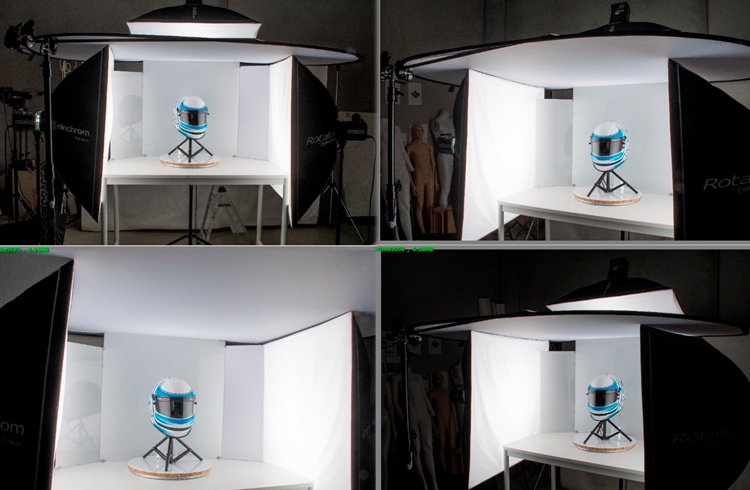
Lighting
I usually use continuous lights for my 360 product views, but for these helmets I used strobes. I shot stills of these helmets beforehand and had the lighting looking good, so I just progressed from that shoot.
I used 2 x 1 x 1m soft boxes either side with a strip light at the top shot through a large scrim or translucent reflector. This provides a nice even fill at the top. I did try it first without the reflector, but it created a distracting hotspot with soft box only.
The strip highlights created by the soft boxes were not perfect out of camera and needed a tidy up in Photoshop. In the setup you can see some white card on the left and right side between the soft box and the background Perspex to soften the dark lines created.
Rigging and Turntable
To edit out the stand the insert was shot separately by shooting some images with the helmet upside down and later flipping them 180 degrees and editing in.
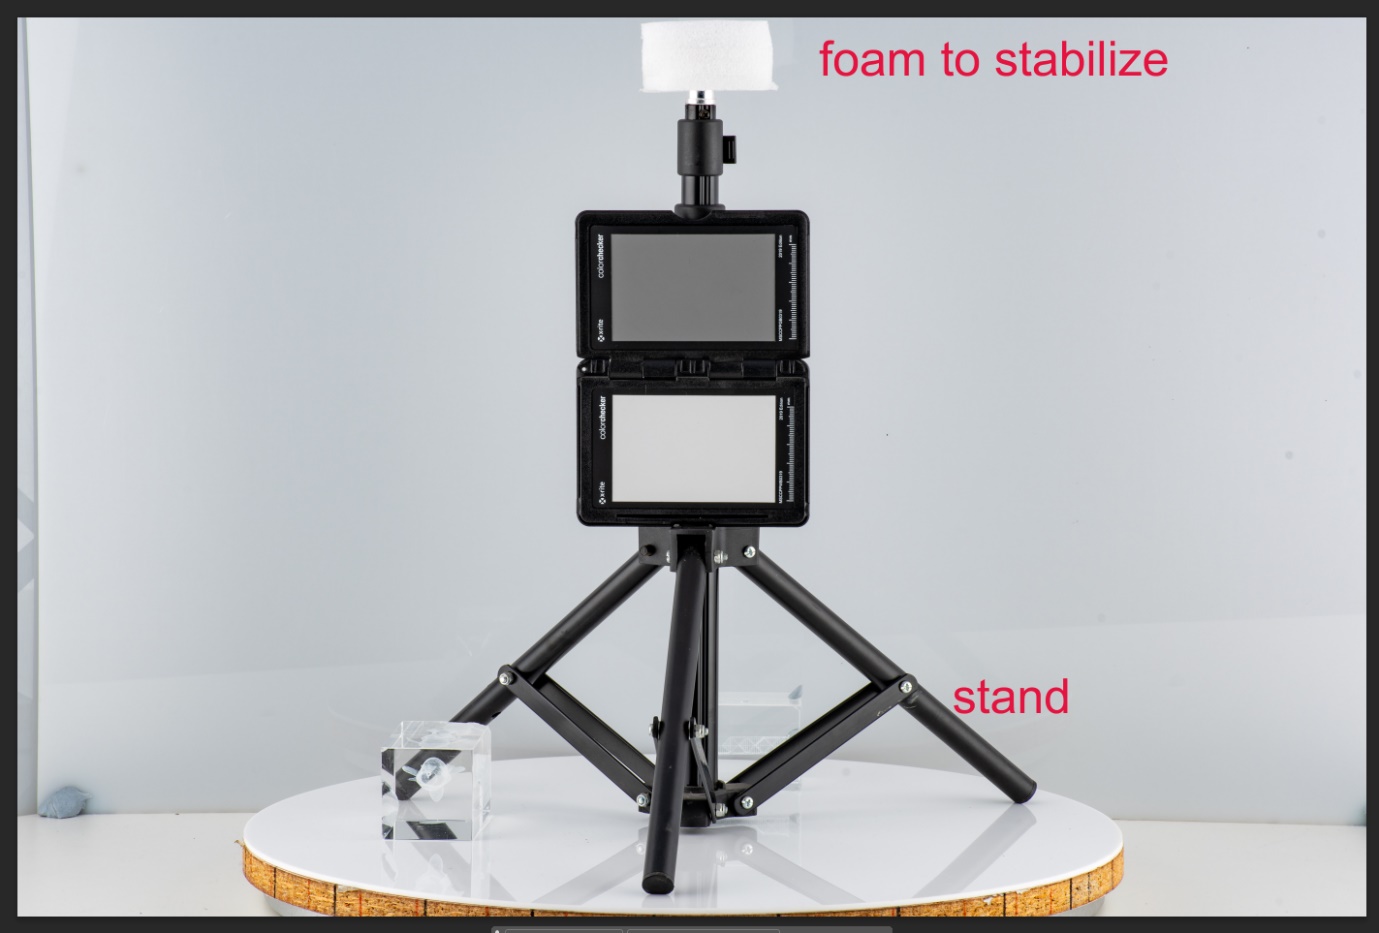
The helmets were placed on a small floor stand with some packing foam on the top to make it more stable.
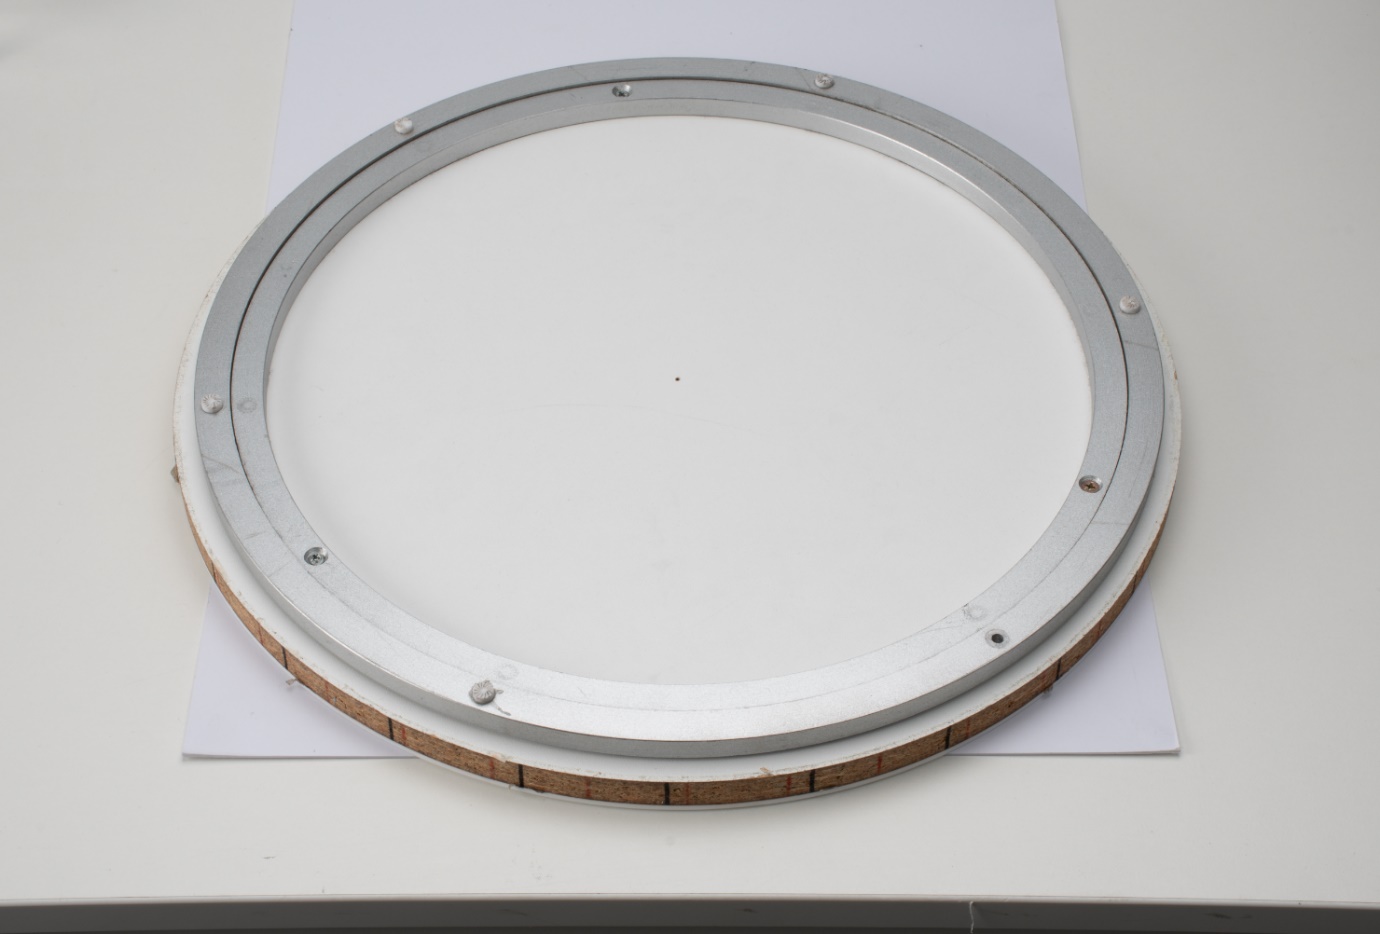
The turntable is homemade and measured out in both 24 and 36 shot increments. It's just a round piece of chip board laminated white and cut round by the supplier, I also asked them to drill a small hole in the centre for my reference.
The "lazysusan" turntable mechanism underneath came from a woodwork supply shop.
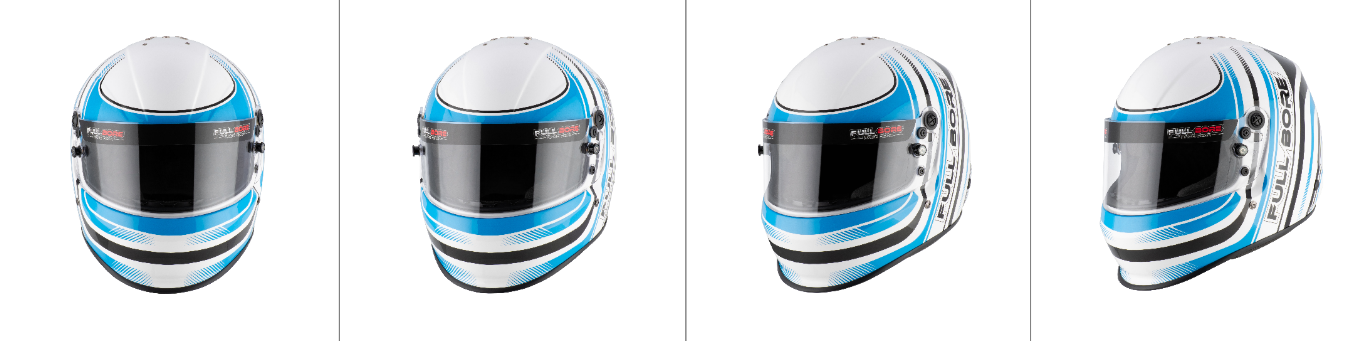
Post-production
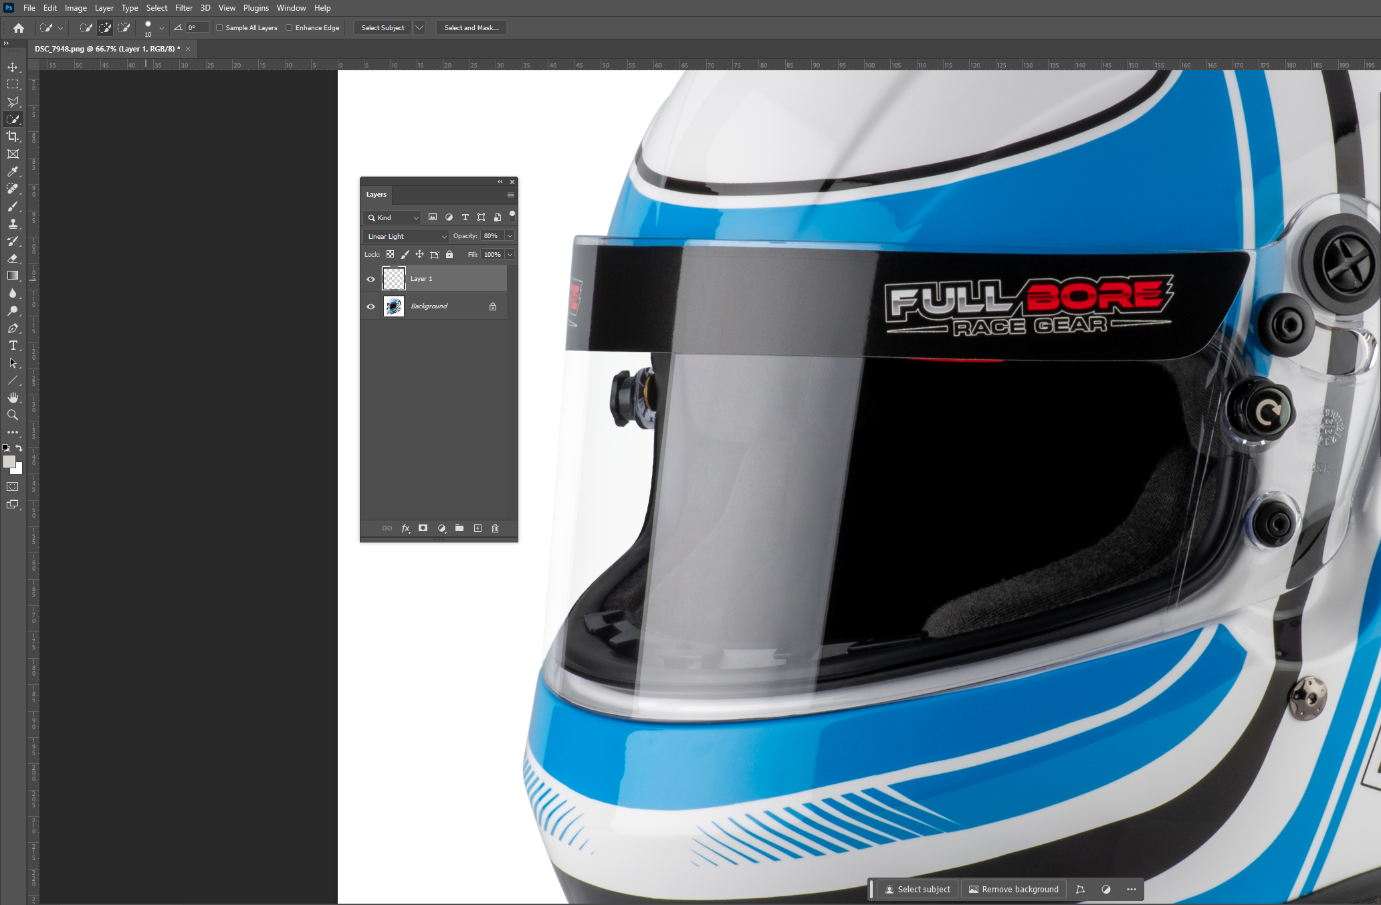
We needed to show the visors clear the way customer provided them to us. Normally, I'll show the product clear by back-lighting but with these reflective helmets the back-lighting created a distracting reflection around the helmets, so I decided to create the translucency in the visor in post-production.
I did that in Photoshop by using the quick selection tool to select the part that needed to look translucent, duplicating the layer and using the blend mode in linear light so I could adjust the transparency to show some of the visor so it's not completely white but does look translucent.
Contact See 360 Degrees for consultation and online imagery as required.