Recently we asked Eric Gordon of The Product Photography Studio to show our readers how he produced 360 product photography for one of his clients which we found interesting. It's not the usual 360 product photography you would see elsewhere. It's a 360 product photography with a twist. Literally!
Before we're ready to comprehend what Eric did on this peculiar project, let's review the terminology:
Single-row 360 product view
A regular 360 product spin is composed of a sequence of 360-degree product images photographed on a turntable with a stationary camera. Let's assume our turntable allows us to take 36 images in a single revolution of its platform. We photograph these 36 images on a single horizontal plane and so we call it a single-row 360 product view. Here's a schematic example using 36 images that you can spin horizontally:
Multi-row 360 product view
Now if we move the camera slightly up in a circular trajectory around the center of our platform and take another set of 36 images by spinning our turntable again, we get the second "row" of 360-degree images. If we do it like this a few times, we get a multi-row 360 product view where you can drag the images both horizontally and vertically and which schematically looks like this (7 rows by 36 images in this example):
There're many advantages to this type of interactive three-dimensional presentation but it's also often challenging to produce and it's particularly time consuming.
Two-row 360 product view
That's where our unique two-row mode comes to rescue. In simple terms, the difference with the multi-row process we just reviewed is that after we take the first single-row of 36 images on a turntable and move our camera up (or down), we don't spin the turntable again to capture another sequence of 360-degree images. Instead we take just a single picture with each such vertical camera transition while the turntable doesn't move.
By doing so we get one row of images of a horizontal 360-degree rotation like our first example, and one row of a vertical rotation. For simplicity we call it a two-row 360 product view.
Here's a demo of this mode that has 36 images in the horizontal row and just 6 in the vertical one. Note how you can still see the entire product by spinning it either vertically or horizontally:
There's still the challenge of setting up some kind of a vertical camera rig to accomplish something this type of animation, and that's why Eric's approach we review next is interesting.
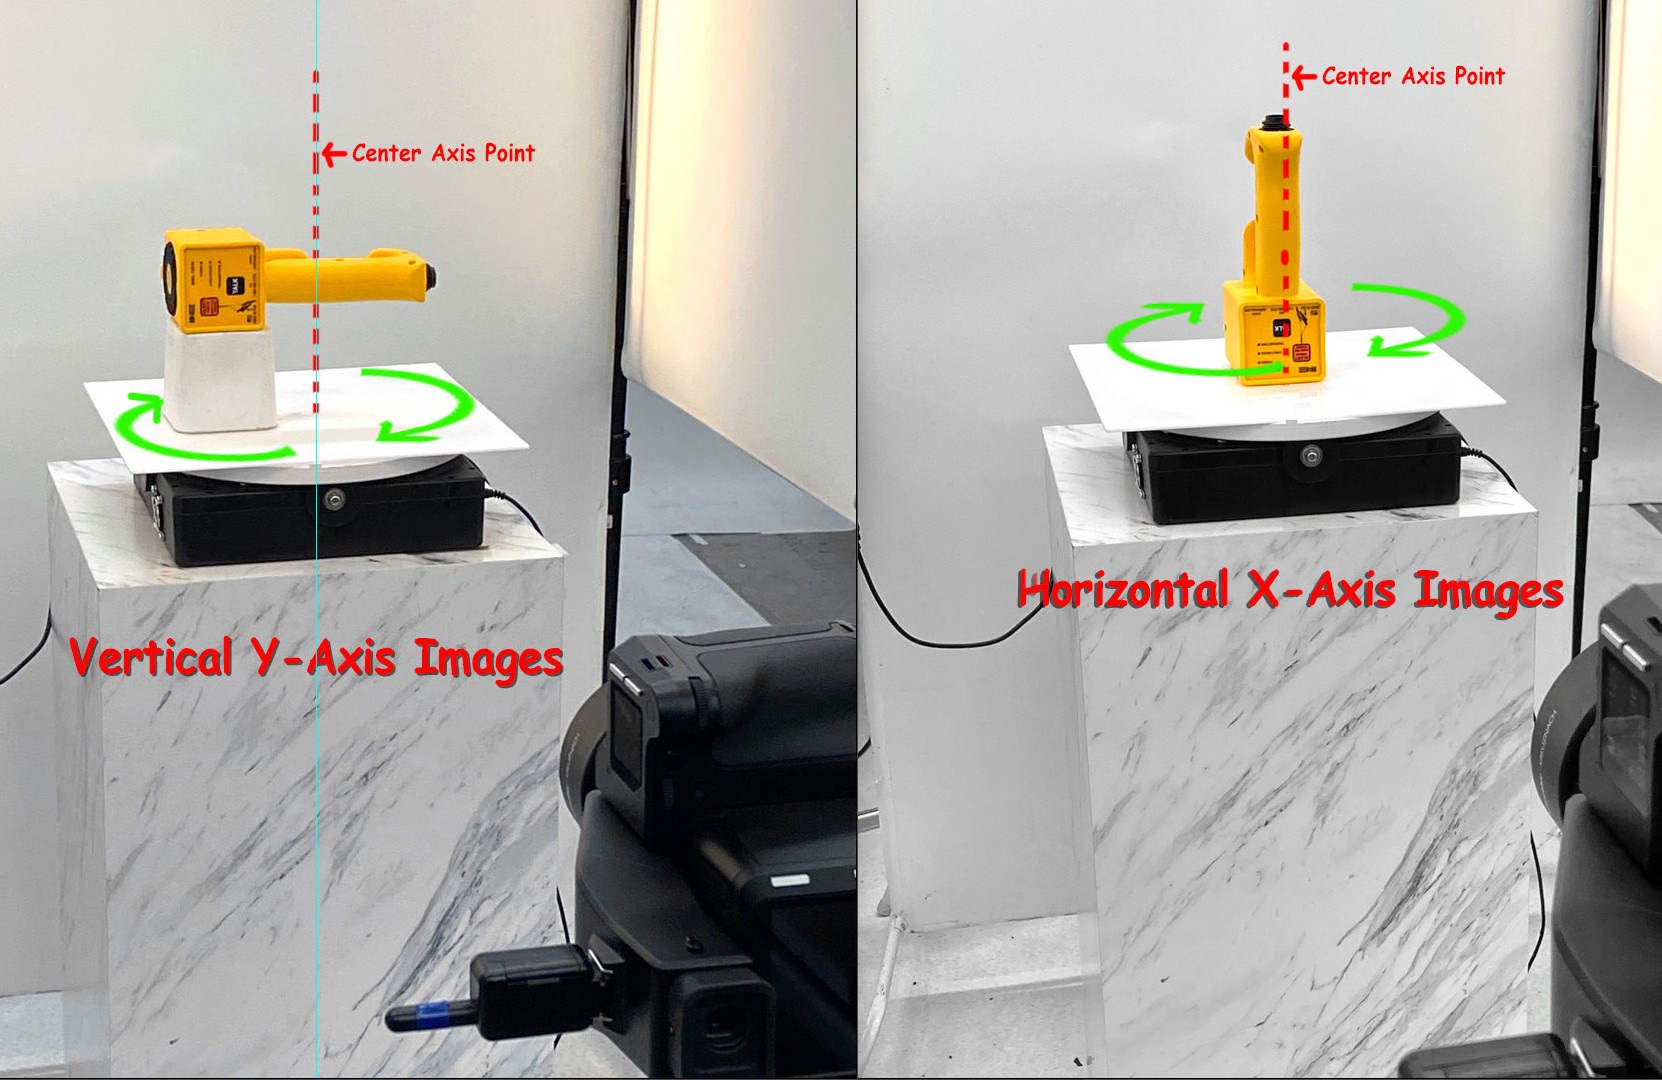
As you can see in this diagram below, Eric's solution doesn't require moving the camera at all. It's always fixed. To accomplish our two-row animation, his trick was to put the product on its side on the turntable to capture what would then appear as a vertical rotation, once the images were flipped in his Capture One software:
Here's how Eric describes the process:
"The diagram is not entirely accurate as there are two centering axis points that must be maintained as well as pitch vs yaw (gets very complex and annoying when setting up) but this covers the basic “vibe" of the method.
Also the easiest method for holding the object in place must be taken into account. For horizontal axis the easiest method was to simply lay the thing on its top and shoot it upside-down.

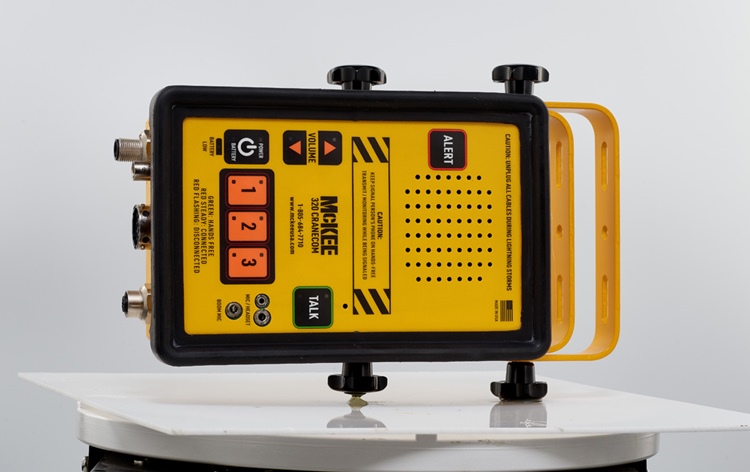
This unit above was tough due to it not really having any flat stable surface so it had to be shot upside-down using hot glue that had to be removed in post, and its vertical axis shots were also difficult because there was virtually no way to hold it straight in all 3 axis for pitch & yaw problem."
Nevertheless, considering these complex products, the results we saw were impressive. Here's one of the 360 product views Eric produced for this project:
If you are curious about the gear Eric used here, it's PhaseOne camera, Schneider-Kreusnach 120mm f4 Macro AF lens, Pocket Wizard PlusX (remote trigger), Paul C. Buff Einsteins lights, 3x1 ft stripbox through 4 ft square diffusion flags.
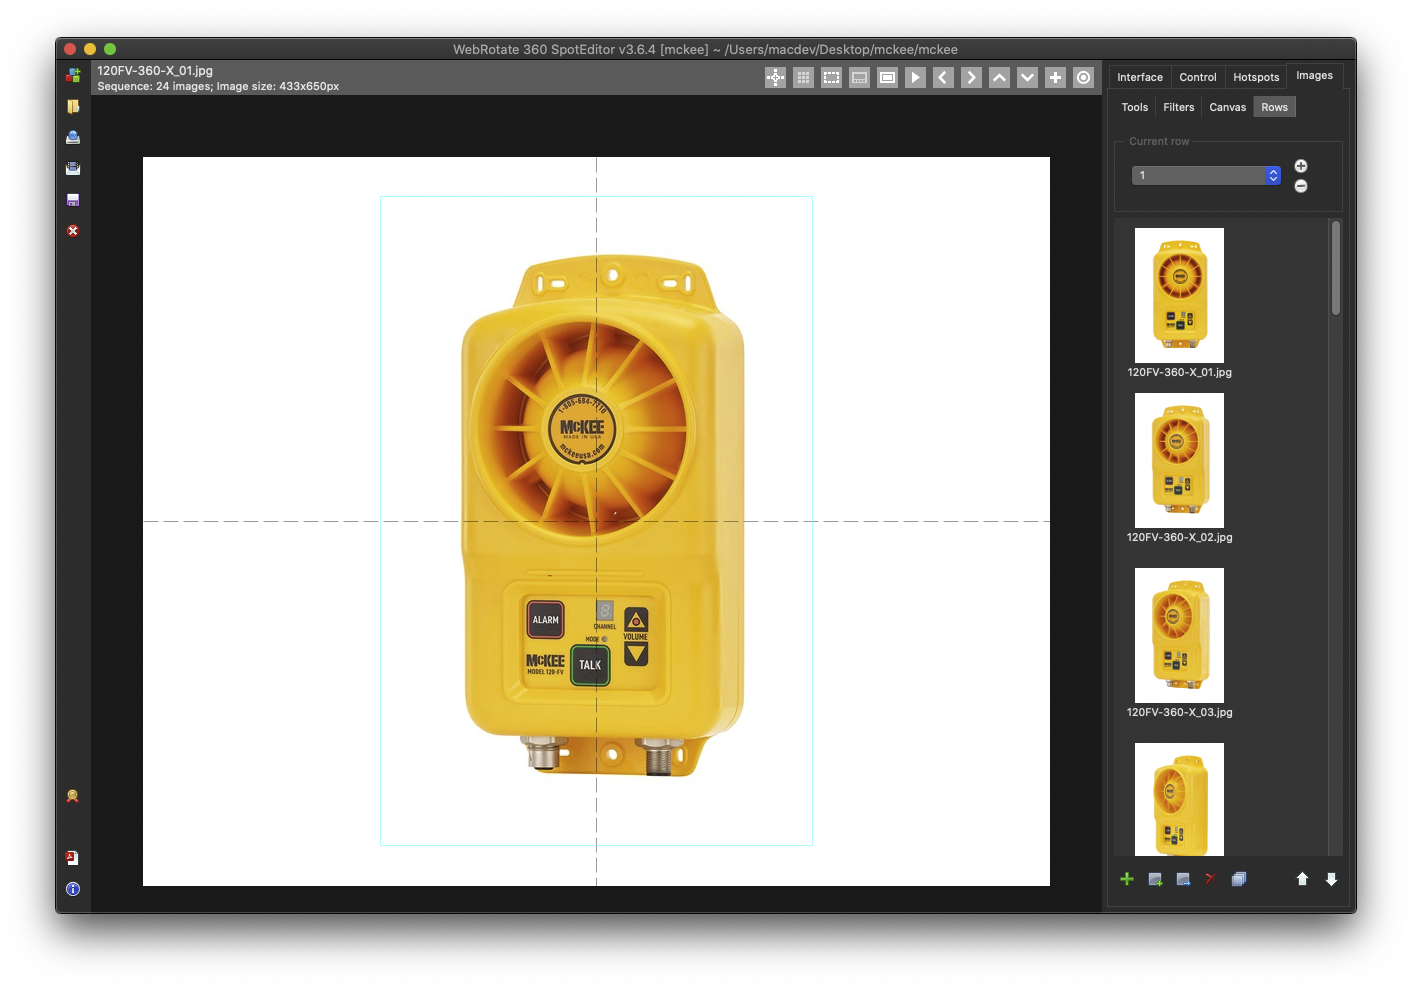
Publishing such two-row 360 product views is easy in WebRotate 360 product view creator software:
1 Prepare two folders with images on your hard-drive, one folder with the images of the horizontal spin and one with the vertical images (download our green cube example below).
It's important that the image file names are unique between the two folders. Also, given the current limitations, the first image of the vertical sequence and the first image of the horizontal one should match, or in other words, the first image in the folder with the vertical images should be the one you expect to see right above (or below) the first image in the folder with the horizontal images.
2 Start a new project in SpotEditor and select the folder with the horizontal images on the New Project form. The number of rows under Advanced options -> Number of image rows should remain 1 for this type of projects.
3 Once the images are loaded, go to Images -> Rows and click the green plus button at the bottom of the tab.
4 On the Add new rows form, set the number of rows to the number of images in the folder with your vertical images (6 in the example we shared below) and select that folder.
5 Navigate to Control -> More options and check Rows on single index.
6 Under Control -> Rotation -> Speed, adjust X and Y sensitivity as needed to make dragging in both directions more stable (both values should be non-zero).
7 Publish your project and if you use the example images below, it should look and work like the two-row cube we reviewed earlier.