Hello everybody! I'm Avi Mandal and I'm a creative graphic artist in Melbourne, Australia. Not long ago I have been involved in a great assignment with Surf Coast Shire Council within Digital Transformation team where among other projects I worked on an interactive 3D app.
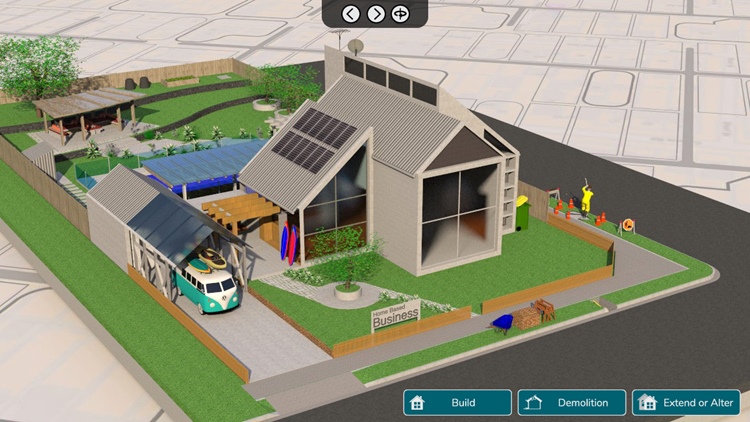
The app was designed as a graphical presentation for the Building and Planning permit guidelines and the goal was to visually explain various permit requirements using common architectural and environmental elements one would find in a typical Surf Coast house.
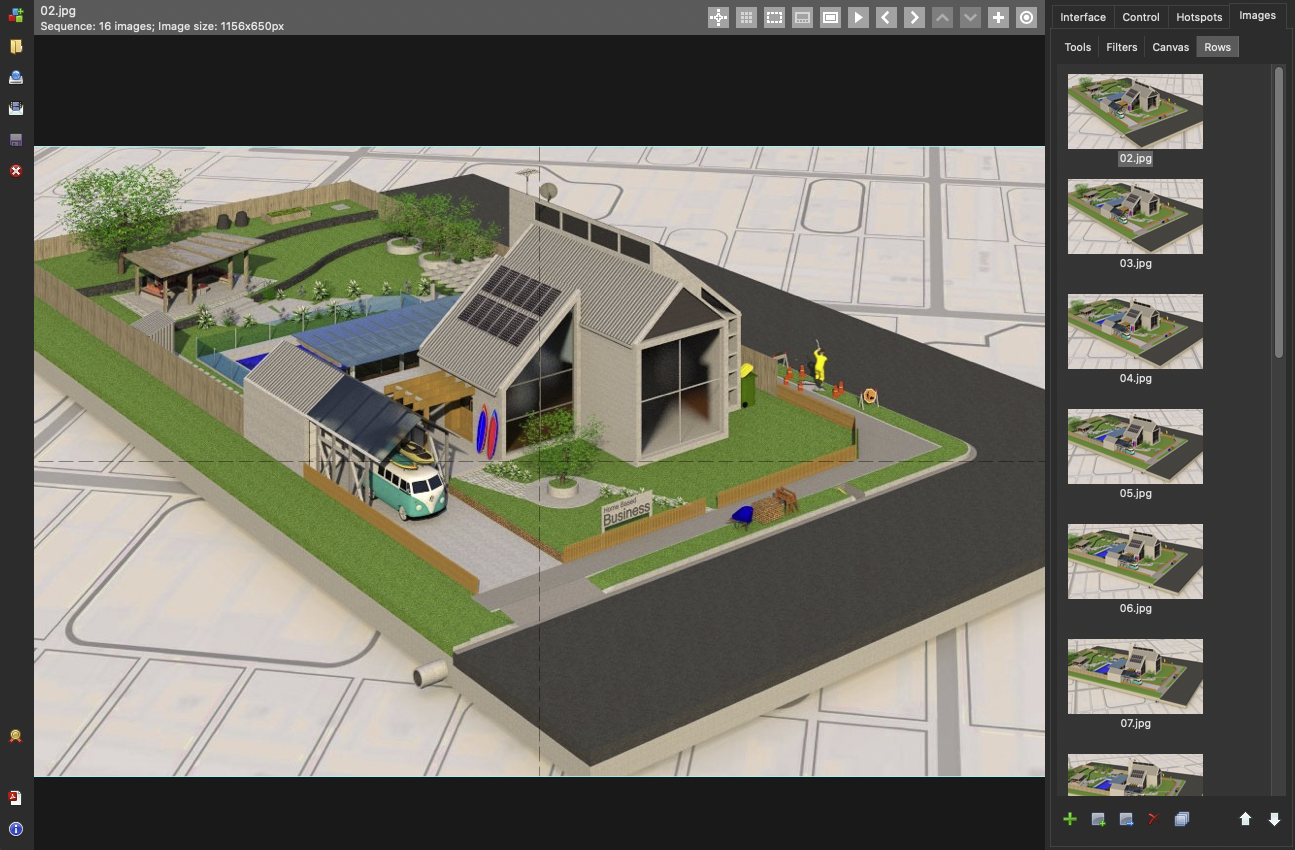
Presenting the guidelines inside a 360-degree view using interactive call-outs was the perfect choice for this application and I picked WebRotate 360 for the implementation as the hotspot support there is very extensive.
Check out the final result here
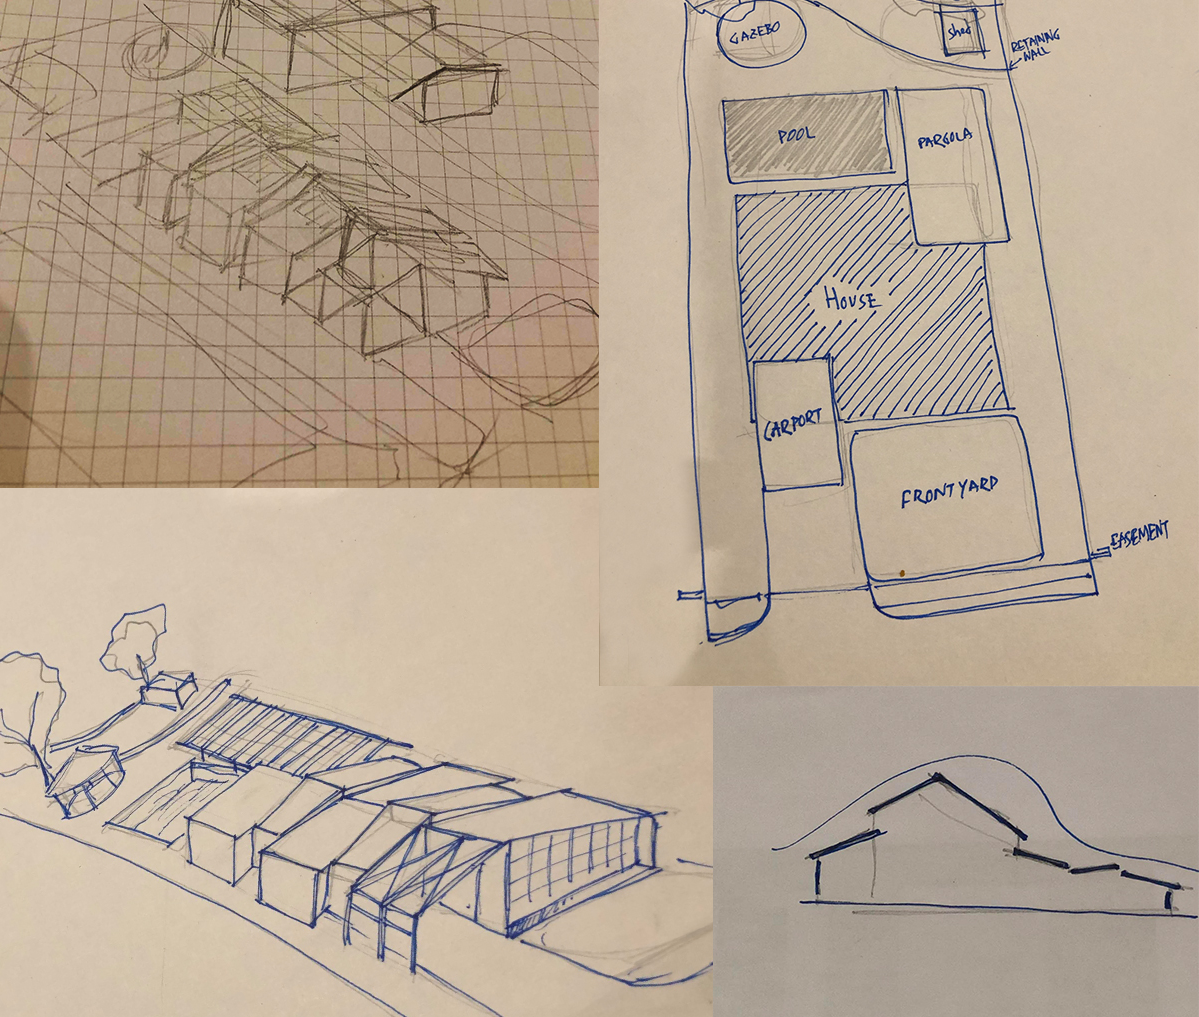
I started it with old school sketches and some planning on paper:
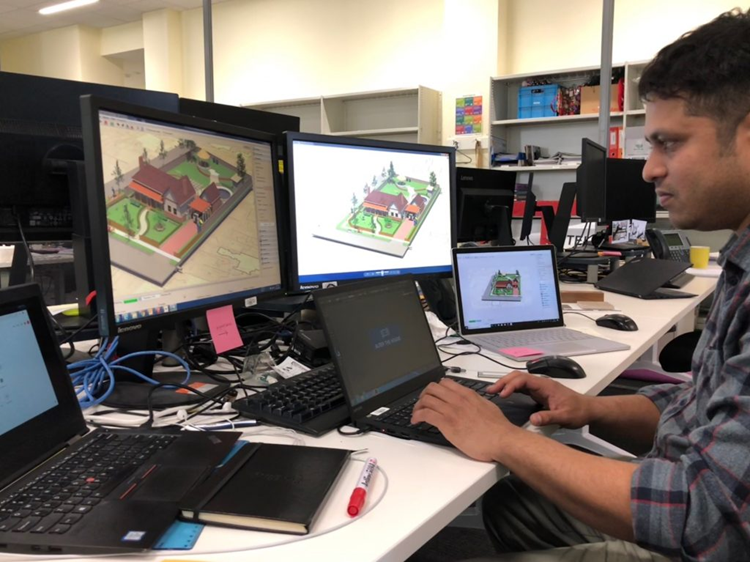
The next step was to model the house in 3D and render it as a sequence of 360-degree images. For this project I decided to go with 72 images (i.e frames) for the entire animation as it felt like a good balance of smoothness, detail and performance. Also more images meant more hotspot work in WebRotate 360 and there were lots of hotspots!
Initially, I used Sketch-up and Raylectron but the combo was not flexible enough as I had a fixed camera and had to rotate the model manually in 5-degree increments to render the images for further import into WebRotate 360 SpotEditor. Not to mention, Raylectron was not available for Mac...
Recently I have moved to Blender for all of my 3D modeling and rendering projects. In fact I have a similar app in works which is done exclusively in Blender. The rendering process there is much simpler. All I have to do is to create a big enough circle for the the camera to spin and follow an empty object I choose.

Here's how you can render a 3D model in Blender as a turntable animation to produce 360 degree images compatible with WebRotate 360:
Update [Aug 3, 2023]: Now you can use our advanced add-on for Blender that can create such multi-row 360 turntable animations and much more!
1 Add a bezier circle big enough to cover your 3D model. You can scale it up or down later as needed.

2 Give the camera a Follow Path constraint using the bezier circle as a target and also Track To constraint with your center object as a target. Make sure to set the camera location to 0,0,0 so it sticks to the circle and play with the To and Up settings of the Track To constraint until the camera is oriented towards the target.
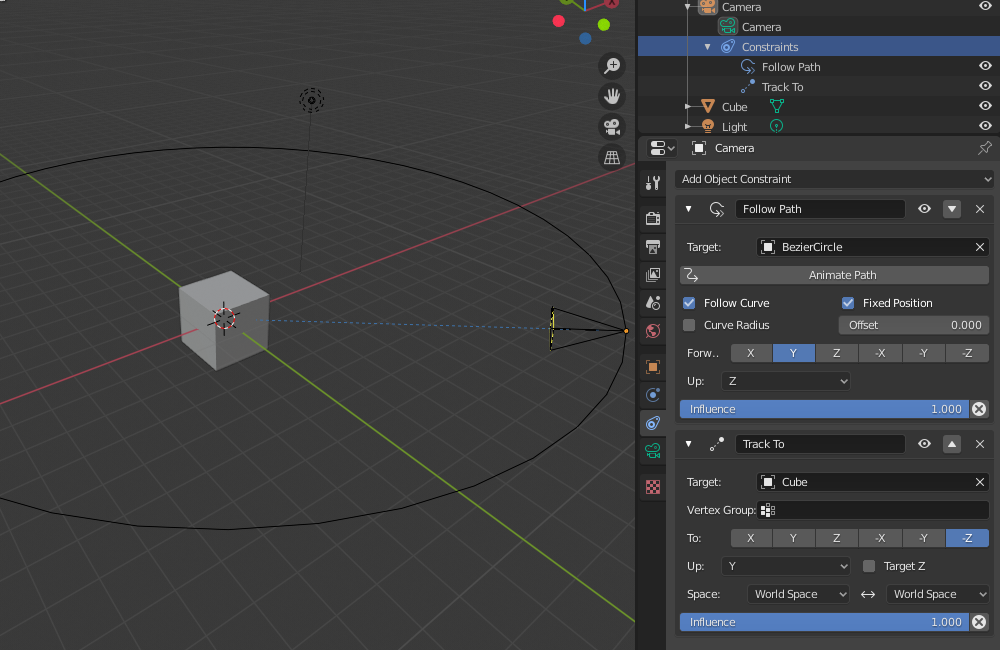
3 Select bezier circle and check Path Animation in the Object Data Properties. Set timeline frames to start at 1 and end at 72. Create an animation of the bezier rotation by inserting two keyframes (use "i" key on the keyboard):
1) on frame 0 with Rotation Z at 0 degrees
2) on frame 72 with Rotation Z at 360 degrees.
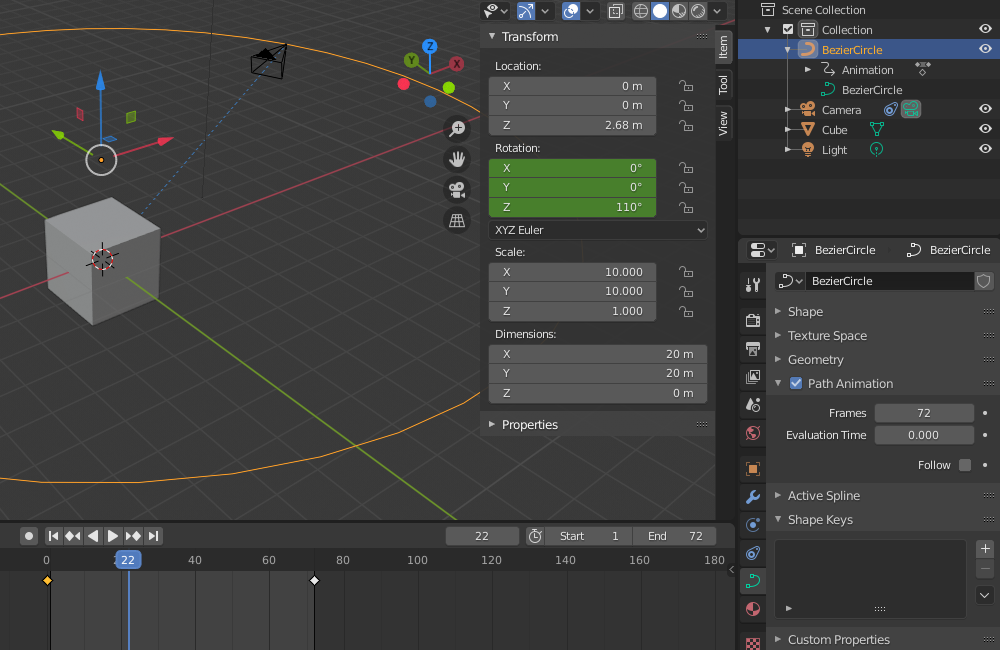
Make sure to set Interpolation mode to Linear for the first keyframe by selecting the keyframe in the timeline and pressing "t" key on the keyboard.
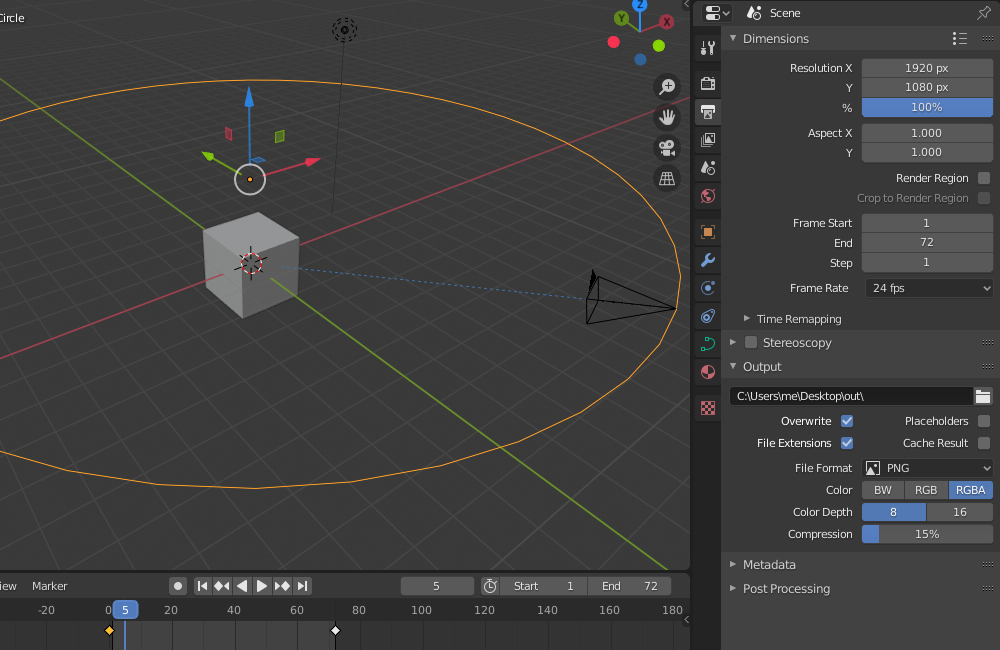
4 Assuming you have already configured your light setup and materials, configure the Output Properties as needed and finally select Render -> Render Animation in the top menu to start the render.
Once images were rendered, I have imported them into SpotEditor and added my hotspots. To learn more about various hotspots options, see this user guide under Hotspots. For my 3D projects I check Use custom styles and place my own HTML markup under Text Content tab of the Hotspot form so I'm not limited to the built-in features and styles.
Though I have tested different software packages for web publishing of my 3D models, I keep coming back to WebRotate 360. A sequence of images is all that is needed to create these interactive apps so any end-user will be able to open it without installing any plugins and I can produce quality 3D image renderings of any complexity.