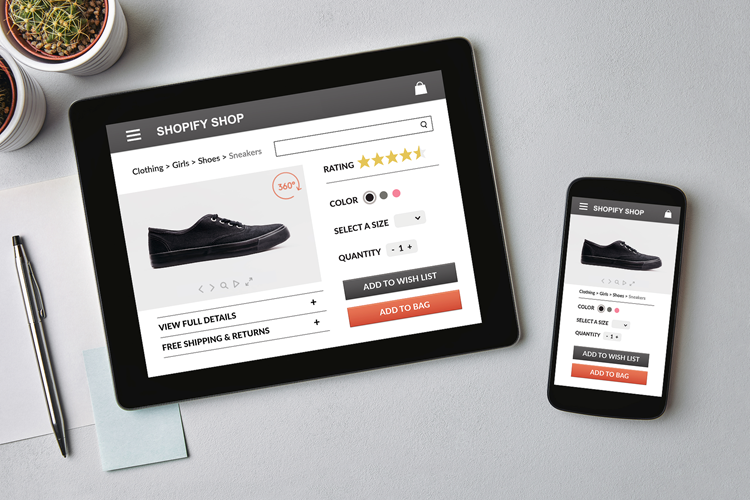
We have recently revamped our Shopify app, so today lets review what is currently possible in the latest WebRotate 360 Product Viewer for Shopify v2.0.
It's important to note that given Shopify limitations, your 360 product views have to be uploaded to a third-party web hosting such as webrotate's PixRiot, a GoDaddy server, etc. PixRiot, if you haven't had a chance to play with it is our new optimized hosting solution where you simply drag a published folder from your hard-drive to your PixRiot dashboard to host and share your webrotate 360 views online. PixRiot is not a requirement for using this integration.
There're three main integration methods available in the new app:
- Automatic PixRiot integration
- Image ALT integration
- Programmatic Integration
Let's first review Automatic PixRiot integration which is a new method we added in v2.0:
Automatic PixRiot integration
It's the simplest integration we have so far. It relies on automatic matching of a product ID in your Shopify catalog with the name of your 360 product spin in PixRiot. In other words, if a user lands on a product page and the app finds a matching 360 product spin on PixRiot, the integration is activated automatically.
Here's how to configure it step by step:
1 Let's first find out the ID of our product which we can do by simply looking at the URL of the product page in our Shopify admin. The ID is this long number at the end of the URL:

If you don't like using this ID for some reason, you Shopify developer can use a global JavaScript variable that they can output in your product template with the matching PixRiot name as needed. The name of the variable is __PixRiotAssetName.
Let's copy this number and re-publish our 360 product view in WebRotate 360 SpotEditor (download) using the Shopify number as the View Name. Alternatively, we could create a new SpotEditor project using this ID as the actual project name:
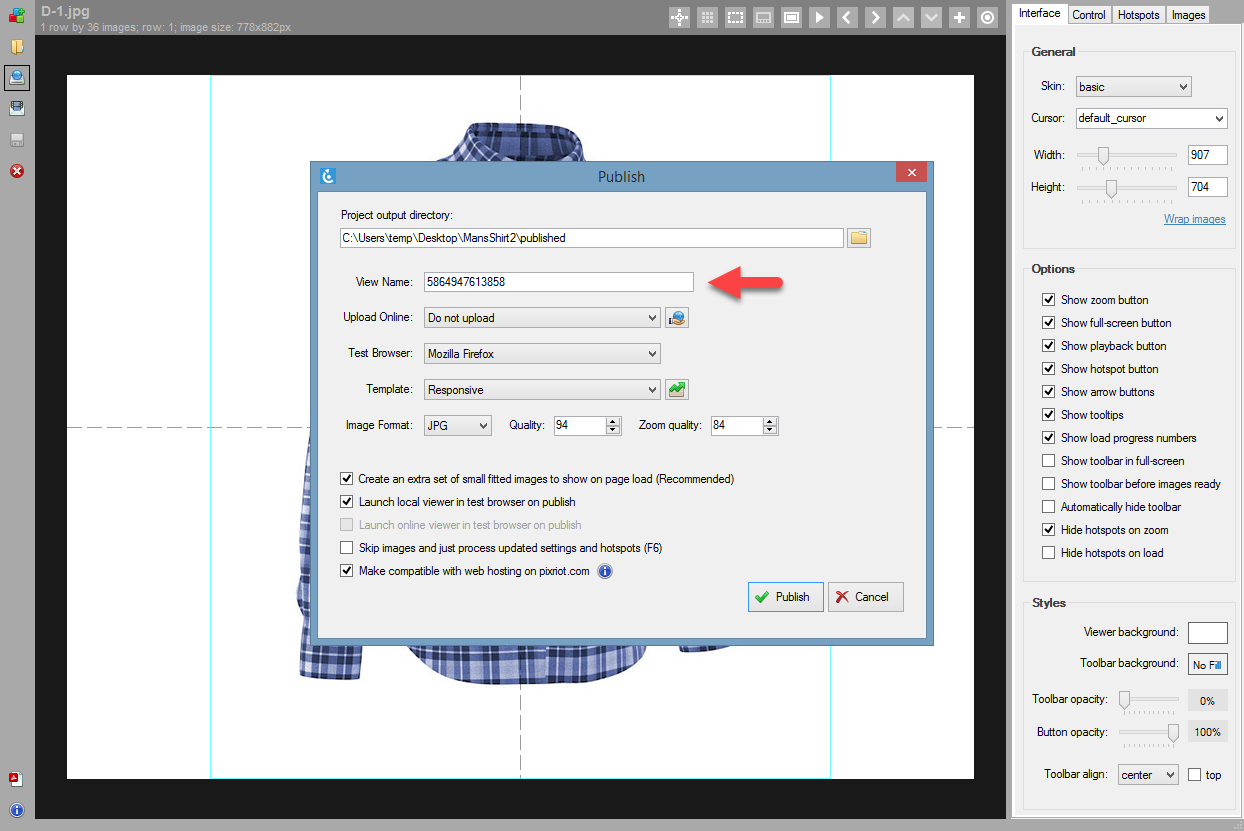
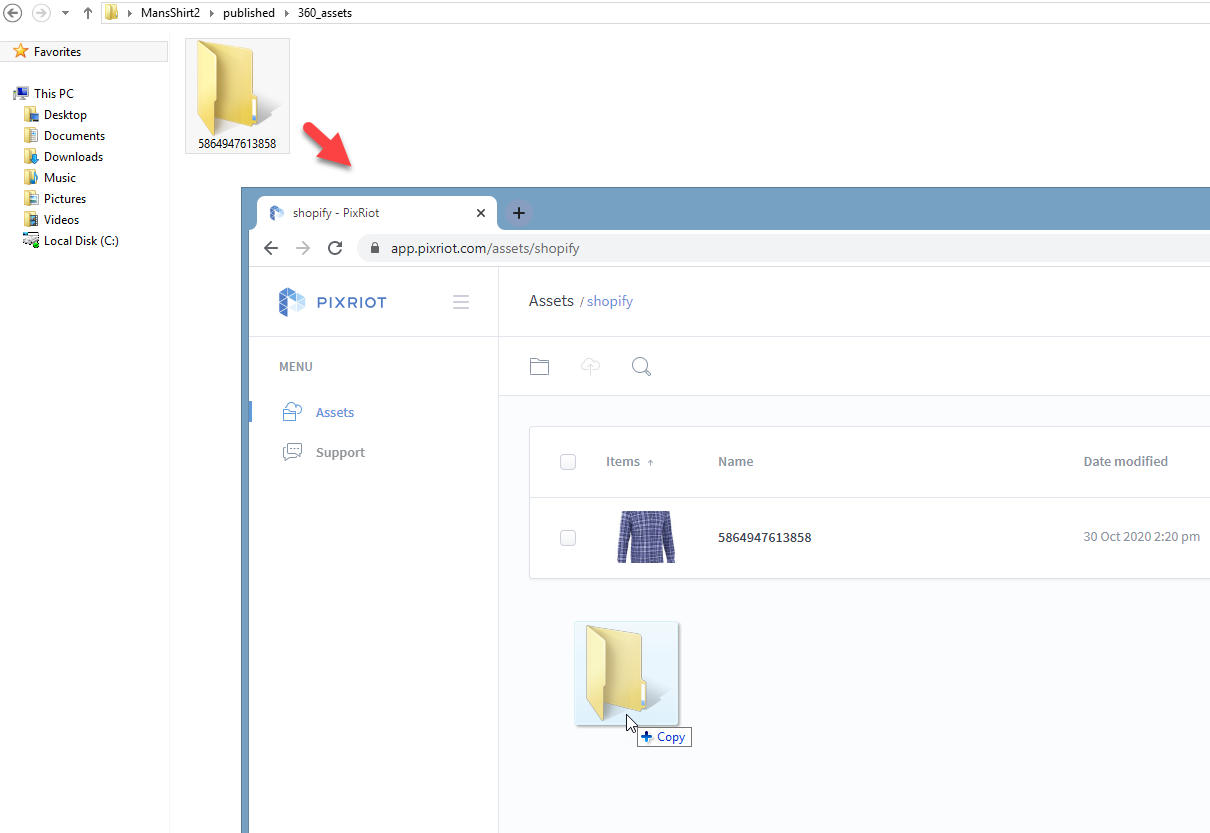
2 Now we can upload the published view to PixRiot under some folder like the shopify folder we created in the following screenshot. This folder and any sub-folders we can create there contain all required 360 product views for our app.
To upload, simply drag a single folder that just got created under published/360_assets that looks like our product id and drop it under your chosen folder in PixRiot:
3 To configure the app, first select Yes under Use PixRiot and also enter the URL of the shopify folder under PixRiot Folder in the app settings. To get the URL of the folder, click Share (globe icon) next to the folder name in PixRiot and copy-paste the URL accordingly:
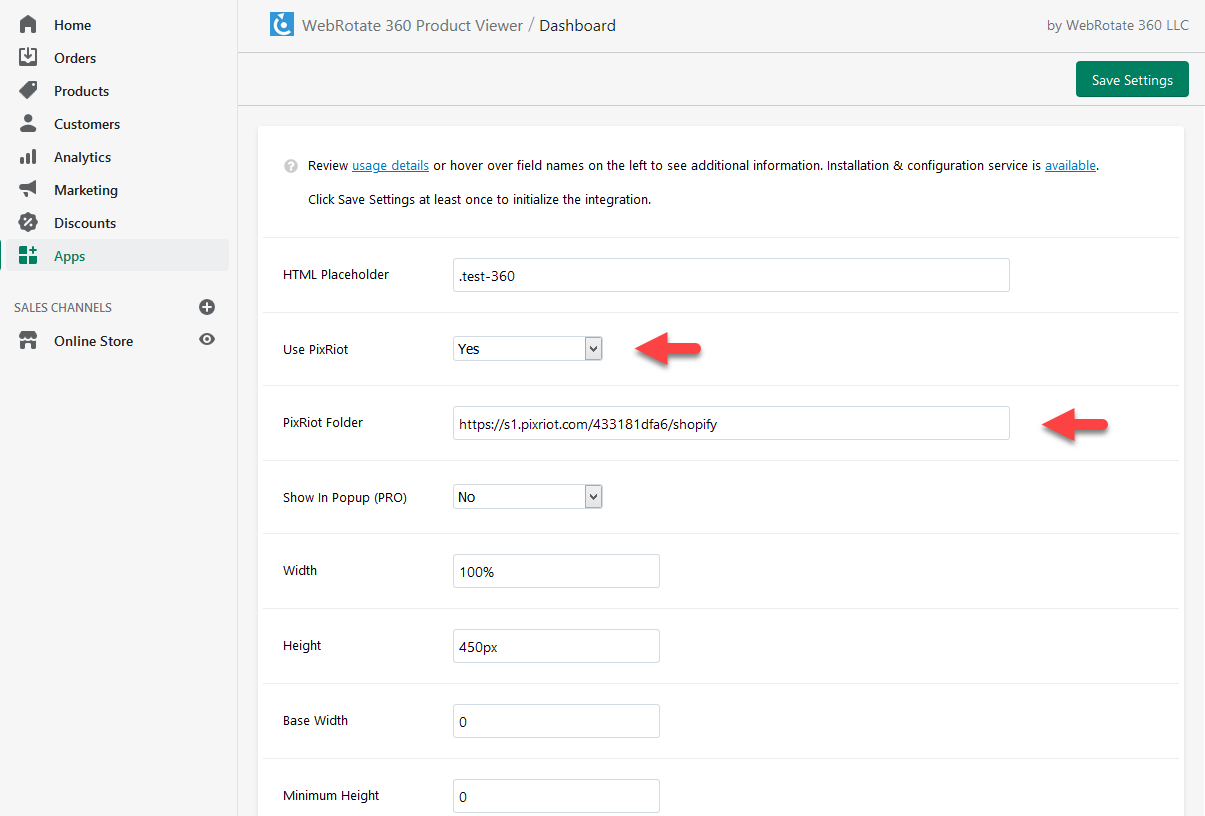
Now we need to decide where to place our 360 product view on a product page in Shopify and this is what the HTML Placeholder field is for.
HTML Placeholder is either a CSS class or id of an existing HTML element (container) on a product page where we want to see our embedded 360 product spins.
It can be also a class or id of an element that triggers a popup with a 360 product view, if it's configured in the app (e.g a thumbnail with a 360 view graphic, etc). If this sounds intimidating, please get in touch with us or your Shopify developer to find out how to identify or create such placeholder.
For this exercise, we will manually replace the gallery that came with our Shopify template with this empty div container in the product template as follows:
<div class="test-360">
</div>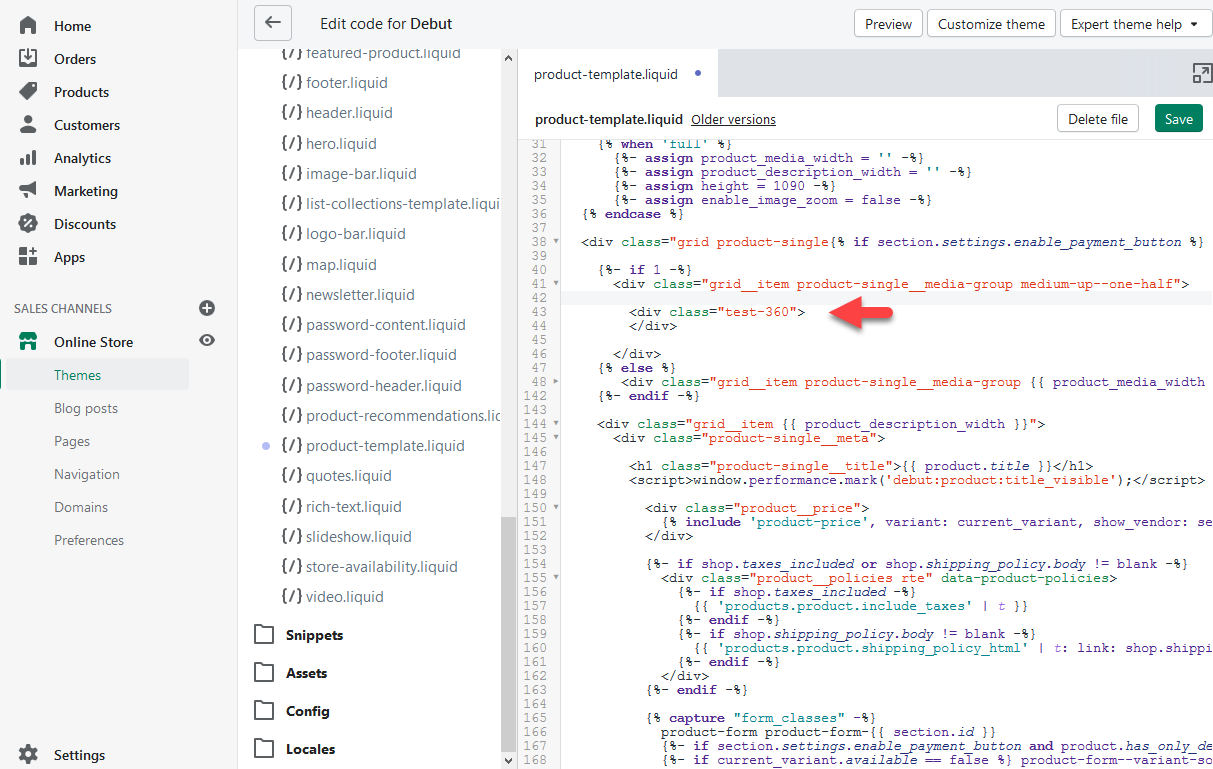
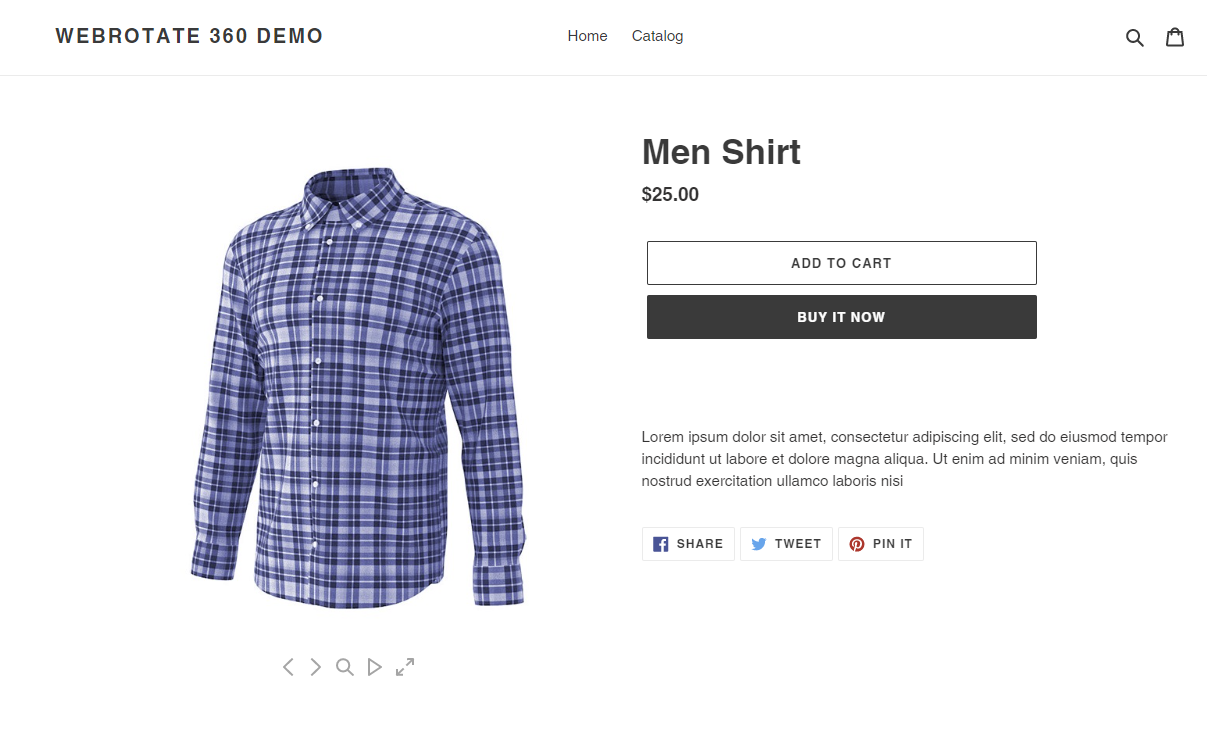
Alternatively, we could make it a hidden 360 graphic as shown next and place it let's say next to our main product gallery and select Show In Popup (PRO) in the app settings. The app would make it visible automatically on a product page, if a matching 360 is found in PixRiot (not all of your products may have a 360 product images). If user clicks the graphic, it opens a clean popup with a configured 360.
<div class="test-360" style="visibility:hidden;width:120px;">
    <img src="https://cdn.webrotate360.com/lib/integration/shopify/graphics/360icon.svg"/>
</div>
4 Finally, let's enter .test-360 in HTML Placeholder in the app settings in Shopify admin, save the app and clear browser cache to see our embedded 360 product spin as we intended:
You can fine-tune it further by updating viewer dimensions, its Base Width (important for responsive viewer height!), viewer skin, etc using the app settings as needed. Hover over the field names on the left in the app settings to see more details about each field there.
Remember to clear your browser cache each time you save the changes.
Image ALT integration
Instead of the automatic linking with PixRiot we reviewed earlier, here the app relies on the URL of a 360 product view that you can enter in the ALT field of any product image in your Shopify admin under Products.
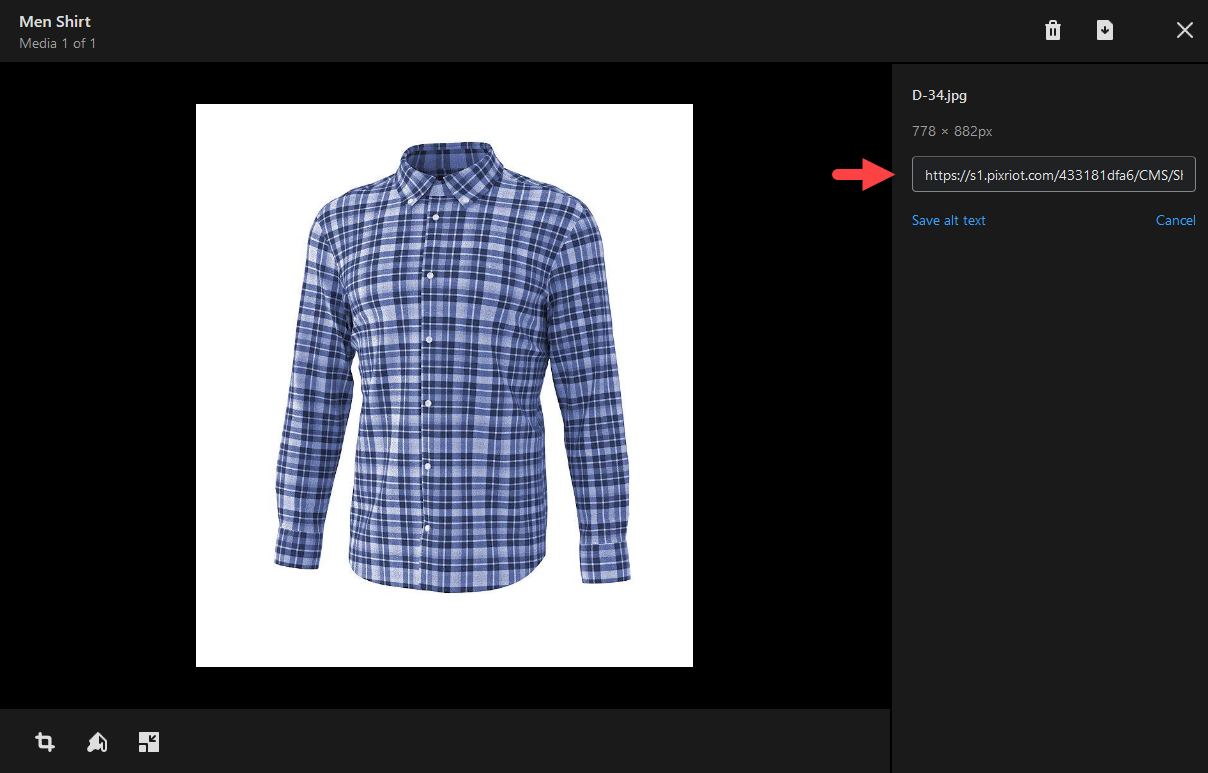
The URL can point to a webrotate 360 product view on any third-party web hosting, including PixRiot. And it's the URL of a config XML file that WebRotate 360 publishing software creates on publish on your hard-drive under published/360assets/your-folder-name.
It's the same URL you see on the first tab of the Share & Embed form in PixRiot if it's uploaded there:
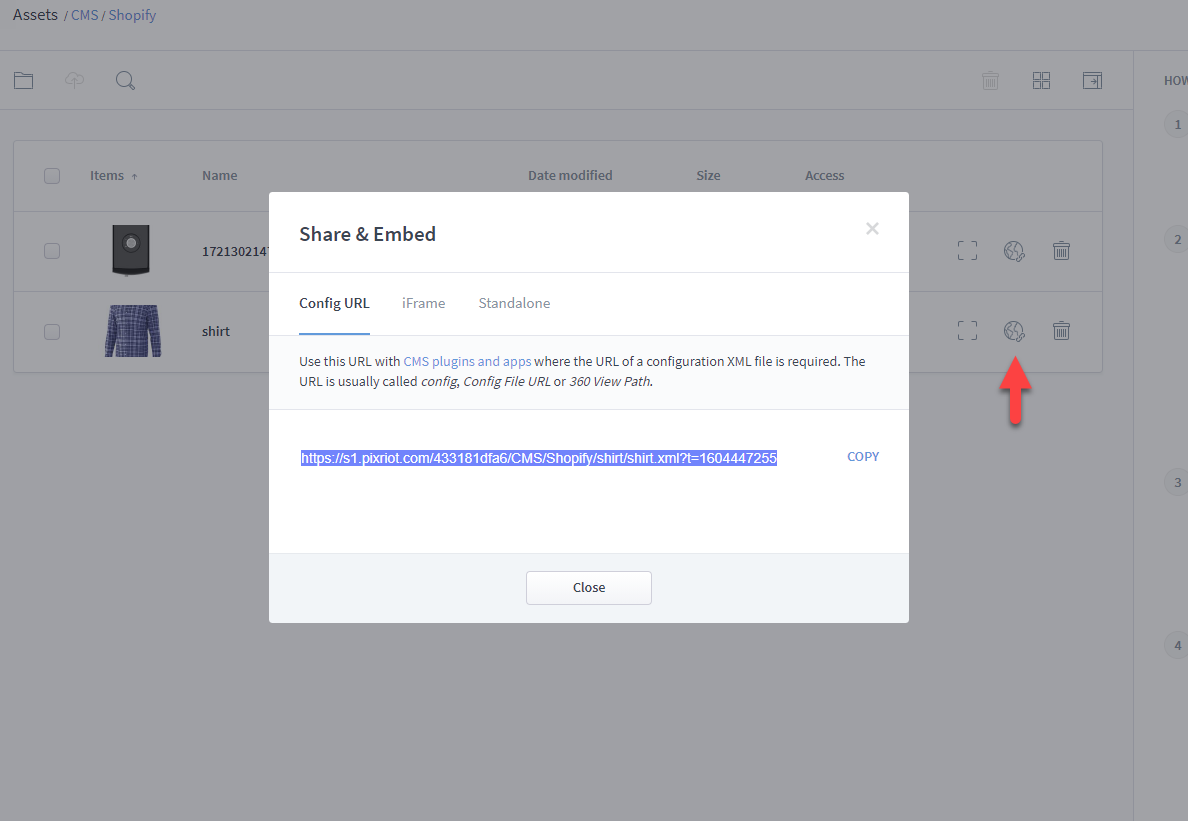
Here's an example URL you can use for your tests:
https://s1.pixriot.com/433181dfa6/CMS/Shopify/shirt/shirt.xmlThe integration will look for the image ALT on a product page that resembles our config file to see if a given product actually links to a 360 product view. And if it does, it will show it inside your configured placeholder (or via a popup) as we just discussed in bullet 3 under Automatic PixRiot integration.
Programmatic Integration
With this integration method, your Shopify developer can insert an HTML placeholder at a desired location on a product page programmatically and only for those products that have 360 product views. The placeholder container just needs to include the URL of the config XML file via the data attribute as shown in the following example:
<div class="test-360" data-imagerotator='{"config":"https://s1.pixriot.com/433181dfa6/CMS/Shopify/shirt/shirt.xml"}'>
</div>
Using this example, we also need to tell the app to use .test-360 as the HTML Placeholder in the app settings accordingly.
As with the other two integration methods we have reviewed, you can also configure this placeholder to work as a popup thumbnail and use the rest of the app settings as applicable.