So far the only place where we mentioned about our new 2.5.3 release was Facebook and Twitter. We love both of the social networks for the interactivity and quick feedback they provide but we shouldn't forget about our neat little blog...
Without further ado, we're announcing here the release of WebRotate 360 Product Viewer 2.5.3! This an important release for us as it provides an extensive ground work for launching cool new features in the upcoming v3.0 (more on this later).
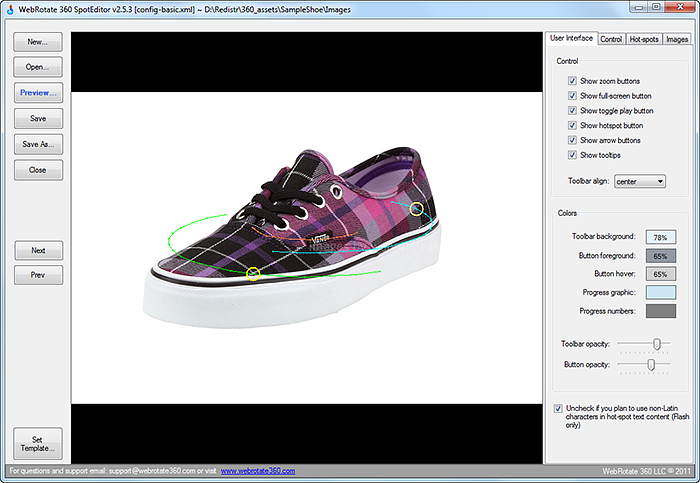
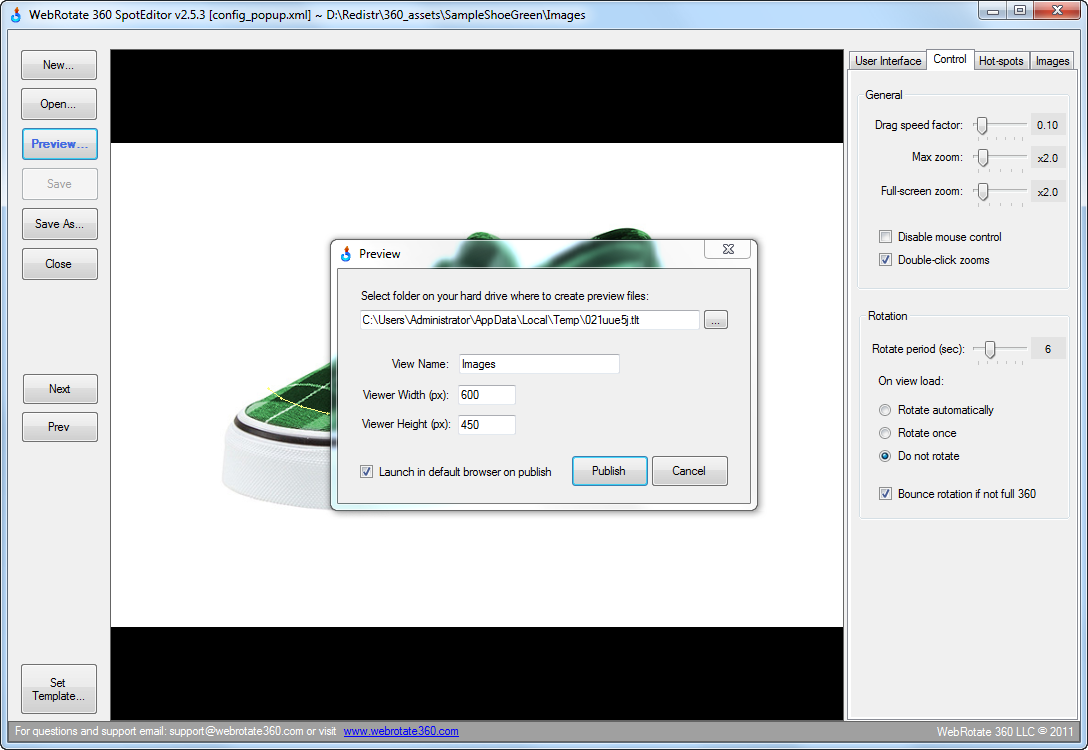
I think the most important update in 2.5.3 is the release of the revamped SpotEditor utility. Now it's finally possible to edit pretty much any configuration setting available in our 360 degree product viewer using our simple user interface and then preview your 360 degree product view in your default browser or even publish it to your hard-drive with everything needed for a quick deployment on your website.
Couple of screenshots of the updated utility:
I hope you will also find it handy that we supplied 5 integration samples with the free viewer package that show how easy it is to create 360 product views with dynamic or static hot-spots using either Flash or the new html5 360 viewer mode and integrate them in a variety of ways on your web pages.
Not to mention our new website that is dedicated to showcasing the types of samples that can be created with our free 360 degree product viewer - http://www.360-product-views.com/
Full list of updates in 2.5.3:
- [+] Revamped SpotEditor tool; added support for all configuration settings as well as Preview / Publish function
- [+] Added five new samples (Basic, Color, JS, Popup, Phone)
- [+] Added support for loading image / hotspot assets from locations separate from xml config (for CDN, etc)
- [+] Added API for in-place viewer reload using different xml configuration
- [+] Added API setting (flybyJsMenuFix) to fix an issue where Flash may overlap dynamic JavaScript menus
- [+] Added new type of hotspot indicator that pulsates constantly
- [+] Added urlTarget (xml) setting to allow specifying URL open mode on click inside hotspot (_blank, _self)
- [+] Added xml setting (bounce) for viewing when full set of 360 images is not available (e.g., 180-degree rotation)
- [+] Added two xml settings for configuring color of progress animation
- [+] Allowed hotspot popups to close on mouse click
- [+] Removed dimming of product images when activating hotspot popups
- [+] Enabled hotspot disable (xml) setting to also apply in JavaScript mode
- [+] Enabled toolbarBackAlpha (xml) setting to also apply in JavaScript mode
- [+] Enabled disableMouseControl (xml) setting to also apply in JavaScript mode
- [+] Added support for checking viewer version via Firebug
- [!] Fixed static hotspots to prevent browse action when no URL is assigned
- [!] Fixed IE security issue specific to Free edition (presented itself as a jQuery access error in IE statusbar)
- [!] Fixed issue in Webkit browsers where mouse cursor would sometimes change into selection mode on click
- [!] Fixed issue in JavaScript mode where viewer was skipping on a single image during rotation via mouse dragging
- [!] Fixed issue where JavaScript mode was not letting more than one static hotspot
- [!] Updated End-User License Agreement (License.PDF)
- [!] Launched our new website 360-product-views.com with a quick tour of the key product features
Download your free 360 product viewer HERE and join us on Twitter or Facebook for realtime news, updates, and a live dialog!