Photo by Maarten van den Heuvel
In this new series of posts we will attempt to cover some of the topics that so far have not been documented well, starting with this API example that spins a 360 product view to a desired frame and zooms in to a selected hotspot via API (WebRotate 360 Product Viewer programming interface).
Check it out by opening this link and clicking the button at the top. Alternatively, download the entire SpotEditor project here and see the customized html template in the published folder.
To achieve the same result, start by creating a new project in WebRotate 360 SpotEditor (download here) or open an existing SpotEditor project.
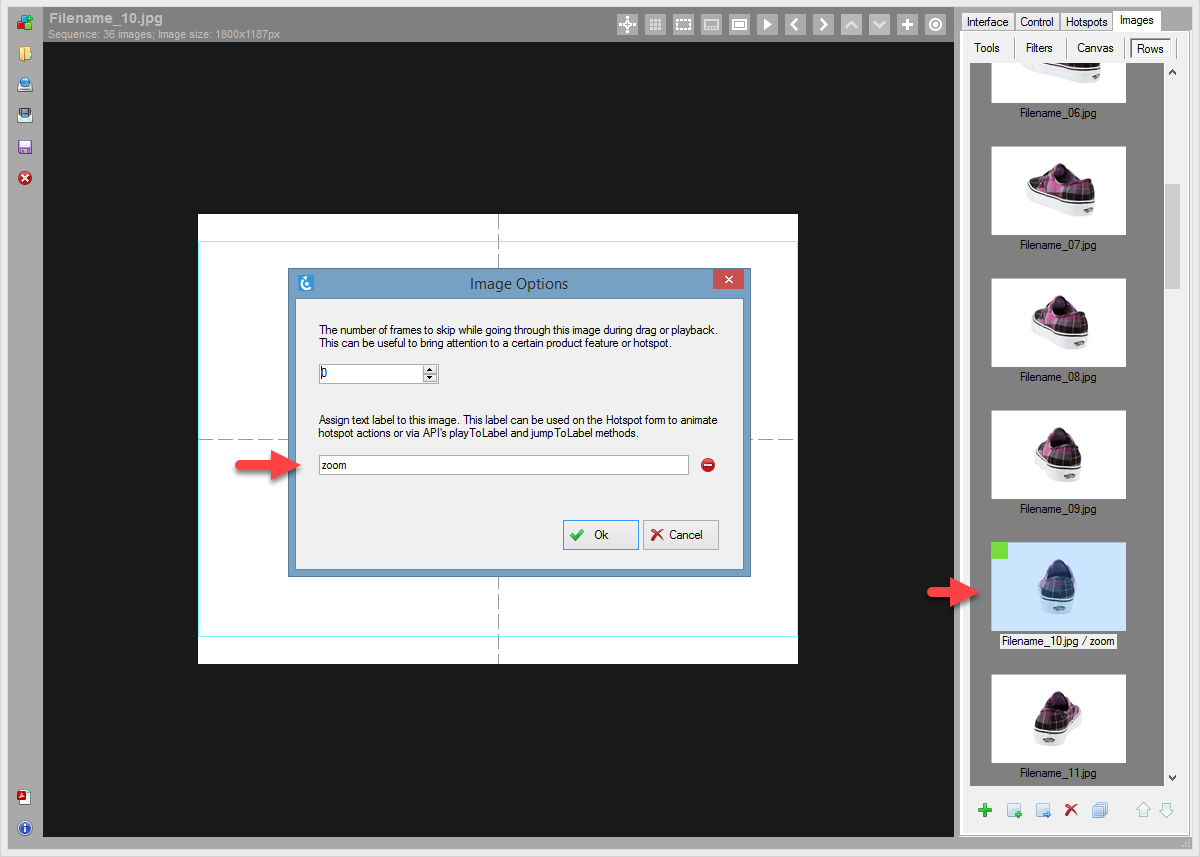
Navigate to Images -> Rows tab that has the list of all images in the 360 product view and select one of the images that will be used as a label for zooming (e.g as a thumbnail in your custom gallery that will need to be zoomed in inside the 360 spin). Double click on the selected image and give the label some name, i.e 'zoom' in the attached screenshot.
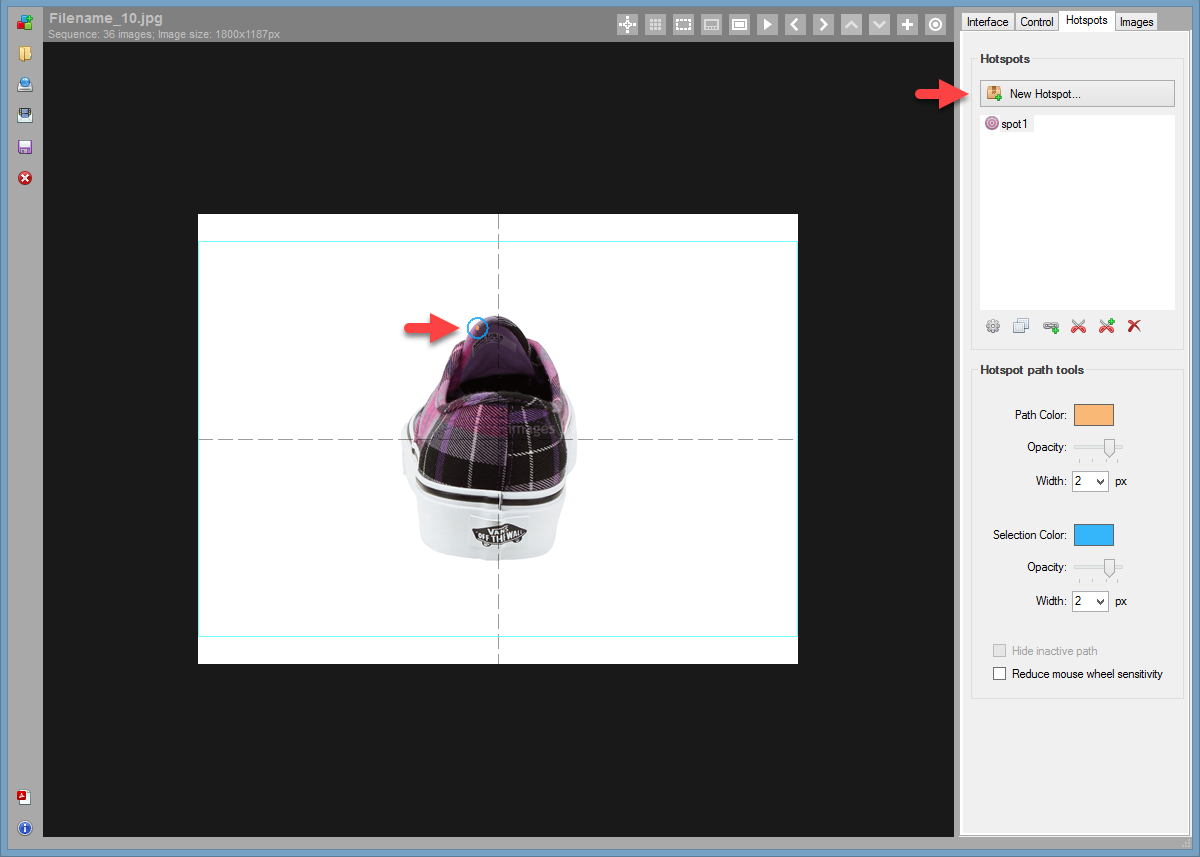
Create a new hotspot and place it at a desired location on the same image as the one that was labeled in step 2 (see the second screenshot).
If you don't want to see the hotspot indicator images on the published 360 product view (i.e those circular shaped graphics that we usually use for the hotspots), you can assign a custom indicator image that can be a 1x1 transparent PNG image for example. You can import such custom indicator images by clicking the current indicator image on the first tab of the Hotspot form.

Once you publish the project, add the apiReadyCallback property to your integration snippet as shown in the following example.
The example has a pretty straightforward logic where we call api.images.playToLabel to spin to our 'zoom' label first and once the playback is finished, we call api.hotspots.getDynamicHotspots()[0] to get the first hotspot and extract its coordinates on the current frame (i.e the image we labeled with 'zoom').
You can also enumerate the array that is returned in getDynamicHotspots to find a hotspot by its name as needed. Note that the second parameter in 'playToLabel' is the speed at which we want to spin to the labeled image. The speed is measured in seconds and it's the time it takes for the 360 product view to make a full spin (i.e 2 seconds in this example).
jQuery('#wr360PlayerId').rotator({

    ....

    apiReadyCallback: function(api, isFullScreen) {
        if (isFullScreen)
            return;

        jQuery('#zoomButton').click(function() {
            api.images.playToLabel('zoom', 2, function() {
                var hostpost = api.hotspots.getDynamicHotspots()[0];
                api.images.zoom(1, { x: hostpost.coordX, y: hostpost.coordY });
            });
        });
    },

    ....

});
Lastly, we call api.images.zoom(1, { x: hostpost.coordX, y: hostpost.coordY }) where we pass zoom step (which is 1 unless you have configured multiple zoom steps under Control -> More options -> zoom) and the coordinate for our zoom.
In the final release of v3.6.4 which is planned for November 2019 (version history), we will add a new API function that will allow receiving the coordinate of a hotspot on a desired image / label even before the hotspot is shown as right now, as you may have noticed, we had to wait for playToLabel to finish before calling zoom so that we can get the correct coordinates. With the new API, you won't need to wait in playToLabel and rather call api.images.zoom right after or before it (i.e not inside the playToLabel callback) which will produce a more dramatic effect with the concurrent play and zoom transitions.
See the next post in the Missing Manuals series here.