Due to popular demand, let's review two ways you can publish multi-row 360 product views in WebRotate 360 SpotEditor.
Multi-row in WebRotate 360 is a feature that let's you spin 360-degree images both vertically and horizontally. Although rare, some folks also use our multi-row support to create product configurators and tours, where you can instantly switch product options like colors within the same view.
Using "multi-row" for configurators is problematic in that we load all images from all rows upfront, and so it can be quite slow if you need to cover lots of options (e.g. color, fabrics, etc.). For image based configurators, we usually recommend using "reload" feature that lets you load separate 360 spins or animations within the same view on demand. The feature is available via viewer API or using Hyperlink hotspot action with viewer config as action URL. More details on both the hyperlink action and APIs can be found in the user guide.

We have a few blog posts dedicated to image production workflows for multi-row 360 product spins using both photographic setups as well as 3D image rendering in specialized 3D software (e.g., post1, post2, post3). You may also find a couple of live multi-row examples on our website (e.g., here and here). We also support a unique two-row rotation mode that you can learn more about in the following post. While technically a "multi-row", the two-row feature is not covered in this blog post.
Each row in a multi-row 360 product view consists of the same number of images. The software will warn you if this requirement is not met or will automatically add dummy grey images to even out all rows. If you edit a published 360 view manually (i.e via config xml) or generate it programmatically and end up with inconsistent number or images in rows, the viewer will fall back to treating it as a single-row 360-degree product animation.
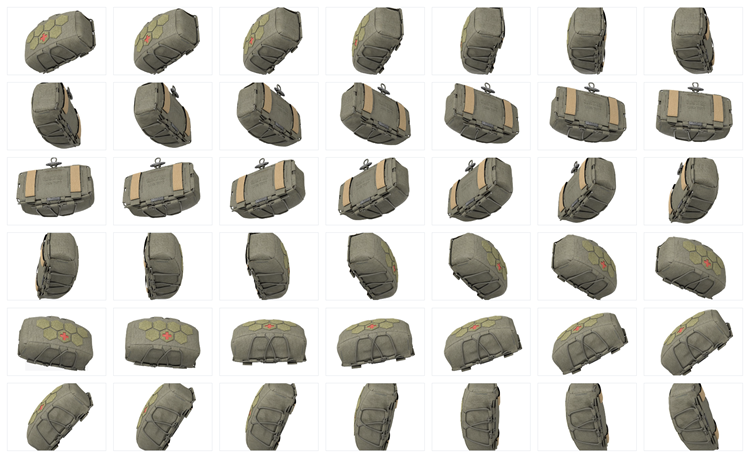
There are three ways to create multi-row spins like the following example in SpotEditor.

1. New Project Form
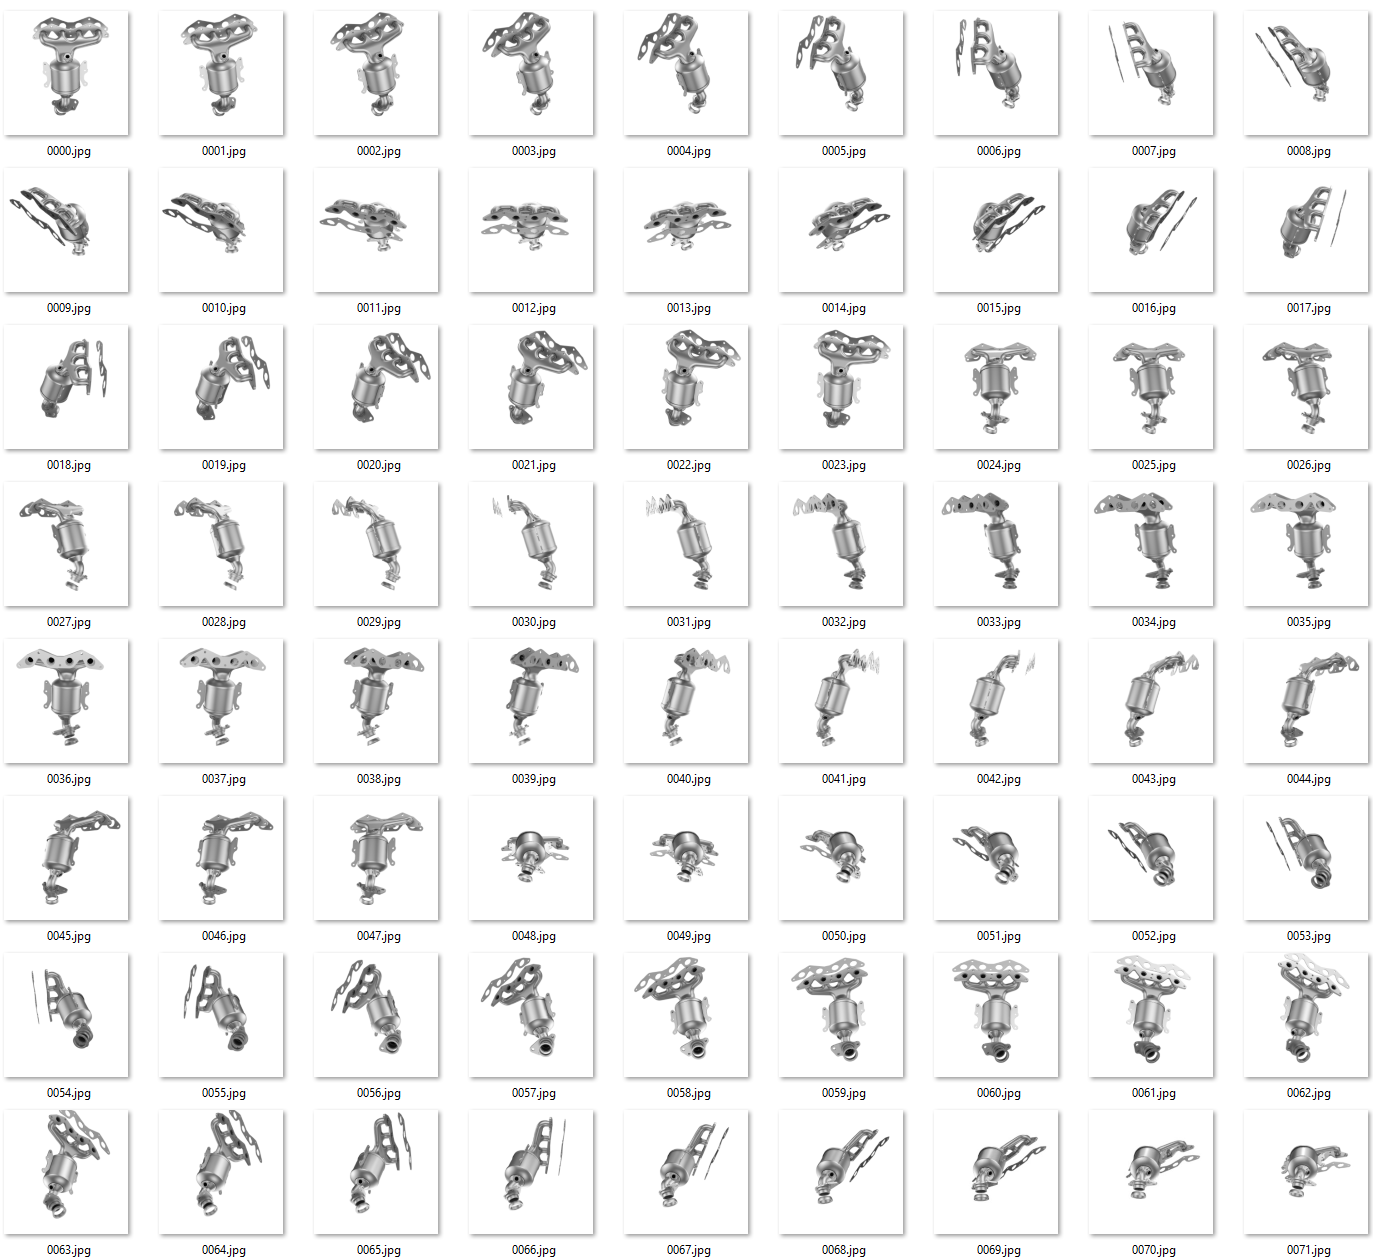
Start by organizing your images in a single folder. They have to be named sequentially through the rows. For example, if you have 3 rows consisting of 24 images each (72 images total), and the first image of the first row is named image0.jpg, then the last image of the last row is going to be image71.jpg.
The following screenshot illustrates the folder contents with 3 x 24 rows:
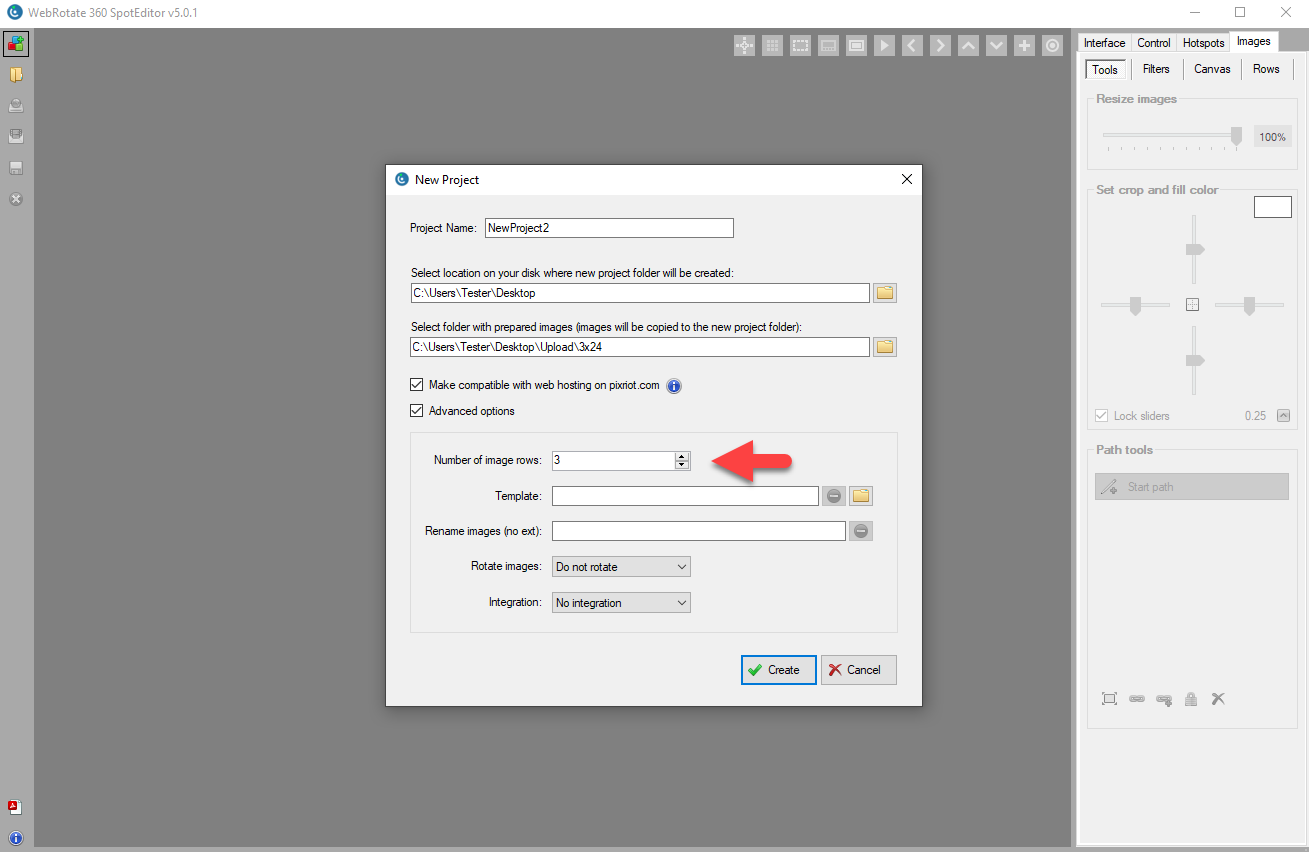
Once images are prepared in a source folder, select New Project in SpotEditor, enter the name of the project, its location and the location of the source folder with the multi-row images on your hard-drive. Check Advanced options and enter the number of rows in the source folder via "Number of image rows".
Download example 360-degree images with 7 x 36 images here and enter 7 under "Number of image rows" for a quick test.
Select Create to load the images.
While it's possible to drag images left and right in the preview window in SpotEditor right away, to switch rows you need to either use the vertical arrow buttons in the top toolbar or flip the rows under Images -> Rows tab. The reason you can't drag images vertically in the Preview is due to how we load images in SpotEditor. To apply edits such as image crop or levels in real-time as you drag images, we have to keep the images ready in memory which can be quite taxing on your computer. It would be more likely to run out of RAM, if we were to load all image rows upfront.
There are several important settings under Control -> Rotation related to 360 multi-row views in SpotEditor that you need to be aware of:
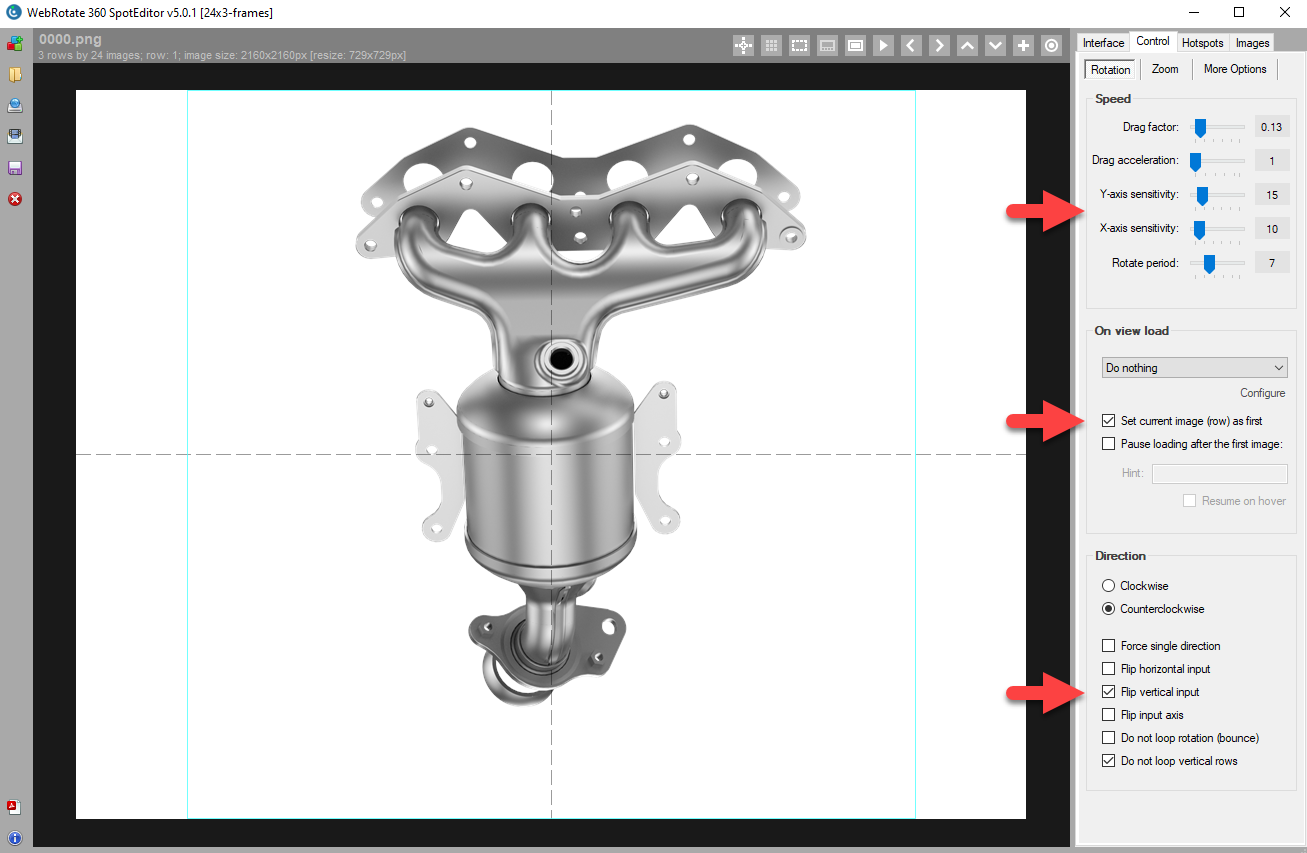
Speed -> X and Y sensitivity
A smooth multi-row 360 product view should be easy to navigate both vertically and horizontally which is not always doable. As even a tiny vertical mouse movement can trigger transition to the next row while dragging 360-degree images horizontally. To control the ease of the transition between rows and frames in individual rows, use X and Y sensitivity options for horizontal and vertical drag respectively. They are basically pixel values that tell the viewer how much drag movement in pixels to ignore until it can flip a row (Y) or jump to the next frame (X).
On view load -> Set current image (row) as first
As you may already know, this setting sets the first image that the viewer will have to load and show right away and before loading the rest of the image sequence. For multi-row spins, this also sets a starting row user will interact with, which is a row that corresponds to the "first" image.
Direction -> Flip vertical input
Depending on the order of image rows, which mostly depends on how photography or rendering was setup, you may end up in a situation where dragging images down will move rows up and vice versa. This setting can quickly fix this by switching the direction of vertical row animation in response to user input.
2. Images > Rows
If you need more control, there's also Images -> Rows tab where you can add or remove rows and images individually. That can be useful if you create an empty project without specifying a source folder on the New Project form, or if you capture additional rows for an existing project that you need to append. Using options under Images -> Rows you can add rows or images either individually or in a batch. The panel options at the bottom of the tab also allow repositioning or replacing individual images in each row.
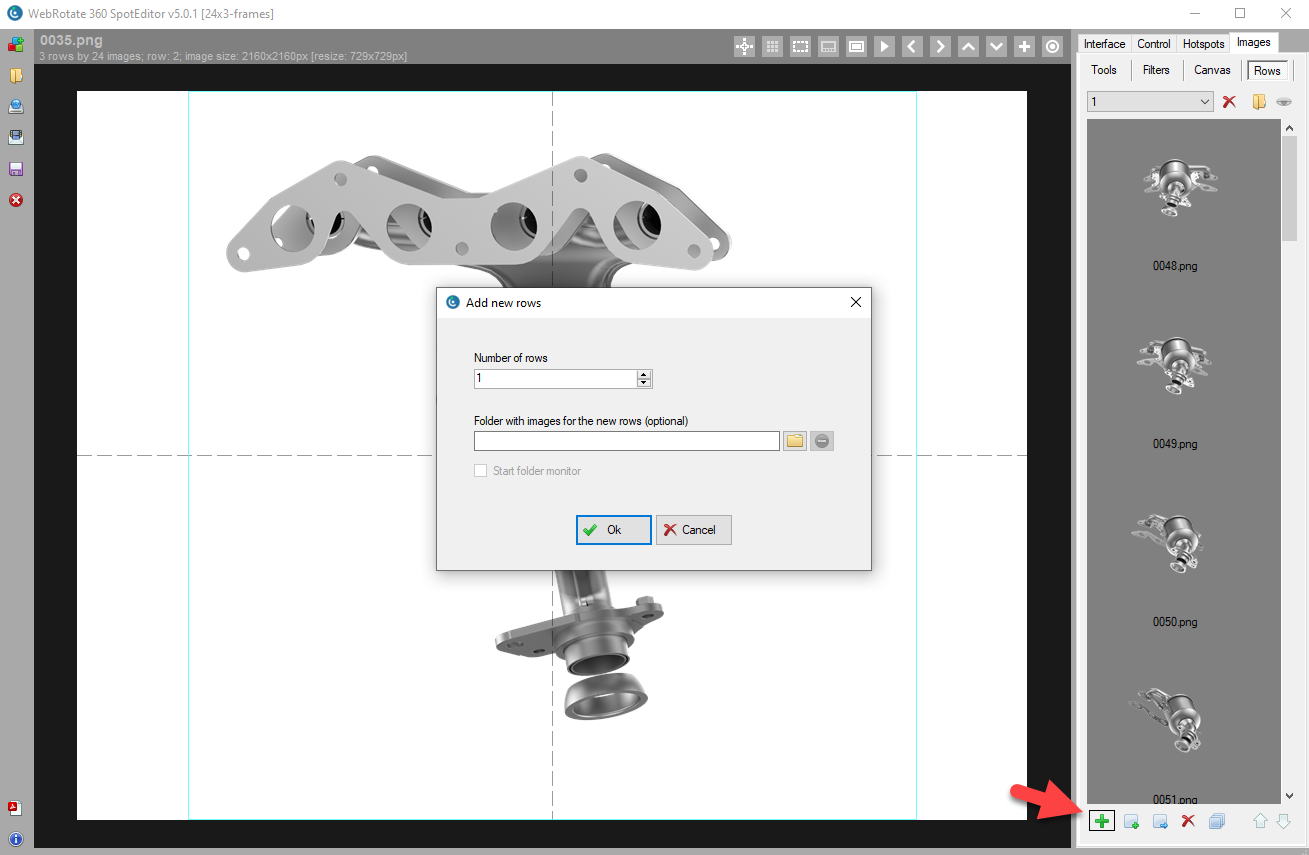
To add a new row(s), click the green plus and enter the number of rows you are adding and optionally select a folder with prepared images (if you are adding multiple rows at once, prepare images in the folder as discussed in the beginning of the post). If a folder is not selected, a empty row is created and you can then import images into the row using the panel button with a small plus sign.
If you end up with dummy grey thumbnails that are automatically added when the number of images in rows is not the same, select the thumbnails with your mouse (Ctrl key for multiple selection) and click the button with an arrow to pick matching replacements.
3. WebRotate 360 Turntable Animator for Blender
Blender is a popular 3D modeling and rendering software and we have just released an advanced plugin for it. With this plugin, you can:
1) Setup a 3D scene for multi-row rendering in a few mouse clicks.
2) Render all images using Blender's built-in rendering engines.
3) Instantly view the result as an interactive view and/or upload it to PixRiot.
4) Open it in WebRotate 360 SpotEditor for further editing and publishing.
Find more details about WebRotate 360 Turntable Animator on our Blender plugin page.