I have been a 3D animator since I purchased my first computer, (an Amiga 500) way back in 1988. Much has changed obviously, in regards to rendering technology, CPU speed and the amount of memory our glorious machines have. However, we as animators still have issues that crop up no matter how technology changes.
One issue that might crop up is how to use this 360 interactive animation technology that you see almost constantly on the Internet. Better yet, how do you even start to think about and use this technology. Think of interactivity as a film strip, which allows the viewer to push or pull their mouse through the presentation. Basically, you are able to present a widget, process, or an idea to the user by dragging your mouse and clicking on icons attached to the geometry which are called hotspots.

Hey, "old 3D animation guy" we get that… do you? Most of my clients think they can only rotate a widget and talk about its parts. Not so. Using the film strip idea above you can allow your users to get lost in your film strip and interact with your widget when you are not able to be there and present it yourself. Your creations do have limitations in the form of internet speeds, graphic cards and the device that your viewer is using to view them on, but that is another blog post all together.
Working with most clients is easy because they simply want to have their product ("widget") rotate in 360. A rotation around the widget's center axis gives the viewer the ability to not only see all sides of the widget, but any hidden features the client wants to showcase.
How many degrees of rotation per frame is adequate for a smooth presentation? I use 24 frames with a rotation of 15° per frame (360 divided by 24 is 15). Just target the camera to your widget and make the first frame zero on the Y axis and at frame 24 336° (360 minus 24 is 336) on Y. The software you use to compile your project will give you a smooth interpretation of the widget’s rotation. Just add hotspot of your choice, and you are ready to publish.
What if you decide to show your widget from all sides in full "3D" and then show a few hotspots as the viewer enjoys the multiple axes provided (see the video example at the bottom of the post)? Easy enough you would think, but here is a sure-fire way to do it...
Luxion KeyShot
Some programs I use like KeyShot do this for you by selecting the "Tumble" feature from the KeyShot XR tab. In Keyshot, you first setup your animation. Setting the camera distance from the widget and lighting of the scene. Next, save your camera and select KeyShot XR from the bottom menu. Now, select tumble and choose "Object" as the rotation center. Since you have already setup your camera, you can select next from the "Pick Initial KeyShotXR View" menu.
For this example, I used 24 for "Horizontal Frames" and 12 for "Vertical Frames".
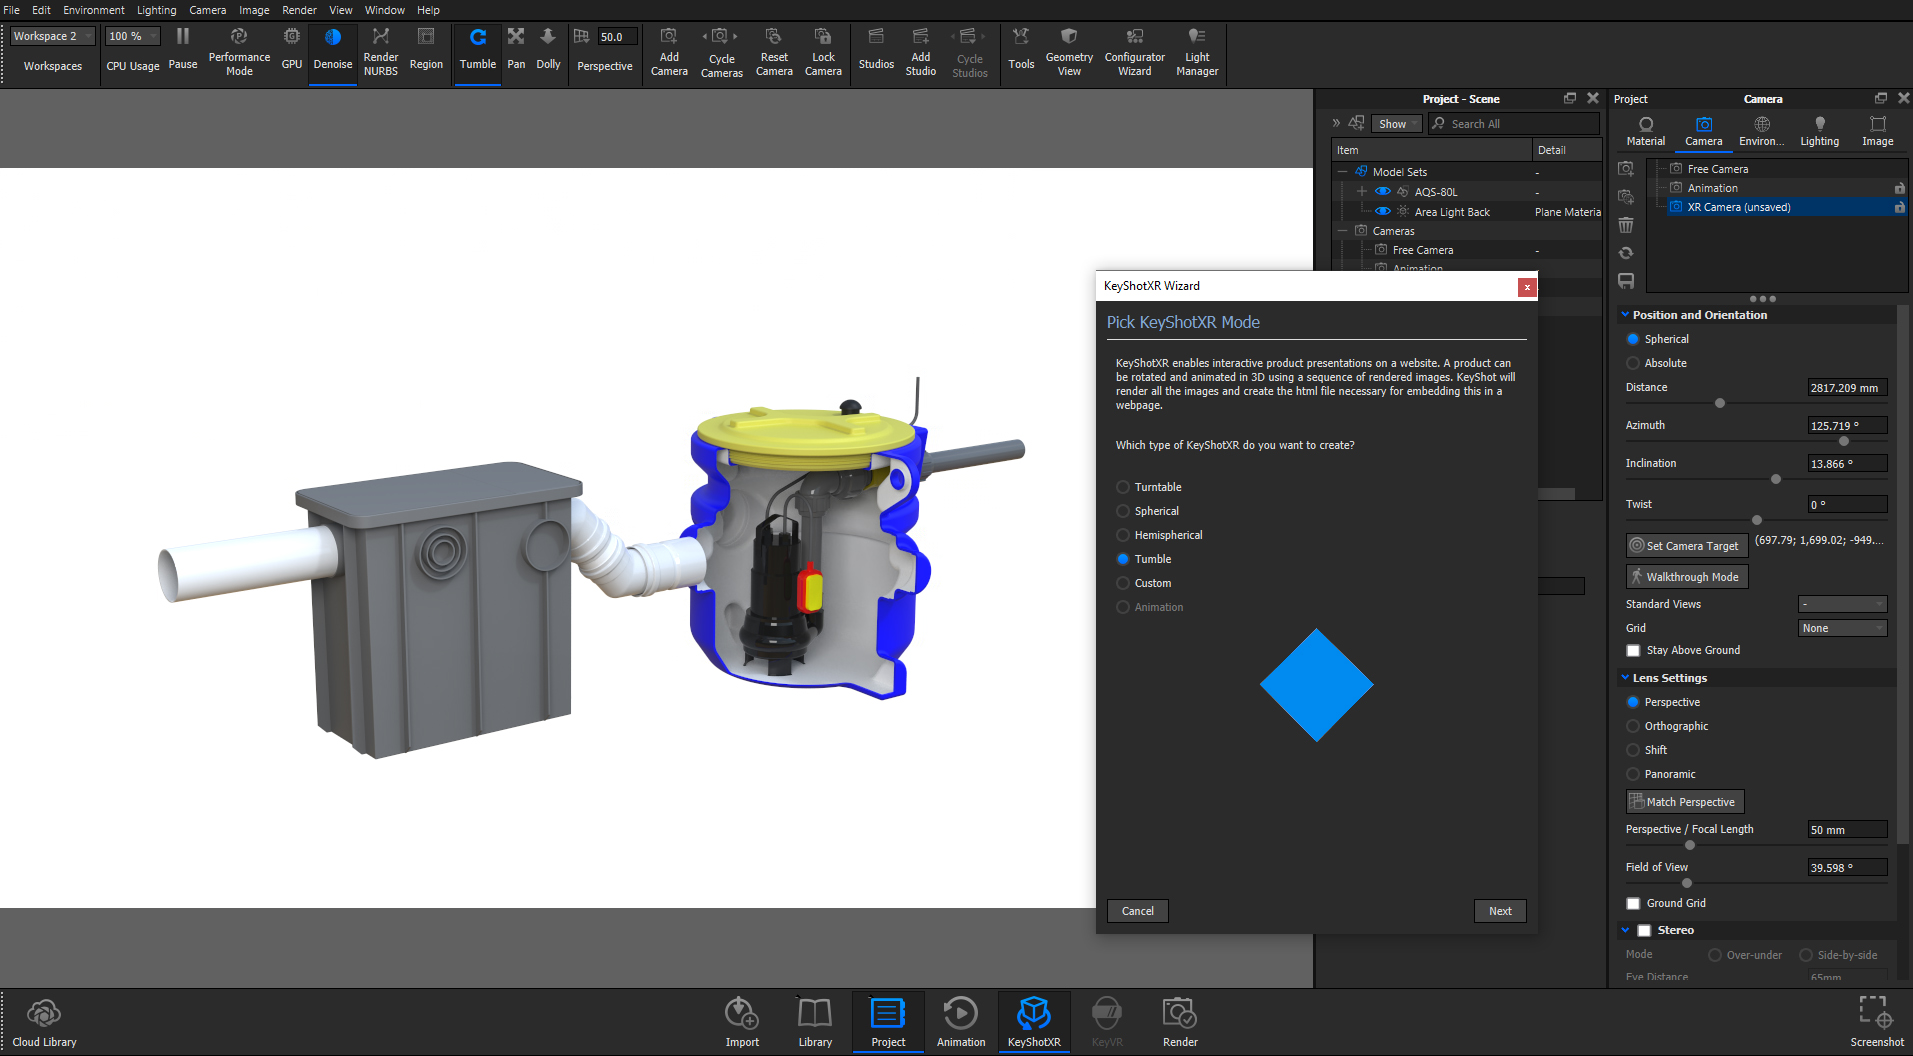
All that is left to do is name your animation, set the folder where the frames will be saved and set frame resolution (1920 x 1080 is what I usually use). Remember to render frames, not video when creating interactive projects. Use .png images if you want to change your background later, or .jpg to conserve room.
However, when I use Modo it can be a little tricky to get the results you're seeking.
Foundry Modo
I start by creating a target for my camera, (usually the center of the widget) then parent the camera to the target after setting the desired distance. In the example here, the client wanted to see their widget from the top and the bottom while it rotated in place. The camera would be at 45° on the Y axis at the highest and lowest points of the project to see the top and bottom of the widget, while rotating around the Y axis as you moved up and down.
To do that, I decided to have four positions for the camera on both the positive and negative Y axis. I simply divided 45° by four to get an angle of 11.25°. Starting from 0° and moving up on the Y axis I got the following angles: -11.25°, -22.5°, -33.75° and -45°. The angles for moving down on the Y axis are: 11.25°, 22.5°, 33.75° and 45°.
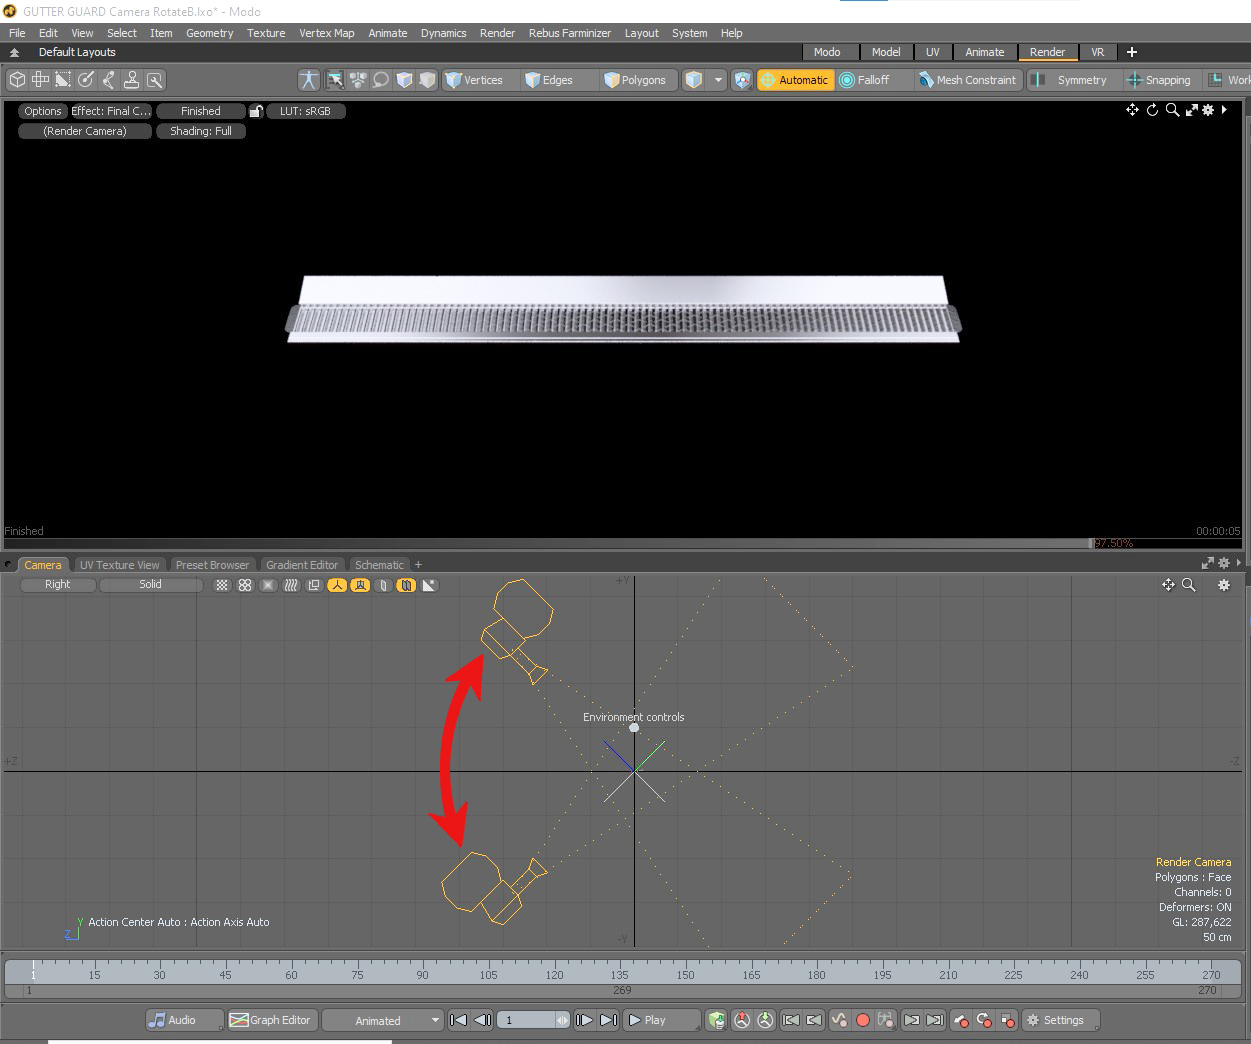
To get the widget to rotate around the Y axis I simply applied a 360-degree rotation over 30 frames. Frame 1 is 0° and frame 30 is 348°. I programed the software to repeat this motion for the rotation of the widget for the length of the project. Since there are 9 positions that the camera can move on the Y axis, the project needed 270 frames total.
WebRotate 360 SpotEditor
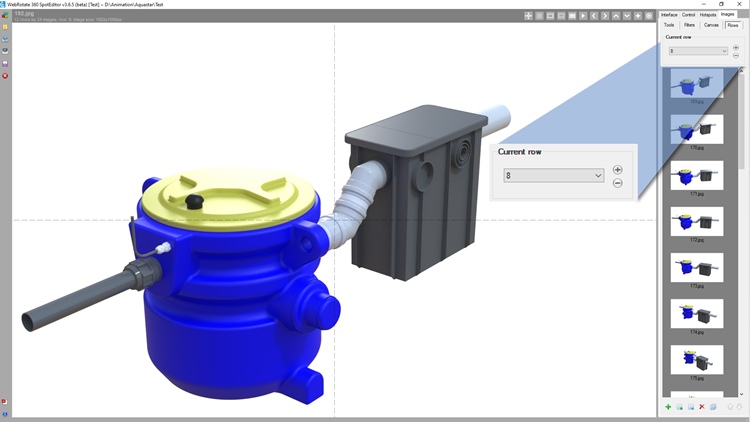
Now let's review how to setup your project up in WebRotate 360 SpotEditor.
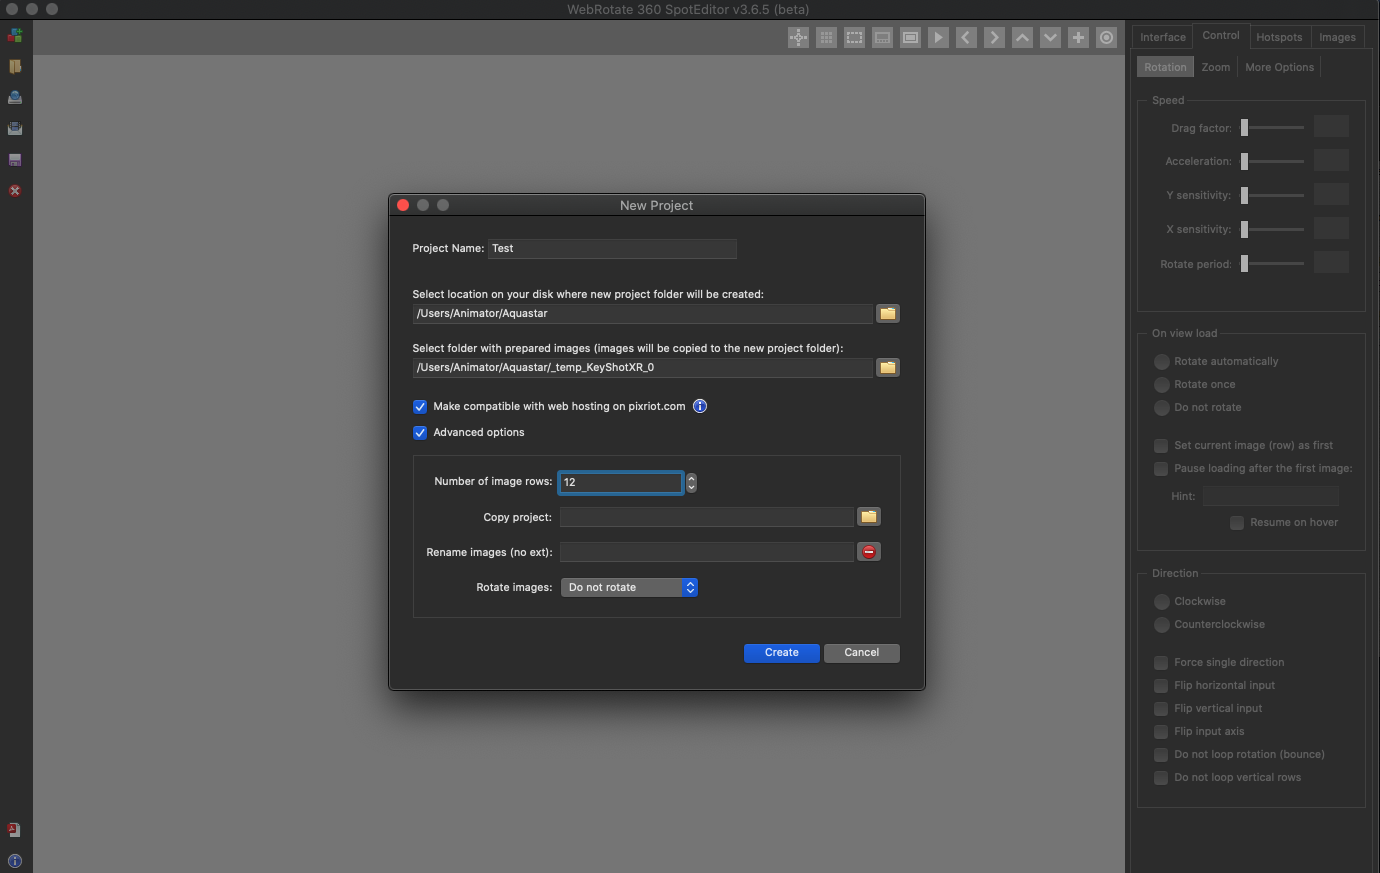
Start a new project in SpotEditor and make sure to check "Advanced options" on the New Project menu. You must tell SpotEditor how many image rows there are. In our case there are 12 rows with 24 images each. The software is pretty smart and does the math for you once you say 12 rows.
After your new project loads, go to the "Images" tab at the top right of the SpotEditor interface. There you find the "Current row" box where you can select which row of images you want to view. Hold the left mouse button and drag to move through each row of images. To see the finished widget, you will need to publish the project that will automatically launch a local preview in your browser.

Wrapping up
To wrap up, Keyshot does a good job in creating the images you need as well as the interactive files, but it lacks a few features that can make your interactive 360 or multi-row 3D product views stand out, so I use WebRotate 360 Product Viewer software. I have been using it for nearly 3 years and cannot recommend it enough.
If you have questions, or need help with your widget, process, or idea interactive project reach out, I would love to help or create the project for you.
Kyle Thatch is a professional 3D animator with over 20 years of experience producing 3D models, interactive 360 product animations, TV commercials, and other digital media.