By Gregory Esman, MARBL
Professional level 360 product photography is usually an expensive ordeal that requires specialized gear, training, and at times even hiring out. It’s not exactly something that the every day business owner can do to a high level, and needless to say, it takes some effort. It is difficult to create perfectly equidistant 360-degree images of a product, while maintaining each photo at the same height as the last.
But what if this could all be done in house, with little training, and in a budget friendly way? Furthermore, what if this same solution can also be used to help you create 360 product photos in a near automated manner, only requiring you to set up the lighting, framing and composition?
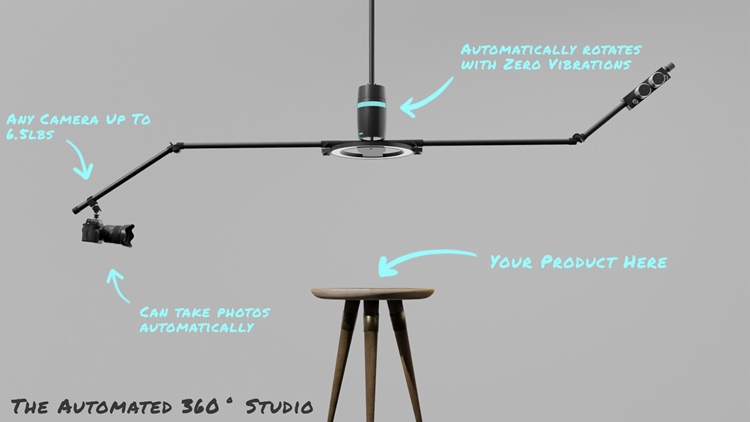
We at MARBL may have an interesting solution for you. One that you and your wallet will probably appreciate reading. Imagine having a portable, suspended camera system that creates a perfect 360° orbit around people, environments, or products. Imagine using your camera to automatically shoot photos of a product every x amount of time as the camera rig automatically rotates above and around the product you want to photograph with absolutely zero vibrations, giving you photos at an equal distance apart, covering 360° of the product. This as a result greatly simplifies the photography aspect of creating a 360 product view, and fast forwarding you to having a unique product display online.
With the photography aspect covered, all that's left for you to do is throw your images into 360 product photography publishing software like WebRotate360, and you've all of a sudden accomplished professional level 360 product photography in-house (while nearly automating the entire process).
My goal for this article is to help you visualize exactly how you would be able to use the Marbl ORBIT, a suspended camera system that orbits around people, objects and environments at variable speeds and distances, to save you time and money by creating your own in house 360 product photography studio.
Let's explore exactly how this is done, by first introducing the Marbl ORBIT, then explaining how to set everything up. At the end, you will know exactly how to create your own 360 product photography studio.
I will start with the main parts: the specialized motor, a set of arms, and the mounting accessories.
THE MOTOR
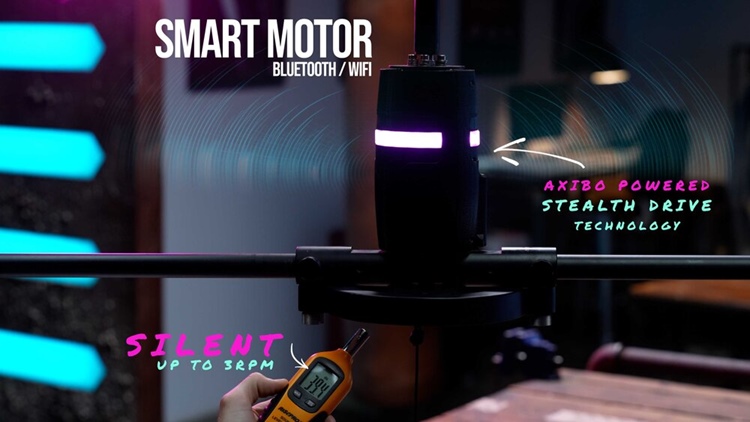
The Marbl ORBIT's motor can rotate from 1/60 RPM (1 rotation every 60 minutes), to 10 RPM, giving you plenty of room to choose your ideal RPM. It's exceptionally smooth, and utterly silent below 3 RPM. This unlocks the unique opportunity to do 360-degree product photography with lenses you've never used before, like high magnification telephoto lenses, and even the Laowa 24mm probe lens - with zero worries of any shaking or vibrations.
To ensure your photos will look the way you expect, you are also able to move the ORBIT by hand to preview and ensure your 360-degree images look the way you want all the way around.
THE ARMS
The Marbl ORBIT has two arms with swivel joints and quick release bolts. As a result, you can easily adjust the device to change how close the camera is to the subject, along with the height, tilt, roll and yaw of your camera.
The arms stretch to 84 inches (2.1 meters) while fully extended, giving you the opportunity to use high magnification lenses. We have a model with even longer arms, too! With the arms fully folded in, they only take up 44 inches (1.1 meters), and are able to fit in most rooms. While fully extended, the arms can hold 6.5lbs (or 8lbs for our pro model), so you will be able to safely use any camera you are likely to have.
MOUNTING
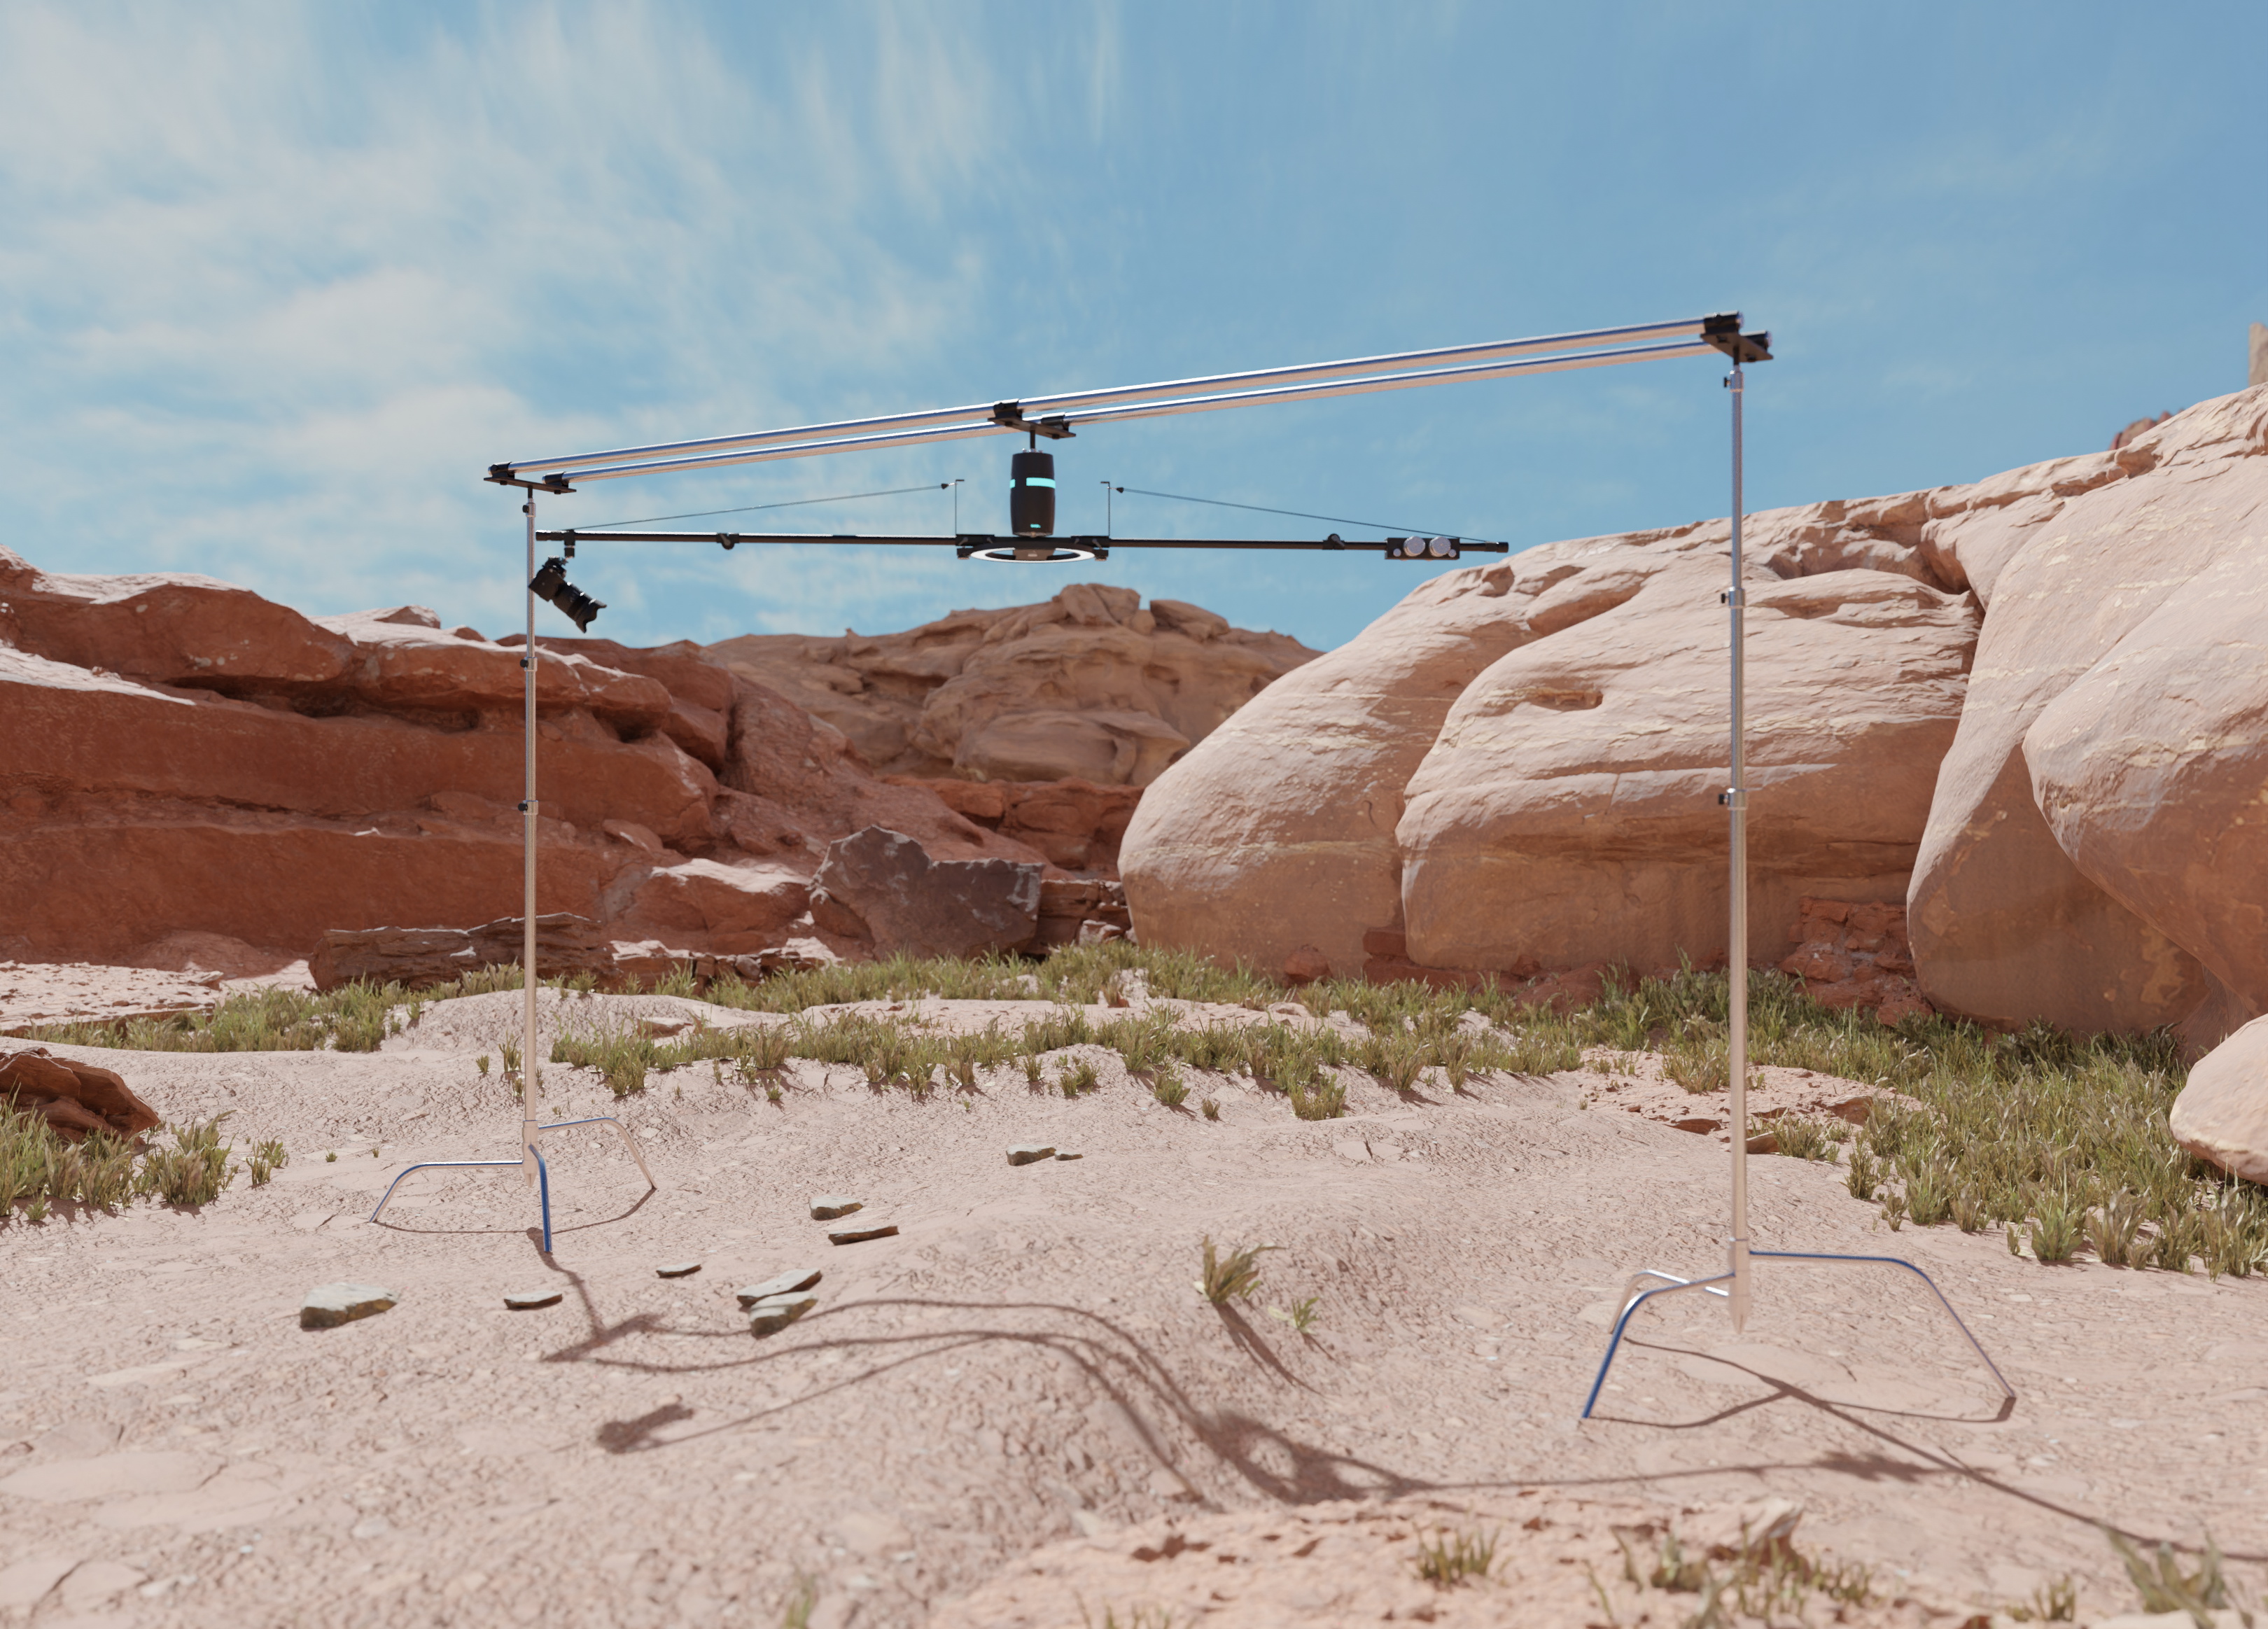
The Marbl ORBIT normally comes with a ceiling mount, but the Pro version also comes with adapters that attach to speedrails and C-Stands. This gives you the opportunity to mount the Marbl ORBIT between two C-Stands, and bring the Marbl ORBIT anywhere you'd like, instead of only being limited to indoor spaces.
Now that you are familiar with the device, let me run you through the start-to-finish set up procedure for 360 product photography, so you can see exactly how to use this to simplify your life, be home earlier and have a happier marriage*
(*Results may vary. It will help make 360 product photography more enjoyable and accessible for everyone though!)
MOUNTING THE MARBL ORBIT
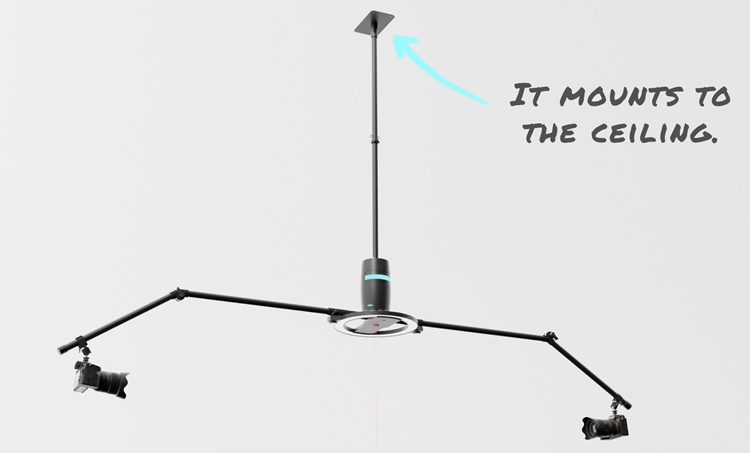
Attach the Marbl ORBIT to the ceiling by screwing in the 4 screws into a stud. Or hang the Marbl ORBIT up, suspended between two C-Stands using the additional speed rail adapters that come with the Marbl ORBIT Pro Model. You can see how the ORBIT looks suspended between two C-Stands in the photo above.
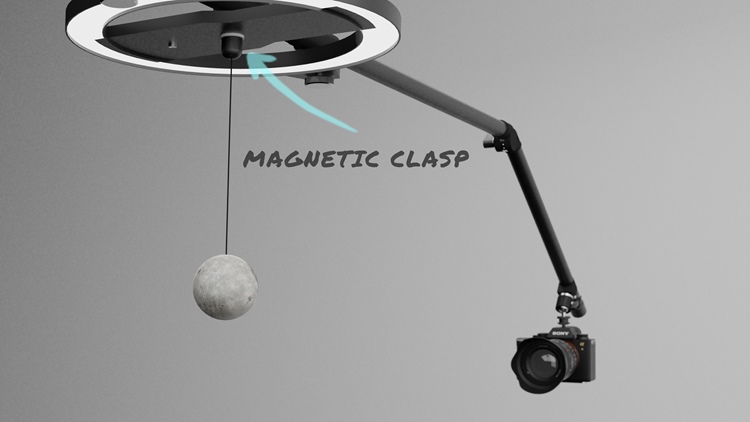
THE FOCUS
The Marbl ORBIT comes with a magnetic focus ball that attaches to the very bottom of the device, right in the middle. All you have to do is focus on the ball, then switch your camera into manual focus mode to freeze the focus settings where they're at. Considering your product will be dead center of the ORBIT, the magnetic focus ball will help you set your focus reliably, and aimed directly at the pivot point of your product, making your subject in focus the entire time. Once you are done, take off the focus ball by simply pulling it down and off.
PRODUCT PLACEMENT
Use the laser crosshairs to position your product directly in the center of the Marbl ORBIT. Take note that bigger objects, or irregularly shaped objects may not be fully in focus because of their size and shape. If parts of your product are out of focus, you can play with the aperture until you achieve a satisfactory result, or you can MacGyver it by measuring the widest point of your product, then using THIS calculator to precisely calculate the aperture required so the Depth of Field between the nearest and furthest point in which the subject is in focus matches the widest point of your product.
Bonus: Dynamic Lighting
The ORBIT has two arms. Usually, you have a counterweight on the other side. But, you can also mount accessories, too. For example, what about a flashlight creating keylighting that follows the frame as it rotates around the subject, adding perfect, identical lighting to each of your photos around the product?
FRAMING THE SHOT
Simply unlock the quick release bolts and move the arms how you wish. This allows you to make big adjustments. Then, semi-release the ball joint holding the camera to the Marbl ORBIT’s arm to fine tune your frame. After you found the position you like, lock everything up! Rotate the ORBIT a full rotation by hand while looking at the camera screen to ensure you love what you see throughout the full 360-degree product spin. If something's off, now's the time to fix it.
Everything, including lighting, should now be set up! Your product is framed and ready to go. All that's left is taking the photos. The issue is, we can't touch the camera. It will introduce unnecessary vibrations. What do we do, and how do we automate this part of the process like I promised above?
Turns out, it's pretty simple. We use an intervalometer. An intervalometer is a device that plugs into a camera and controls how often a photo is taken. Once every second, once every ¼ of a second, or once every hour, if you'd like. It also controls how many shots are taken in total. Modern cameras like my Sony A7Riii have this device built in, but older cameras simply require an intervalometer attachment before they're ready to go.
We now have the capabilities for automated rotation around the product, and the capabilities for automated picture taking. All that's left now is telling the camera when to take the photos, and we're all set!
INTEGRATING WITH WEBROTATE360
Once you have all the photos collected, you are ready to create a real 360 product view for online publishing. Folks at WebRotate 360 will explain how to use WebRotate 360 to accomplish this goal:
1 Download & install WebRotate 360 Product Viewer on your Windows or Mac.
2 Save your captured 360 product images to your computer to a folder of your choice.
3 Fire up the software, start a new project and point it to the folder with the images.
4 There're built-in image processing tools, watermarking tools and hundreds of other settings to play with, including interactive callouts (points of interest or hotspots).
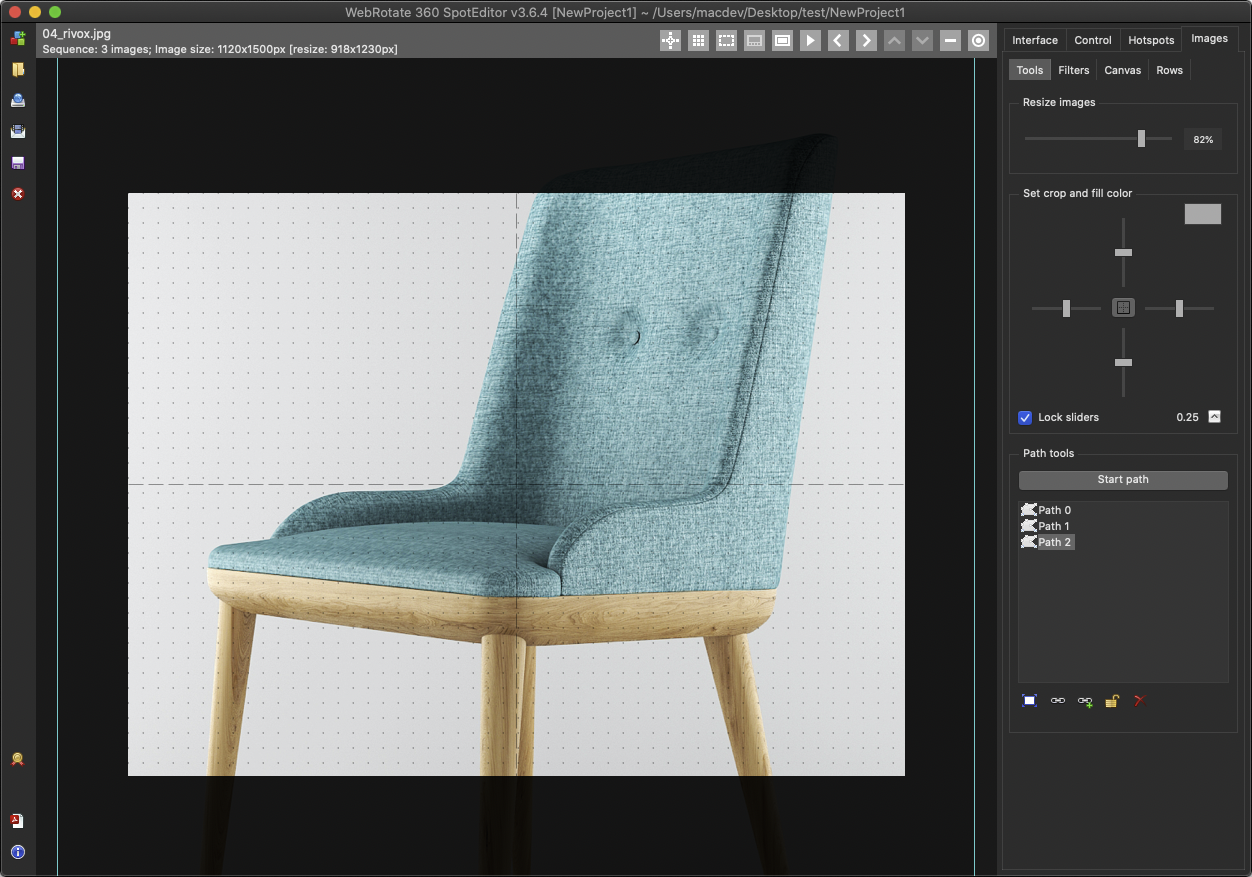
5 Publish and upload your media to a web hosting of your choice or simply drag it to our optimized PixRiot hosting service. Plugins for popular e-commerce platforms are available or you can integrate it directly using advanced APIs that come with the 360 product viewer.
Back to TEAM MARBL...
One last upside to this 360 product photography set up is simplicity. This level of simplicity allows you to fairly quickly teach anyone the process of creating 360 product images, which either gives yourself as a non-technologically savvy small business owner the potential to do your own 360 product photography, or gives the multi-employee business owner the potential to train their staff how to create these same photos, too. This means you no longer have to wait for the one person with these skills to come in and make the photos you need made, and you can also systematize the entire process, giving you the ability to train people how to use this device without you being there.
Then, when you're not using the ORBIT for product photography, you can use it for all the other different uses it has, like filming your passion, filming interviews for your company, or giving other content creators the potential to create orbiting shots like these, by renting it out. It will never be sitting in a corner. Can you tell that at Marbl, we’re passionate about innovation?
TO GET YOUR OWN
We are currently running a Kickstarter to share the Marbl ORBIT with our first customers. You can visit our page to secure your own ORBIT at a discounted price of up to 36% off. Our first shipment will arrive this October. Our second shipment will arrive in January 2022. We are getting down to the last few spots within our October 2021 shipment, so be sure to secure yours as soon as possible, before spots in our first shipment run out.
All the best,
Josh, Jon, Greg, Ty and Hayden
TEAM MARBL
The Marbl ORBIT was designed and invented by Josh Yeo, the creator of MAKE.ART.NOW. The ORBIT has many uses going from medical field, to cinematography, to stop motion animation, to 360 product photography.