Jan 20, 2015 - Our completely reinvisioned & reworked module for PrestaShop 1.6.x has been released. Find out more HERE
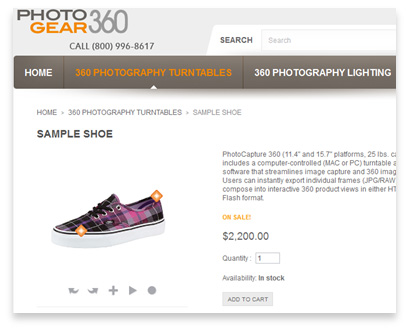
Follow this simple guide to integrate WebRotate 360 Product Viewer into your Prestashop web store. Once integrated, your visitors will see an interactive product view with zoom capability, 360 rotation, extensive hot-spot / annotation features (and more!) conveniently located in place of the main product image (if configured for a given product).
The current version of the integration was tested on 1.4.x (including 1.4.9) and 1.5.
Step 1 - Download and copy necessary files
Download WebRotate 360 Prestashop Integration, unzip, and copy files and folders as follows (you can also install directly under Modules in the Admin - please still follow these exact steps below):
- Copy 360assets folder to the root of your site (it's just a sample 360 product view).
- Copy AdminWebRotate360.php from webrotate360/admin/tabs into admin/tabs folder.
- Copy WebRotate360.php from webrotate360/classes into classes folder under site root.
- Copy webrotate360 folder from webrotate360/modules into your modules folder located in the root (overwriting any files that were created there automatically if installed using the Add from my computer option or directly from the Prestashop Addon Marketplace).
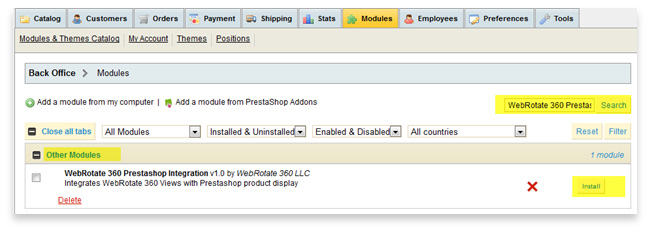
Step 2 - Install
Login in your Prestashop admin and navigate to the Modules section. Then expand Others section in the Modules list or use Search box and type webrotate to quickly find the module. Once found, select Install to install the module. Remember to backup your database before proceeding with the installation to ensure that you can restore your data if something goes wrong with the module.
Once the module is installed, please select Configure and carefully read the instructions.
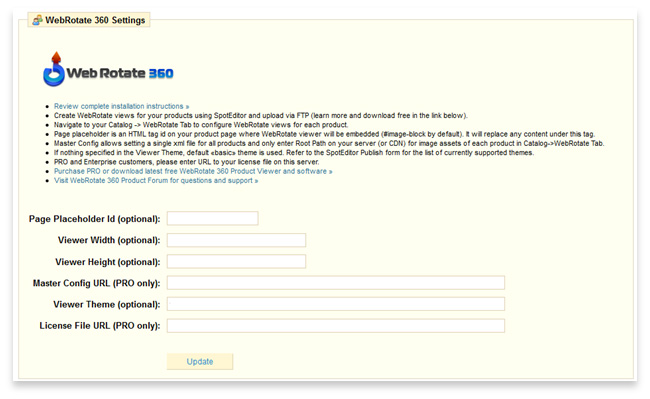
Step 3 - Configure
In the most basic setup you don't need to enter anything on the module configuration screen (see immediately below). Important: if using Prestashop 1.5, please still enter your desired width and height of the viewer on your product pages or just style #image-block in your theme's CSS to have fixed width and height as Prestashop 1.5 doesn't have fixed dimensions for #image-block style in the default theme.
Step 4 - Create Admin Tab
In Prestashop version 1.4.x or lower navigate to the Employees tab and select Tabs immediately below. Then select Add new and enter WebRotate360 as Name and AdminWebRotate360 as Class. Leave the Module field empty. Set Parent to Catalog. You can also assign a tab icon that is included in the supplied zip under admin as tab_logo.png.
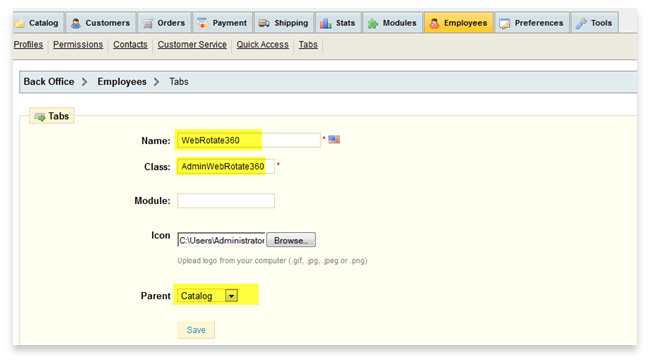
Save the tab which will now appear in the menu under your Catalog in the Prestashop Admin.
Step 5 - Assign Product Views
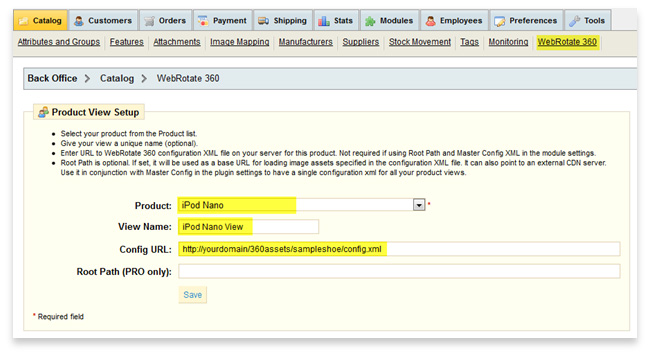
Navigate to your Catalog and note the new menu called WebRotate360 at the end of the first line below the Catalog tab (Prestashop 1.4.x). Expand the new tab and select Add new.Carefully review the instructions and follow these steps to try the test 360 rotation (sampleshoe) included with this package:
- Select your test product from the Product combo-box.
- Give this view a unique name that you could later recognize (e.g same as your product name for example).
- Enter Config URL which would be http://yourdomain/360assets/sampleshoe/config.xml that you have copied in the first step of this integration guide.
Now the sample 360 degree spin should be visible when you expand your test product page in the Prestashop front-end of your store.
To create your own interactive views download our software on our standalone product viewer page, watch tutorial videos located on the same page, or use our new forum for additional information. Visit our new equipment store to browse professional 360 photography equipment that we use in our own studio.
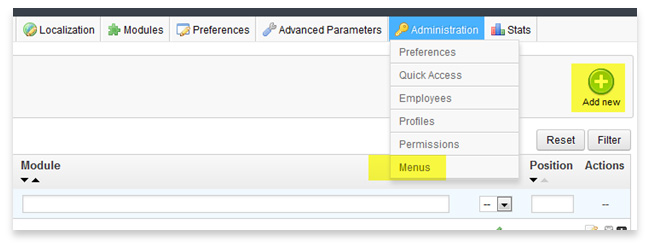
Appendix. Creating Admin tab (menu) in Prestashop 1.5
Prestashop 1.5 has a different location for adding your WebRotate360 Admin tab (now called menu) as discussed in the Step 4. To add the new Catalog menu for WebRotate360 in 1.5, please navigate to Administration->Menus, select Add new and enter the same information as discribed in Step 4. Once saved, the new menu will show up under Catalog.
Aug 12, 2013 - If using Prestashop 1.5.4.1 and up, please download updated AdminWebRotate360.php from here and overwrite the same file under your admin/tabs folder.
Nov 04, 2013 - If using Prestashop 1.5.6 and up please delete your /cache/class_index.php after installing the module.
Jan 20, 2015 - Our completely reinvisioned & reworked module for PrestaShop 1.6.x has been released. Find out more HERE
If you're still having issues with the module, please let us know on our forum here.